Block Paving Edging: A Step-by-Step Installation Guide
Learn to lay block paving edging with our comprehensive step-by-step guide. Ensure strong, beautiful paver projects that last.
Why Block Paving Edging is the Foundation of a Lasting Driveway or Patio
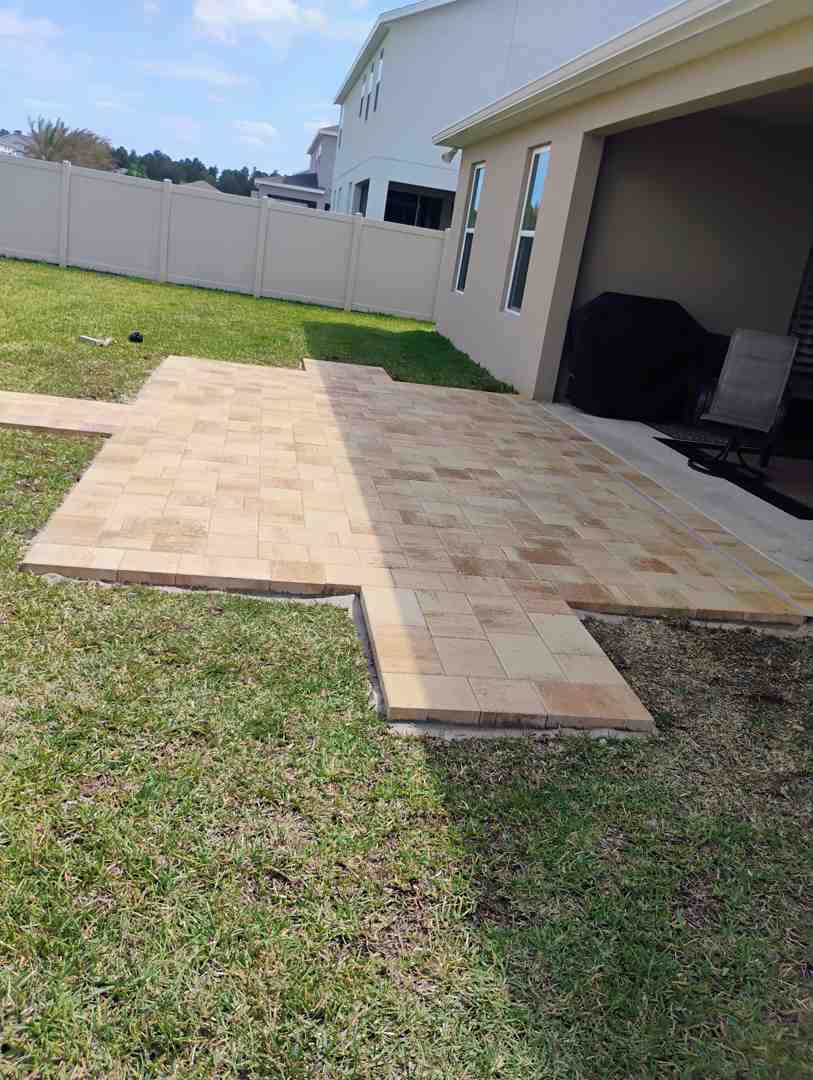
To lay block paving edging correctly, you must excavate a trench, set a string line for alignment, lay a concrete bedding layer, position the edging stones while tapping them level with a rubber mallet, and apply a concrete haunch to the back for support. The edging must sit on a solid sub-base and be secured with concrete to prevent movement and contain the paving.
Quick Steps to Lay Block Paving Edging:
- Excavate - Dig a trench 150-250mm wide and deep enough for 100-150mm of concrete base
- Set String Line - Mark your level and alignment guides with stakes and taut string
- Pour Bedding - Lay semi-dry concrete mix in a "windrow" along the trench
- Position Stones - Place edging stones 10-25mm proud of the string line
- Tap Level - Use a rubber mallet to settle stones evenly, checking with a spirit level
- Apply Haunch - Trowel wetter concrete mix against the back of stones at 45 degrees, at least 75-100mm wide
- Cure - Allow 24-72 hours before applying any load
Many Central Florida homeowners underestimate the critical role edging plays in their paver projects. Without proper edging, your beautiful new driveway or patio can shift, spread, and develop unsightly gaps within months. The edges are the most vulnerable part of any paved area—they take the brunt of mowing, foot traffic, and lateral forces from vehicles. When installed correctly, edging acts as a rigid frame that locks everything in place, preventing the slow creep of sand and pavers that leads to costly repairs.
For expert guidance on the broader paver installation process, see our complete guide to paver installation, or if you're ready to start your project with professional help, request a free consultation from Alliance Pavers today.
Learn more about lay block paving edging:
Essential Tools and Materials for the Job
Before starting, gather the right tools and materials. This preparation makes the process smoother and leads to a more professional finish.
Here's what you'll need:
Tools:
- Shovel: For excavating the trench and mixing concrete.
- String Line and Stakes: Crucial for establishing precise lines and levels.
- Spirit Level: Essential for ensuring edging stones are perfectly level. A small boat level works for individual stones, and a longer straightedge for overall runs.
- Rubber Mallet: For gently tapping edging stones into place without damage.
- Trowel: For spreading concrete bedding and shaping the haunch.
- Wheelbarrow: For mixing and transporting concrete.
- Hand Tamper or Plate Compactor: For compacting the sub-base and bedding. A plate compactor is recommended for larger projects to ensure superior compaction.
- Measuring Tape: For accurate measurements.
- Safety Gear: Gloves, safety glasses, and sturdy footwear are a must.
Materials:
- Edging Stones: Can be concrete, natural stone, or clay, chosen to complement your pavers or landscape design.
- Concrete Mix: A semi-dry mix for the bedding and a slightly wetter mix for the haunch. A 6:1 ratio of aggregate to cement is typical for bedding.
- Sharp Sand: Used for the bedding layer beneath main pavers and sometimes in the concrete mix.
- Water: For mixing concrete.
Having these items ready sets you up for success, allowing you to focus on proper technique.
Ground Preparation: The Foundation for Success
Like any strong structure, block paving edging requires a solid foundation. Meticulous ground preparation is the most important step, as skimping here leads to uneven, shifting, or failing edging.
Preparing to Lay Block Paving Edging
The goal is to create a stable, well-drained base for long-lasting support.
Excavating a Trench:
- First, mark the edging path with a string line and stakes.
- Excavate a trench 150-250mm (6-10 inches) wide to accommodate the edging stone and concrete haunch.
- Dig the trench deep enough for a 100-150mm (4-6 inches) concrete base, plus the height of the stone, ensuring the top aligns with the desired finished level.
- Remove all roots, weeds, and other organic matter.
Setting up a Taut String Line:
- Set a taut string line between stakes along the edging course. This is your guide for level and alignment.
- The string line represents the finished height. Use a spirit level to ensure it's level or has the proper fall for drainage. Paving near a home should be at least 150mm below the Damp Proof Course (DPC) for drainage away from the foundation.
Compacting the Sub-Base:
- After excavating, compact the trench bottom to create a solid foundation and prevent settlement.
- Use a hand tamper or plate compactor to create a firm, unyielding surface. For a very loose sub-base, add a layer of compacted aggregate before the concrete bedding.
- For comprehensive guidance on creating a robust foundation for your entire paver project, explore our paver installation 101 guide.
Proper ground preparation prevents dips, hollows, and uneven settling, which protects the aesthetic and structural integrity of your paved area.
How to Lay Block Paving Edging: A Step-by-Step Guide
Now we'll cover how to lay block paving edging that looks fantastic and lasts for decades.
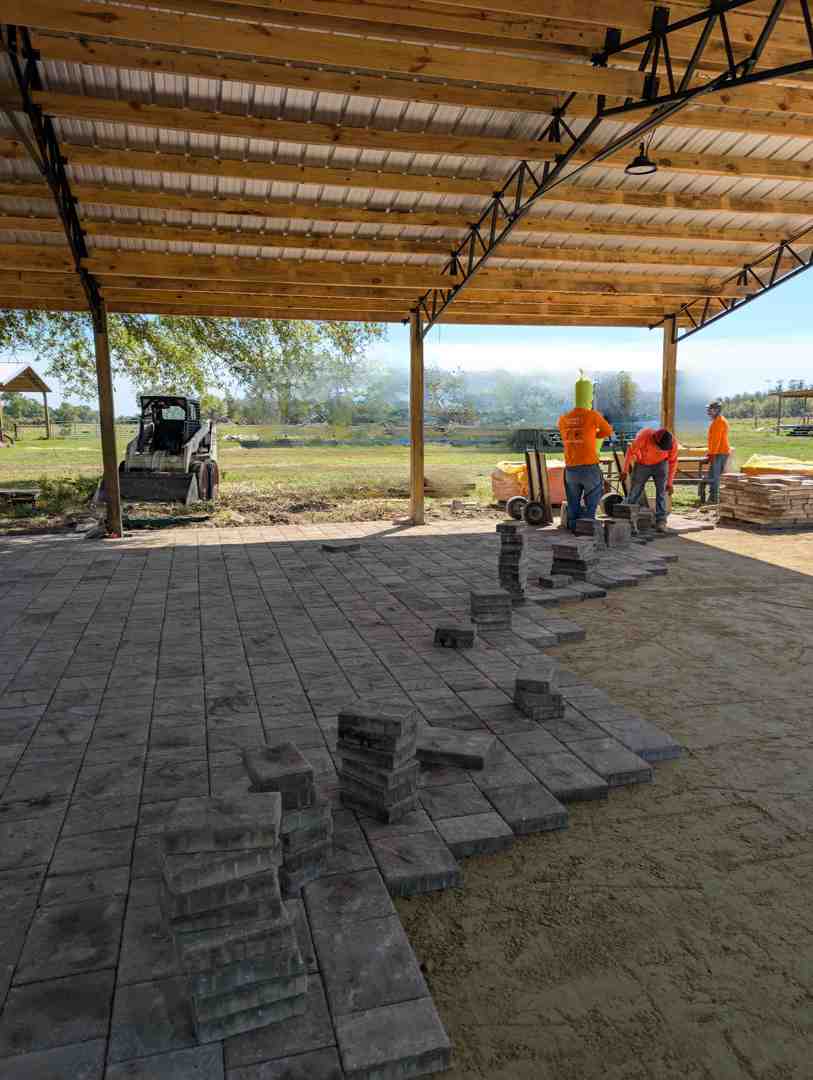
Step 1: Laying the Concrete Bedding
The concrete bedding provides immediate support for the edging stones and is paramount for stability.
- Mixing the Concrete: Use a semi-dry concrete mix (6 parts aggregate to 1 part cement). This consistency offers good support without being too wet (causing stones to sink) or too dry (preventing proper compaction). It should hold its shape when squeezed, like damp sand.
- Creating a 'Windrow' of Concrete: Place the mixed concrete in a continuous mound, or "windrow," along the trench. Lay it slightly higher than the final base level for the edging stone.
- Troweling the Bed: Roughly level the windrow with a trowel, keeping it consistent and slightly high. This allows you to tap the stones down to the precise final height. For more on achieving perfect levels, check out our leveling techniques for brick patio installation.
Step 2: Setting and Leveling the Edging Stones
Patience and precision are key in this step.
- Placing Stones on the Bed: Carefully place the first edging stone on the concrete bed. Aim for smaller units to sit 10-25mm (0.4-1 inch) proud of the string line, and larger kerbs 20-30mm (0.8-1.2 inches) proud, as they need more force to settle.
- Tapping Down with a Rubber Mallet: Gently but firmly tap the stone down with a rubber mallet, working from end to end. The goal is to bring the top of the stone precisely to the string line's level.
- Checking Levels: Immediately after tapping, use a spirit level to check the stone's level along its length and across its width. For wider units, checking the crossfall is important for drainage.
- Aligning with the String Line: Continuously check the stone's alignment against the string line, nudging it into position as needed. For natural stone, visual alignment can be a better guide for a harmonious look.
- Adjusting the Bed:
- Too Proud: Never force a proud stone down. Lift the stone, scrape away some concrete from the bed, then re-seat and re-level it.
- Too Low: If a stone is too low, lift it, add more concrete mix to the bed, then re-seat and re-level it. An improperly filled bed can lead to failure.
Step 3: Creating the Concrete Haunch for Support
The haunch is a concrete buttress providing essential lateral stability, preventing edging stones from moving outwards.
- Purpose of a Haunch: The haunch locks the edging in place, forming a rigid frame that resists lateral forces from the main paving, which is crucial for driveways.
- Wetter Concrete Mix: Use a slightly wetter concrete mix for the haunch than for the bedding. This allows for easier compaction and a firmer bond.
- Applying Concrete to the Back of the Stone: Apply the concrete mix to the outer side of the edging stones.
- Troweling to a 45-Degree Angle: Use a trowel to shape the concrete into a firm haunch, sloping away from the stone at a 45-degree angle. Ensure it's compacted tightly against the stone.
- Haunch Height and Width:
- Width: The haunch should be at least 75mm (3 inches) wide. For driveways, ensure it's at least 100mm (4 inches), and preferably 150mm (6 inches) for maximum strength.
- Height: The top of the haunch should be at least 25mm (1 inch) below the top of the edging. For deeper units, the haunch should reach at least half the kerb's depth for adequate support.
- A well-formed haunch prevents movement. Insufficient edge restraint is a common cause of loose pavers. Our guide on how to fix a loose paver digs into these issues.
Step 4: Tips for Straight vs. Curved Edges
The principles for straight lines and curves are similar, but the execution has nuances.
Laying Straight Lines:
- For straight runs, the taut string line is your best guide. Align each stone to this line for a uniform edge.
- Periodically use a long straightedge to check for humps or dips over several units.
Creating Curves:
- To mark out curves, use a garden hose or flexible pipe to lay out the shape.
- For smooth curves, especially with tight radii, you may need to cut stones with a block splitter or diamond blade saw to avoid gaps.
- Flexible plastic edgings can conform to curves but don't offer the same structural restraint as concrete-bedded stone, especially for driveways.
- For inspiration on patterns and shapes, explore our driveway paver patterns.
Finally, allow the concrete bedding and haunch to cure. Avoid placing any load on the edging for at least 24-72 hours to ensure maximum strength. Cordon off the area to protect it from damage.
Choosing Your Edging: Materials and Styles
Your choice of edging material impacts both the function and look of your paved area. It defines the space while restraining the pavers.
| Edging Material | Aesthetics | Durability | Common Uses |
|---|---|---|---|
| Concrete | Versatile; can mimic brick or natural stone | Very durable; resistant to heavy loads and weather | Driveways, patios, pathways, garden borders. Can be stained or stamped for custom looks. Interloc Flat Edging (1000x200x60mm) is a popular option, offering a smooth finish and interlocking ends for stability. |
| Natural Stone | Classic, rustic, authentic; unique shapes | Extremely durable; weather-resistant; long-lasting | High-end patios, garden paths, decorative borders. Offers a timeless look and creates depth with light and shadow. Can be limestone, granite, or flagstone. |
| Clay Brick | Traditional, warm, charming; classic feel | Durable; withstands heavy foot traffic and harsh weather | Garden beds, pathways, patios. Offers a historic and inviting appeal. Often laid in 'soldier' or 'sailor' courses for different visual effects. Clay edging tiles (traditionally 9"x6") were popular for their charm. |
| Plastic | Discreet, flexible, often hidden | Good for light use; can expand in heat; not for open-graded bases | Garden bed borders, light-duty pathways where minimal aesthetic impact is desired. Not ideal for heavy-duty applications or where significant lateral restraint is needed. |
| Steel | Modern, sleek, subtle | Very durable; long-lasting; good for crisp lines | Contemporary landscapes, commercial projects, defining minimalist garden beds. Offers a clean, almost invisible edge. |
| Timber | Rustic, natural, informal | Varies with wood type (pressure-treated recommended); prone to decay | Less formal garden borders, raised beds. Relatively cheap but requires replacement over time. |
Concrete Edging
Concrete edging is a versatile workhorse. It offers a clean finish or can mimic natural stone or brick. It's a cost-effective, long-lasting solution resistant to heavy loads and weather, making it popular for driveways and patios. Some products feature interlocking ends for stability and sealed faces for resistance to algae and stains.
Natural Stone Edging
For a classic, timeless appeal, natural stone is unrivaled. Materials like limestone, granite, or flagstone offer unique shapes and textures for an authentic border. It's exceptionally durable and adds depth to your landscape. While more labor-intensive to install, the aesthetic payoff is significant.
Clay Brick Edging
Clay brick edging offers a traditional, warm charm that complements any landscape style. Bricks withstand heavy foot traffic and harsh weather with minimal maintenance. Historically, clay edging tiles were a popular choice.
Soldier Course and Sailor Course
When using brick or rectangular block pavers as edging, you have design choices:
- Soldier Course: Pavers are laid on their long, narrow end, creating a tall, linear border that stands out. This is often used for a formal and robust look.
- Sailor Course: Pavers are laid on their wide, flat side, but with their short ends facing outwards, creating a thinner, more subtle border.
Decorative Profiles
Many edging stones come with decorative profiles like bull-nosed, round tops, or scalloped edges. These add architectural detail and character, allowing you to customize the look. For more creative ideas, check out our paver edging ideas.
The edging choice affects longevity and maintenance. Durable materials like concrete, stone, or brick, when properly installed, last for decades with minimal cleaning. Less robust options like plastic or timber may require more frequent replacement.
Frequently Asked Questions about Block Paving Edging
Here are answers to common questions about block paving edging.
How does edging prevent pavers from sinking or moving?
Proper edging is crucial because block paver systems rely on lateral restraint to remain stable. Without a strong edge:
- Lateral Support: Edging acts as a rigid frame, preventing pavers from spreading outwards under pressure from traffic and weather.
- Containing Bedding Sand: It contains the essential bedding sand, preventing it from washing away, which would cause pavers to settle and become uneven.
- Maintaining Interlock: By keeping pavers confined, edging ensures the surface maintains its interlocking integrity and durability.
In short, edging prevents the shifting that leads to sinking, gaps, and an unkempt look.
What are the key differences between edging stones, kerbs, and mowing strips?
While all three define boundaries, their purpose and scale differ:
- Edging Stones: Smaller units providing aesthetic definition and moderate restraint for patios, paths, and garden borders. They are laid on a concrete bed with a haunch.
- Kerbs (or Curbs): Larger, heavier units designed for significant structural restraint for driveways and roads. They are critical for containing vehicle traffic and are always laid on a substantial concrete bed with a heavy haunch.
- Mowing Strips: Narrow bands of paving laid flush with a lawn, mainly for practical lawnmower access. Their structural role is minimal.
In summary: edging stones are for general boundaries, kerbs are for heavy-duty restraint, and mowing strips are for lawn maintenance.
What are the common mistakes when you lay block paving edging?
Awareness of these common pitfalls is the first step to avoiding them:
- Improper Ground Preparation: Failing to excavate deep enough, remove organic matter, or properly compact the sub-base will lead to settlement and failure.
- Incorrect Concrete Mix: A mix that's too wet for bedding causes stones to sink; too dry, and it won't bond. An insufficient haunch won't provide lateral restraint.
- Insufficient Haunching: A haunch that is too thin, low, or poorly compacted will fail to provide support, which is critical for driveways.
- Poor Leveling and Alignment: An uneven edge is unsightly and compromises the paving. Always use a taut string line and check levels frequently. Adjust the bed rather than forcing a stone into place.
- Not Allowing Concrete to Cure: Placing stress on the edging before the concrete has hardened (at least 24-72 hours) can cause structural weakness.
Avoiding these mistakes ensures your edging protects your investment and maintains the beauty of your outdoor space.
Conclusion: Securing Your Investment with a Perfect Finish
To lay block paving edging properly is to invest in the durability and beauty of your outdoor spaces. The edging is the crucial frame holding your paved masterpiece together, providing the structural integrity to prevent pavers from shifting, spreading, and sinking.
Beyond its functional role, well-installed edging improves curb appeal with a crisp, finished look. The choice of material—classic clay brick, neat natural stone, or durable concrete—allows for seamless integration with your landscape, turning a simple paved area into a crafted outdoor feature.
Proper edging ensures the longevity and reduces the maintenance burden of your paved surfaces. By preventing movement and containing the bedding materials, it minimizes the need for future repairs, allowing you to enjoy your beautiful pavers for many years to come.
For professional results on your next driveway installation, paver patio, or any other hardscaping project in Central Florida, trust our experienced team at Alliance Pavers. We bring 25 years of expertise and a commitment to exceptional craftsmanship to every job, ensuring your project is completed on time, on budget, and with a perfect finish.