About Us
Since 2007, Alliance Paving has been built on hard work and dedication, offering an experience that is truly unmatched.
.webp)

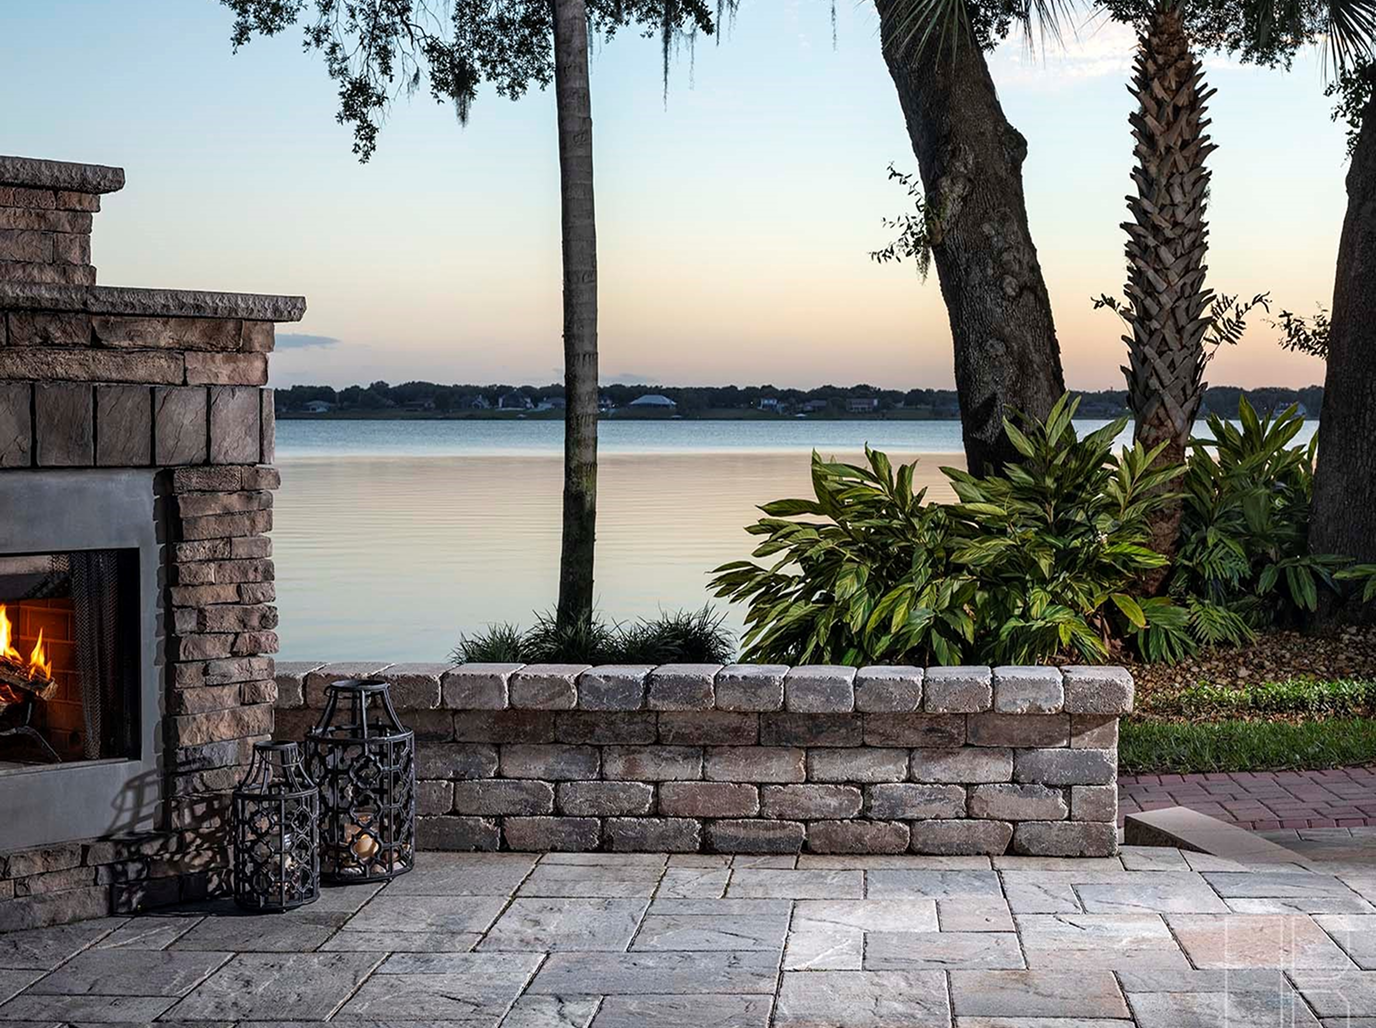
Stylish outdoor spaces with premium pavers and seamless service.
At Alliance Pavers, we believe your outdoor space should be more than just functional—it should be a true extension of your home, where style meets relaxation and memories are made. As a family-owned business since 2007 of hands-on experience, we specialize in premium paver installations, outdoor living areas, and retaining walls. Our mission is simple: deliver exceptional craftsmanship, outstanding customer service, and an experience that feels smooth and effortless from start to finish.
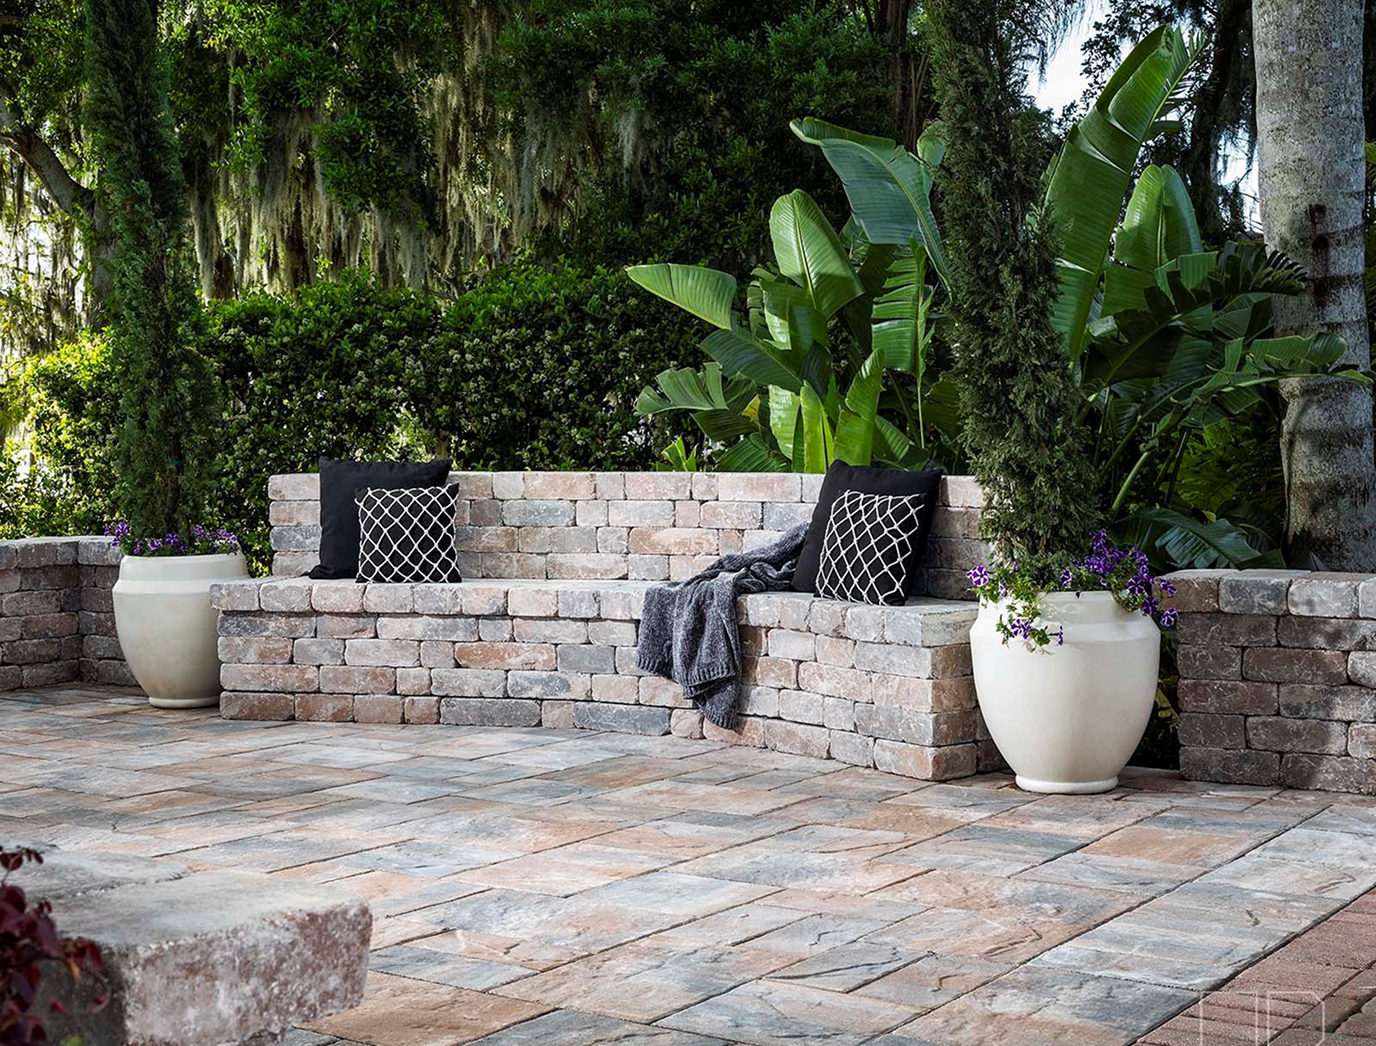

Central Florida’s most trusted, impactful, & experienced paver company.
Alliance Pavers is proud to be one of the longest-surviving, largest, and most trusted names in the Central Florida market. Our unmatched contributions span nearly every CF theme park, university, major builder, general contractor, pool builder, and production builder. While there are many reputable paver installers in the region, none can rival the impact, scale, or reputation we've earned through relentless hard work and dedication. Our success is rooted in our core values

our values

Creativity
We continually refine our methods, integrating innovative solutions through training and performance tracking to tackle challenges with confidence.

Commitment
We communicate clearly, stand behind our craftsmanship with integrity, and invest in our team’s growth to foster lasting relationships.

Pride
Our team takes ownership in every detail—valuing client feedback, prioritizing excellence, and delivering results that exceed expectations.


"From the initial consultation to the final walkthrough, we prioritize your vision. Our goal isn’t just to finish a project—it’s to create a lasting outdoor escape you and your family can enjoy for years to come.
We’re honored to be part of your home’s transformation and look forward to helping you bring your outdoor vision to life."
From the initial consultation to the final cleanup, we’re with you every step of the way. Here’s a breakdown of our entire sealing process:
Step 1
Getting Started – Planning & Approvals
Once your proposal is signed and your initial payment is received, we begin coordinating your project. This includes ordering materials and setting the timeline for scheduling.
If your project requires HOA approval, be sure to submit early. These approvals are important for staying on schedule.
After approvals are complete and material delivery timelines are confirmed, we’ll lock in your installation date. Each project timeline depends on design complexity, site access, and weather conditions.
Step 2
Pre-Installation – Site Preparation & Delivery
Before installation begins, our team will assess your property to finalize layout plans, review access for equipment, and identify the best delivery location for materials.
Pavers and base materials typically arrive 1–2 days before installation via large delivery trucks. We’ll coordinate with you to find a drop-off spot that’s safe, convenient, and allows for easy clean-up at the end of the project.
We request standard underground utility marking before digging begins. If you have irrigation lines or other underground systems in the work area, it’s a good idea to relocate or cap them in advance. This helps us work efficiently and avoid disruptions.
To help us protect your space, we recommend moving outdoor furniture, decorations, and any electronics near the work zone. Some dust and vibration are part of the process.
Step 3
Installation – Excavation to Base Prep
Installation begins with excavation of the existing surface using equipment or wheelbarrows, depending on access. After clearing the area, we mark and prepare the base according to your approved design.
A compacted base layer is installed to support your pavers, ensuring proper drainage and long-term stability. During this phase, you may notice noise or vibration from equipment—this is normal and temporary.
A dumpster or trailer will be staged nearby to manage debris and keep the area clean throughout the process. We’ll work with you on location and timing to minimize disruption.
Step 4
Paver Installation – Bringing the Design to Life
Our experienced, professional crew will lay pavers according to the chosen design, taking care to ensure proper spacing, alignment, and visual flow.
Once pavers are in place, we install concrete edge restraints or mudset borders to secure the layout and prevent shifting over time.
Sand is applied between the joints and compacted into place, creating a stable and unified surface. A slight gap below the surface of the pavers (about ¼”) is typical and helps with drainage.
Step 5
Completion – Final Touches & Walkthrough
After installation, we’ll clean the area, remove equipment and debris, and inspect the project to ensure it meets our quality standards. If you’re available, we’ll walk the space with you to go over the final result.
We’ll leave you with a small supply of extra pavers (if available) for future maintenance or touch-ups.
We calculate material needs with a built-in waste factor to ensure full coverage. Any remaining product will be removed as part of our cleanup process.
Step 6
Final Payment & Warranty Activation
Once the project is complete, we’ll send your final invoice. Prompt payment within 15 days activates your 5-year workmanship warranty—your assurance that we stand behind our work.
Have questions before, during, or after your project? Our team is always here to help. We’re excited to work with you and create an outdoor space you’ll enjoy for years to come.


Don’t take our words for it! Hear it from our customers.
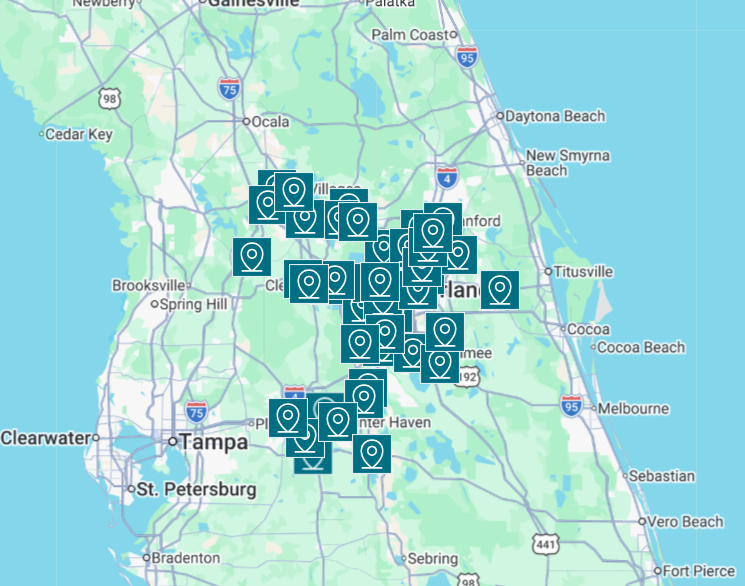
Service Areas