Unlock Your Outdoor Space: How to Install an Interlocking Paver Patio
Unlock your outdoor space! Get step-by-step DIY guidance for successful paver patio installation, from planning to finishing touches.
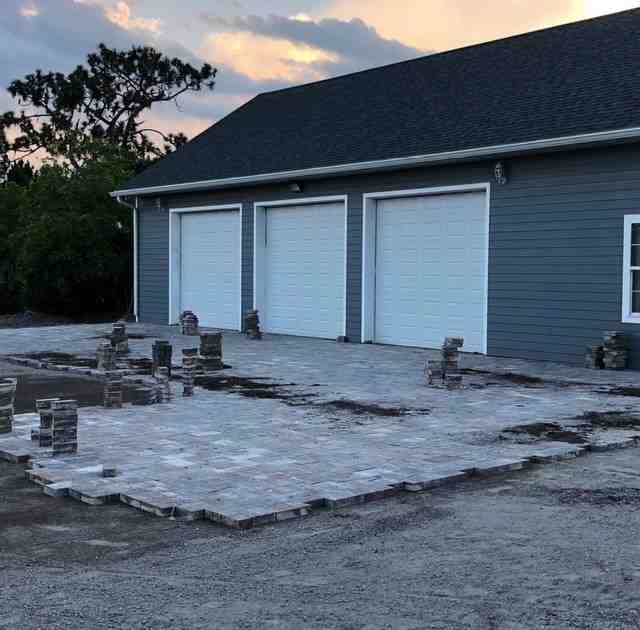
Transform Your Backyard with a Stunning DIY Paver Patio
Paver patio installation is a rewarding DIY project that can transform your outdoor space and add significant value to your home. With proper planning, you can create a beautiful, durable patio that will last for decades.
Quick Overview: Paver Patio Installation Process
- Plan and measure your patio area
- Excavate 4-6 inches plus paver thickness
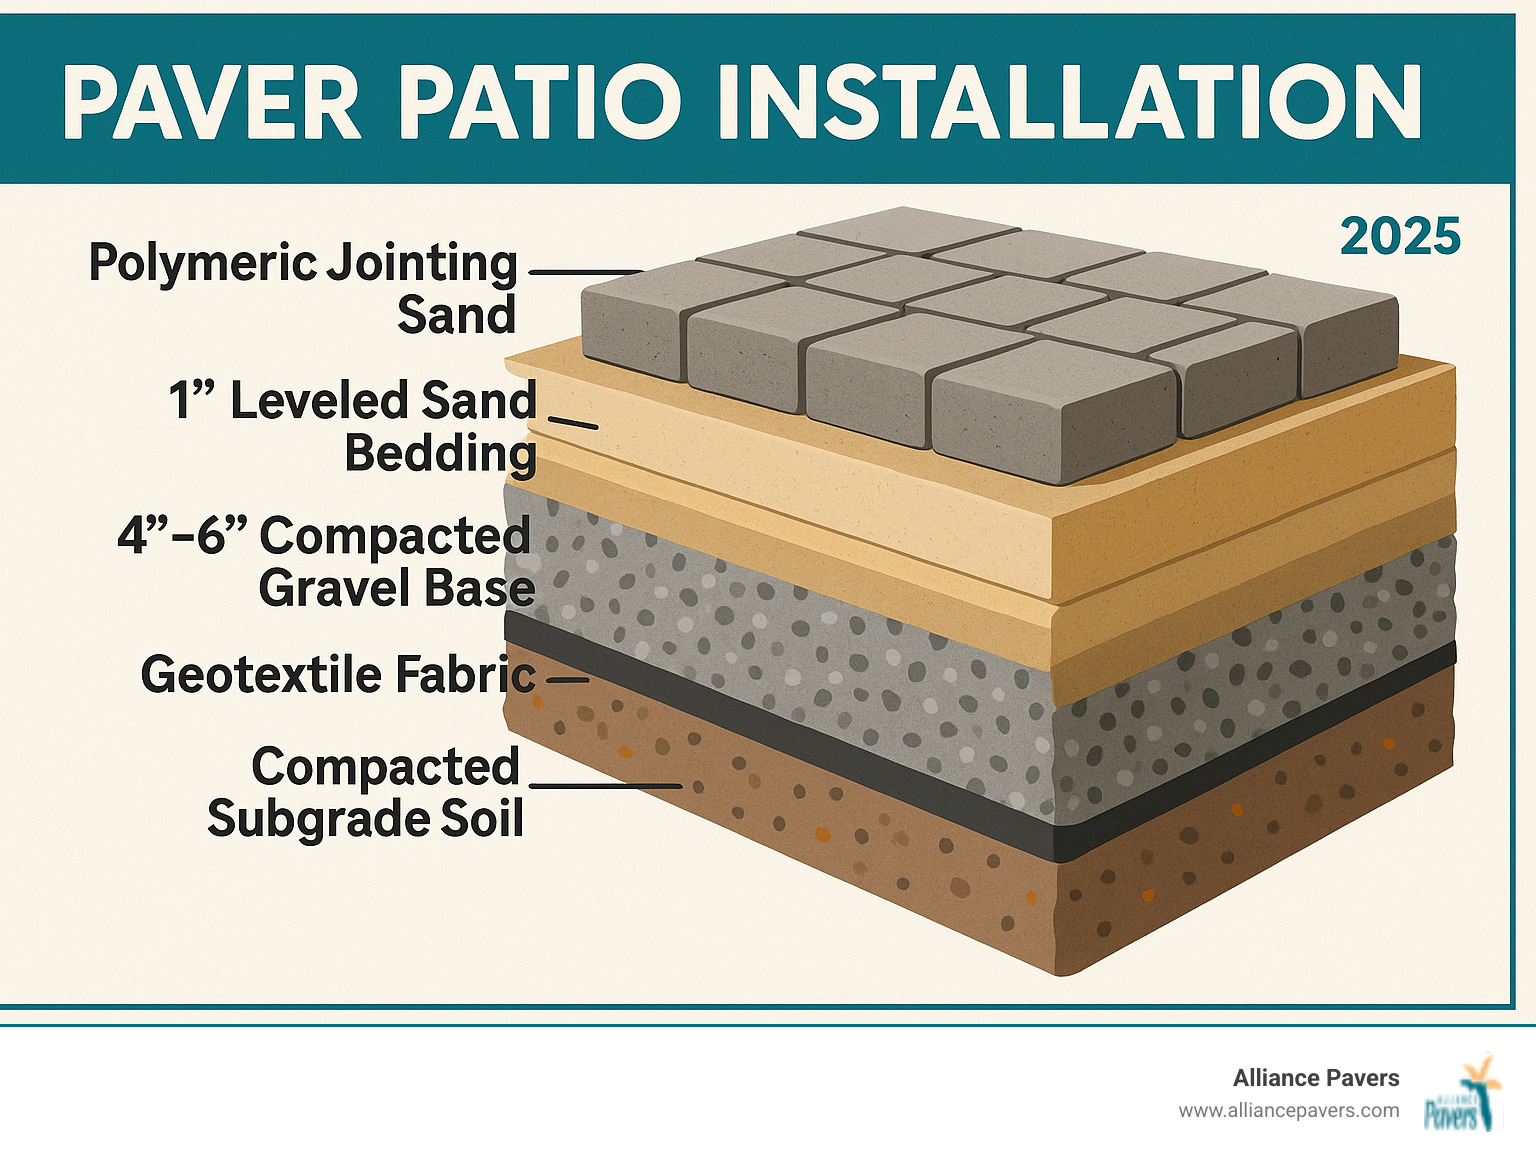
- Install base layers - geotextile fabric and compacted gravel
- Add sand bedding - 1 inch leveled surface
- Lay pavers in your chosen pattern
- Install edge restraints to secure perimeter
- Fill joints with polymeric sand
- Compact and activate the final surface
The key to success is proper foundation preparation. As one experienced DIYer shared, "Spending more time on base preparation makes the rest of the project easier." A well-installed paver patio can last 30 years or more with minimal maintenance.
Compared to concrete, pavers offer superior durability, easier repairs, better drainage, and more design flexibility. A cracked concrete slab requires full replacement, while individual pavers can be easily swapped out if damaged.
An average DIY paver patio (288 sq. ft.) takes about 8 hours, though complex designs may take longer. Careful work can yield professional results while saving thousands on installation costs.
Planning and Preparation: Setting the Stage for Success
Before starting your paver patio installation, proper planning is essential. Think of it as a roadmap for your project—it keeps you on track and helps you avoid costly mistakes. An hour spent planning now can save you hours of frustration later.
Essential Tools and Materials
Having the right tools and materials ready is key to a smooth paver patio installation. You'll need a shovel, wheelbarrow, tape measure, 4-6 foot level, and a rubber mallet for basic work. For a rock-solid base, a plate compactor is non-negotiable and can be rented. Always prioritize safety with safety glasses, gloves, and highly recommended knee pads.
Your material list includes landscape fabric, 3/4" crushed stone, coarse bedding sand (not stone dust), pavers, edge restraints, and polymeric sand.
More about essential tools for paver patio installation
Planning Your Paver Patio Installation Project
Start by envisioning how you'll use the space—for dining, relaxing, or playing? This will determine the ideal size and shape. A 16x18 foot patio (288 sq. ft.) is a good starting point, but always measure your furniture first. Plan for logical foot traffic flow between your house, grill, and garden.
Before any work begins, check local codes and HOA regulations for any required permits. Crucially, call 811 before digging. This free service marks underground utility lines, a step that is required by law in most areas and is essential for safety.
To calculate materials for a 288 sq. ft. patio, you'll need about 1,300 pavers (plus 10% extra for cuts), 96 cubic feet of gravel (for a 4-inch base), and 48 cubic feet of sand. Remember to measure for edging.
More info about 12x12 paver ideas
Establishing the Correct Slope and Drainage
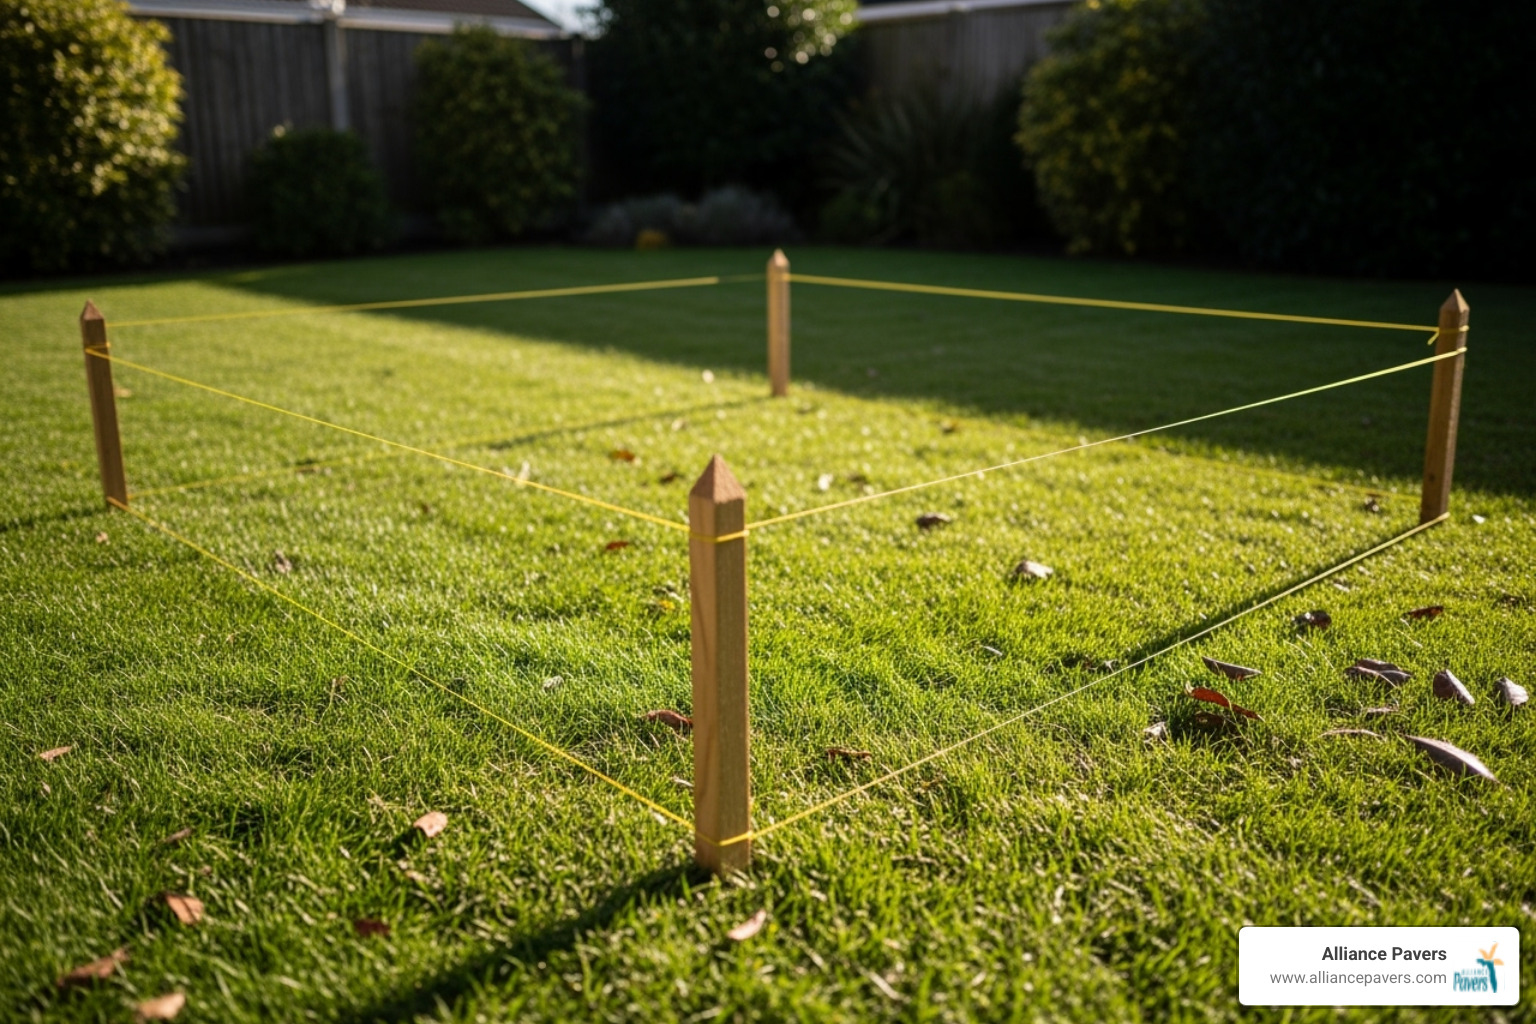
Proper slope is crucial for drainage, directing rainwater away from your house to keep your patio dry and stable. Aim for a 1/8 to 1/4-inch drop per foot away from your foundation. For a 16-foot patio, this means a total drop of 2-4 inches.
Use string lines and a line level to set and check your grade during excavation. This prevents water from pooling, which can damage the base and your home's foundation. The permeable base of gravel and sand is designed to help with this process, allowing water to filter through the joints and disperse into the ground.
Building the Foundation: The Key to a Lasting Patio
The foundation is the most critical phase of your paver patio installation. A solid base ensures your patio remains stable and level for years, preventing issues like sinking or shifting pavers.
Excavation: How Deep to Dig
To calculate your excavation depth, add your paver's height to the depth of your base layers. For a standard patio, this means 4-6 inches for the compacted gravel base and 1 inch for the sand bed. For a 2⅜-inch paver and a 4-inch base, you'll dig about 7⅜ inches deep. Remember to account for the slope as you dig.
Plan for soil removal in advance; a 288 sq. ft. patio can produce a significant amount of dirt.
The Base Layer: Gravel, Sand, and Compaction
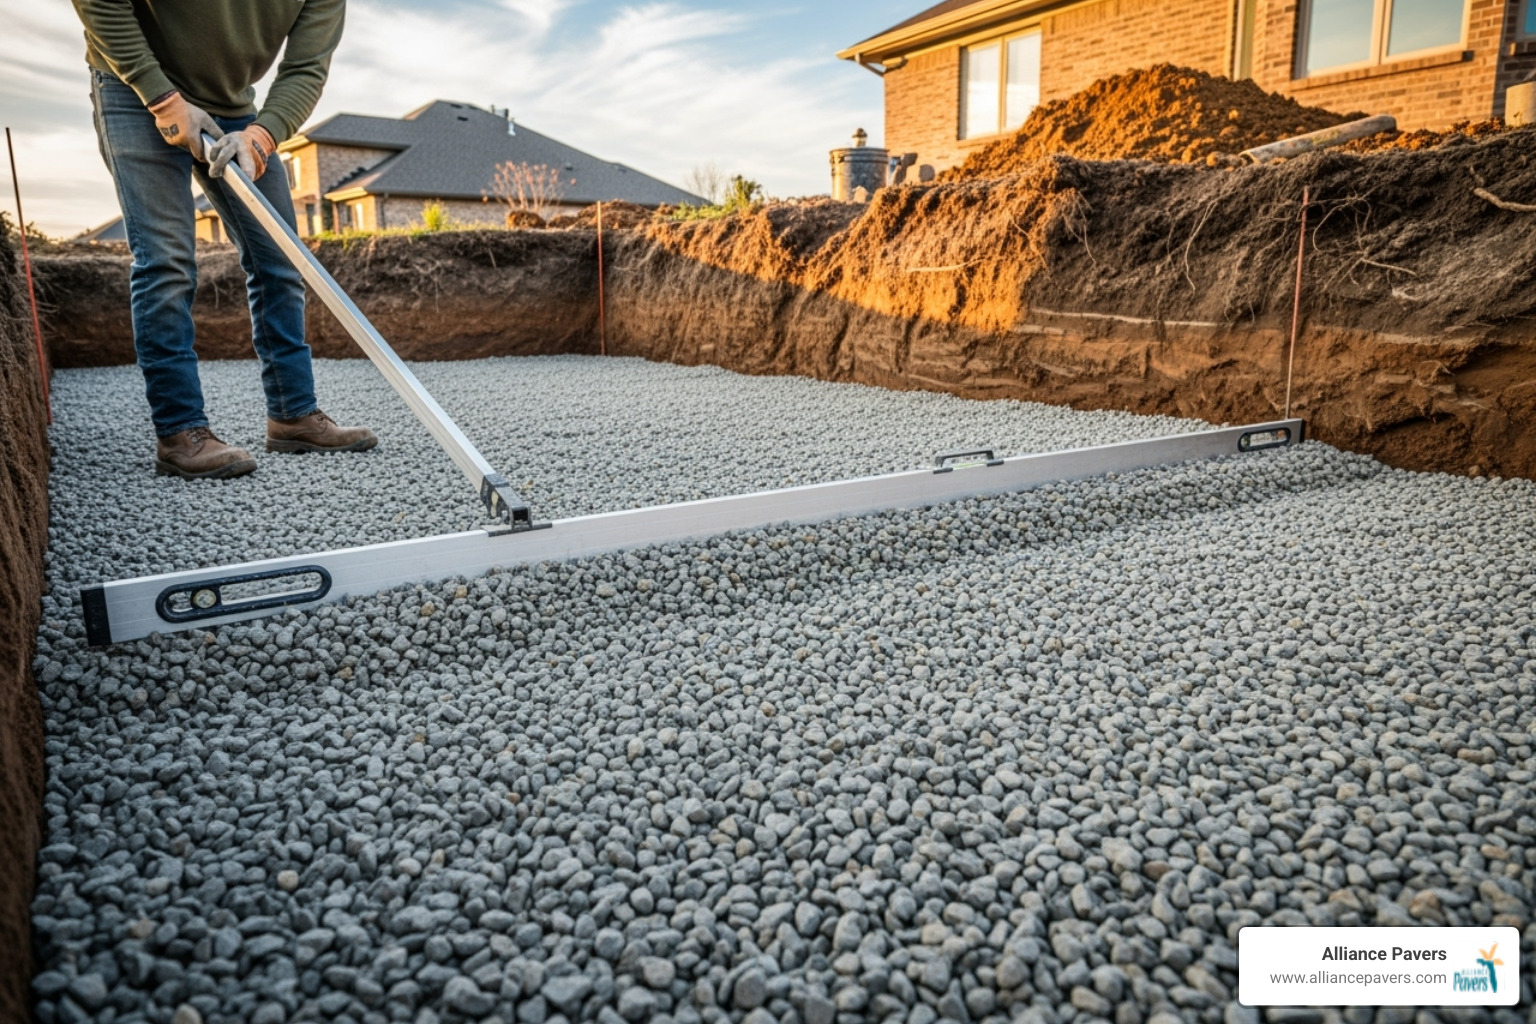
First, lay geotextile fabric over the excavated area, overlapping seams by 12-18 inches to prevent soil and gravel from mixing. Next is the gravel installation. Use ¾-inch crushed stone and compact it in 2-inch lifts (layers) using a plate compactor. Continue until you have a solid 4-6 inch compacted base (use 6 inches in colder climates). Lightly misting the gravel with water helps with compaction.
After the base is complete, spread a uniform 1-inch layer of coarse bedding sand. Screed the sand using two parallel guides (like 1-inch pipes) and a straight board to create a perfectly level surface. Remove the guides and fill in the gaps. Do not compact the sand layer; it must remain loose for setting the pavers. Only prepare as much sand as you can cover with pavers in one day.
More info about leveling techniques
[TABLE] Comparing Different Base Installation Methods
The table below compares the traditional gravel method with modern paver base panels. Paver base panels are a lightweight, labor-saving alternative to a deep gravel base, making them an excellent choice for many DIY projects.
FeatureTraditional Gravel Base (Standard)Paver Base Panels (e.g., Brock, Gator Base)Excavation DepthDeeper (approx. 4-6 inches for gravel + 1 inch sand + paver thickness)Shallower (approx. 1 inch sand + paver thickness, panels replace gravel volume)Labor IntensityHigh (heavy digging, moving tons of gravel, multiple compaction passes)Lower (less digging, lighter materials to move, quicker to lay)Material CostModerate (cost of gravel, sand, geotextile)Potentially higher per square foot for panels, but offsets gravel costDrainage PropertiesExcellent (gravel allows water to permeate)Good (panels often have channels for water, still require permeable underlayer)Overall Project TimeLonger (due to excavation, material handling, compaction)Shorter (streamlined base installation)Weight of MaterialsVery heavy (truckloads of gravel)Significantly lighter (panels weigh about 1 lb each, easier to transport and handle)
The Complete Paver Patio Installation Process: A Step-by-Step Guide
With the foundation prepared, it's time for the most rewarding part of the paver patio installation: laying the pavers.
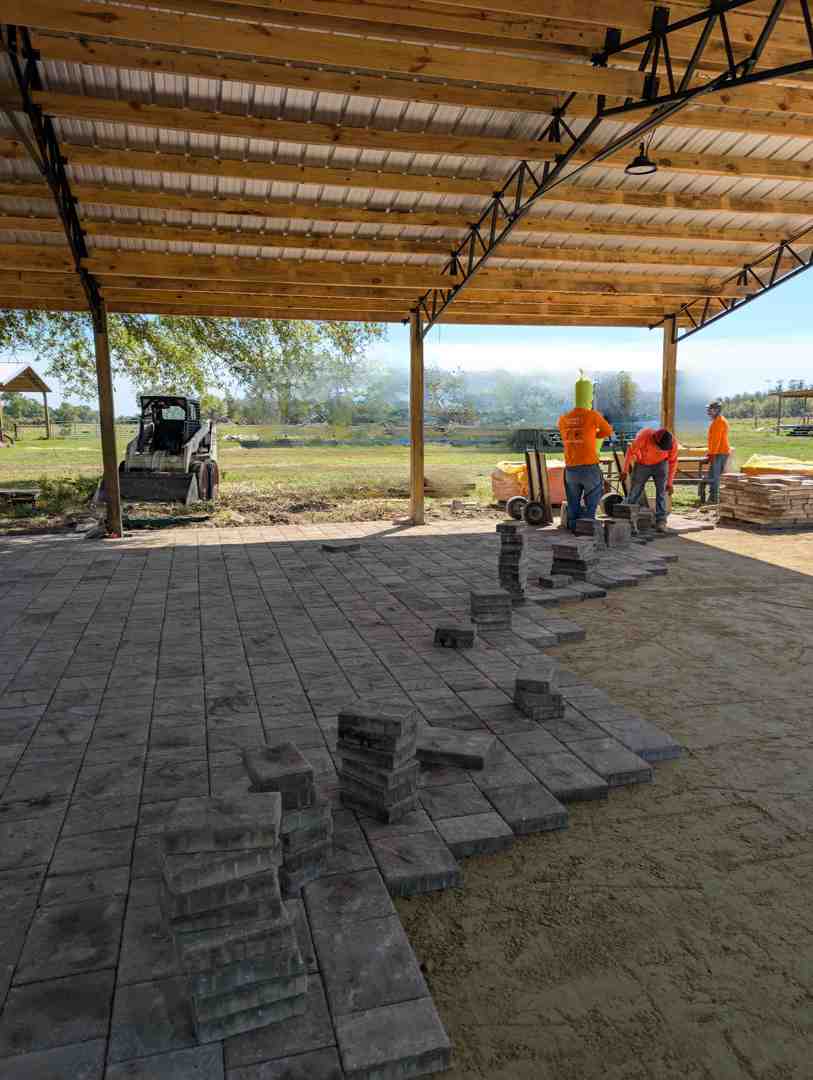
Laying and Aligning the Pavers
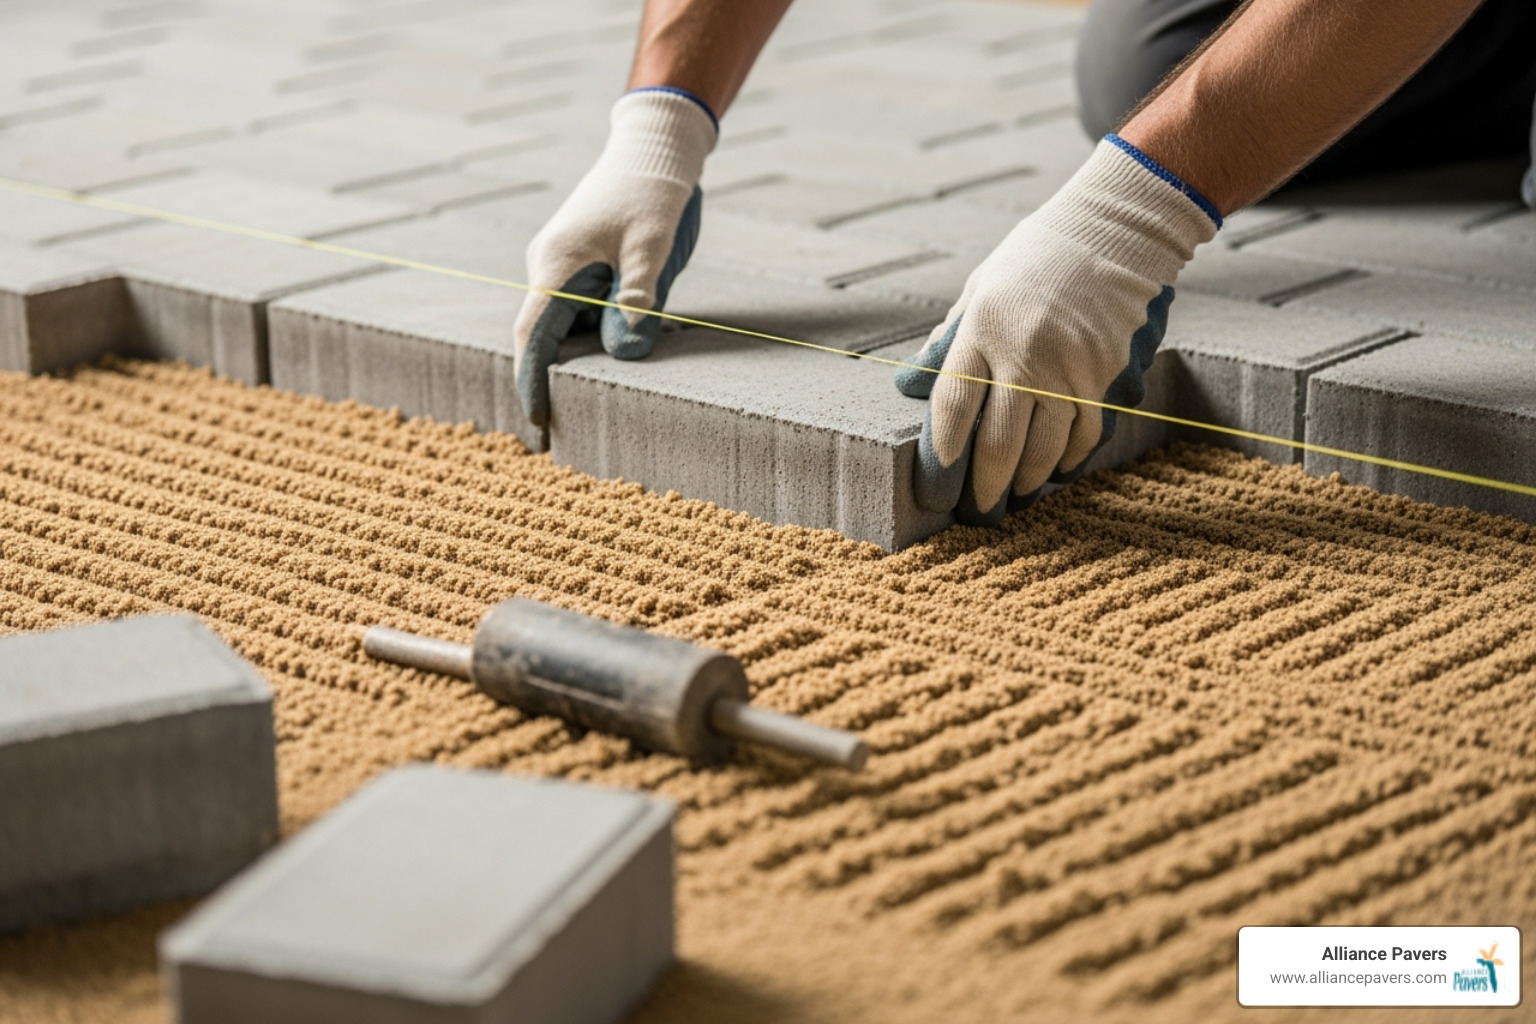
Start from a corner or a straight edge, like the wall of your house. Use string lines to ensure your first row is perfectly straight and to maintain alignment as you continue. Place pavers straight down onto the sand; do not slide them, as this will disturb the level sand bed.
Maintain a consistent ⅛-inch gap between pavers for the jointing sand. Use a rubber mallet for minor adjustments and frequently check your work with a level. Always work from the surface of the pavers you've already laid, not on the prepared sand.
Watch a step-by-step video guide
Cutting Pavers for a Professional Finish
Most projects require cutting pavers to fit edges and obstacles. Measure and mark each paver carefully before cutting. Your tool options include a wet tile saw for clean cuts, a cutoff saw for thicker pavers, an angle grinder for small or intricate cuts, or a manual paver splitter for a dust-free option.
Always prioritize safety by wearing safety glasses, hearing protection, gloves, and a dust mask. For curves, you can use a template and make smaller cuts with an angle grinder.
More info about paver edging ideas
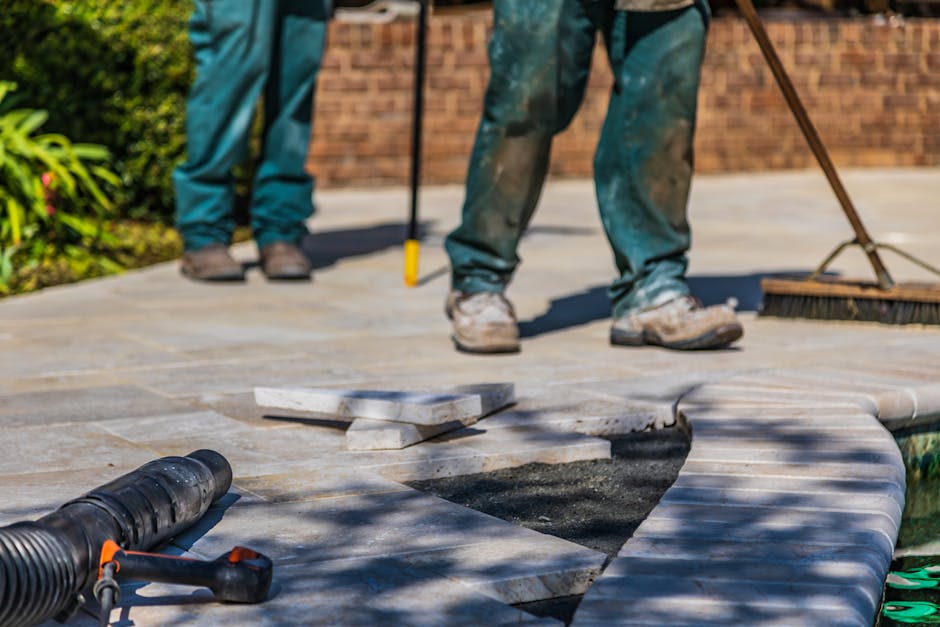
Installing Edge Restraints and Jointing Sand
Edge restraints are essential for preventing pavers from shifting over time. Install them along all open edges, securing them with 10-inch spikes every 12-18 inches. Next, sweep polymeric sand into the joints, using a push broom to fill every gap completely.
Compact the entire patio with a plate compactor; this settles the pavers and locks the sand into the joints. You may need to sweep in more sand and compact again. Finally, activate the polymeric sand with a light mist of water, following the product's directions carefully to avoid washing it out. Allow the patio to cure for at least 24 hours before use.
Common Mistakes to Avoid
Achieving a long-lasting paver patio installation means avoiding common pitfalls. Be sure to steer clear of these frequent mistakes:
- Improper Base Compaction: Failing to compact the gravel base in 2-inch layers will cause pavers to sink and shift.
- Incorrect Slope: A flat patio will pool water. Ensure a 1/8 to 1/4-inch slope per foot away from your house for proper drainage.
- Skipping Edge Restraints: Edging is not optional. It prevents pavers from spreading apart and creating gaps.
- Inconsistent Paver Gaps: The ⅛-inch gap is crucial for the jointing sand to lock pavers together effectively.
- Incompletely Filled Joints: Sweep sand into the joints until they are completely full to ensure a solid, interlocked surface.
- Using the Wrong Bedding Material: Use coarse bedding sand, not playground sand or stone dust, which can cause drainage issues.
- Compacting the Sand Bed: The 1-inch sand layer should remain loose until the final compaction after the pavers are laid.
- Underestimating the Labor: This is a physically demanding project involving moving tons of material. Be realistic about the effort required.
Learn how to fix a loose paver
Frequently Asked Questions about Paver Patios
Here are answers to some of the most common questions about paver patio installation.
Can you build a fire pit on a paver patio?
Yes, you can! A fire pit is a great addition to a paver patio, but safety is key. Use a fire pit kit or fire-rated bricks for the structure itself. To prevent damage to the patio surface from direct heat, place a fire pit mat or an insulating layer of fire bricks underneath the pit. Always maintain a safe distance (typically at least 10 feet) between the fire pit and your house or any other structures, as required by local codes.
What is the expected lifespan and maintenance for a paver patio?
A properly installed paver patio can last 30 years or more. Maintenance is straightforward:
- Cleaning: Regularly sweep the surface and spot-clean stains with soap and water. A pressure washer can be used on a low setting.
- Weed Control: Pull any occasional weeds promptly before they take root.
- Jointing Sand: Top off the polymeric sand in the joints every few years to keep them full and stable.
- Sealing: Applying a sealer every 3-5 years will protect against stains, prevent color fading, and make cleaning easier.
More info about removing weeds between pavers
Is a DIY paver patio installation difficult?
A DIY paver patio installation is a challenging but achievable project for a skilled DIYer. Consider these factors:
- Physical Labor: The project is very demanding, requiring you to move tons of gravel, sand, and pavers.
- Time Commitment: A small patio may take a weekend, but larger or more complex projects can take much longer.
- Attention to Detail: Success depends on precision, especially in the foundation and grading stages. Rushing prep work leads to future problems.
- Cost Savings: The primary motivation for DIY is significant cost savings compared to professional installation.
While the project is rewarding, if the physical demands or technical details seem daunting, hiring a professional ensures a high-quality, stress-free result.
Learn how to fix a loose paver
Conclusion
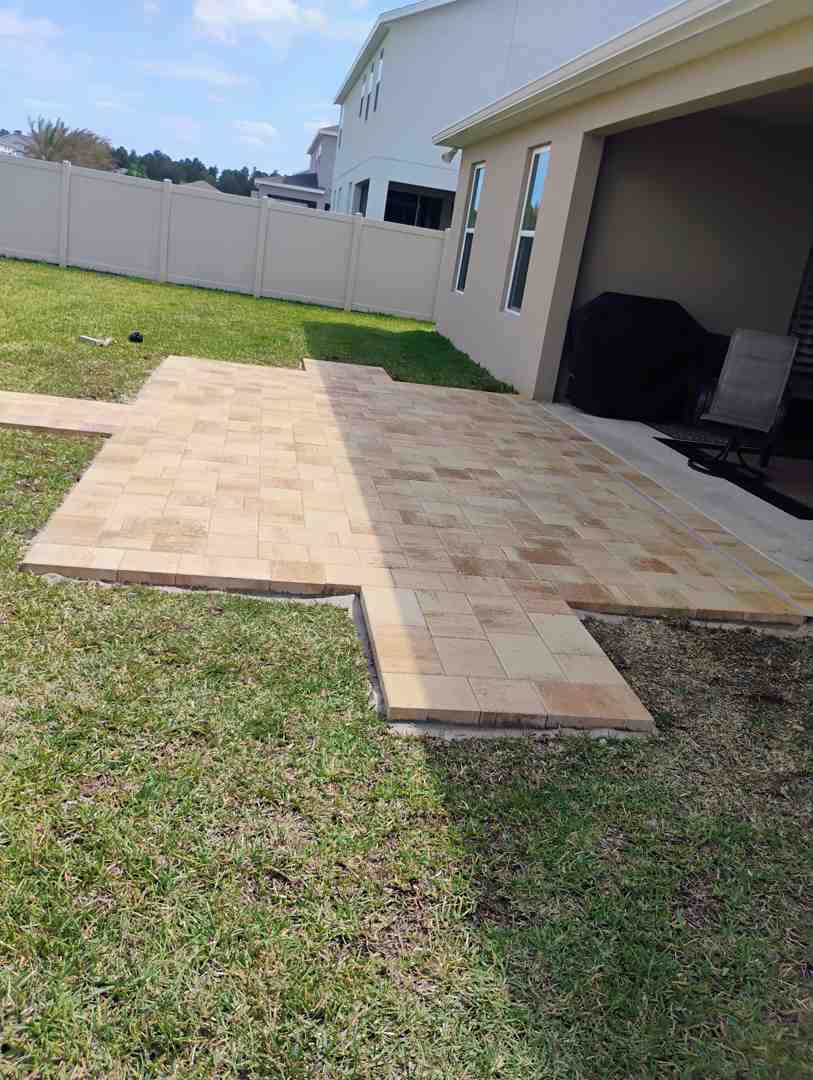
We've covered every crucial step of paver patio installation, from planning and foundation work to laying the final paver. A well-built paver patio creates a durable, long-lasting hub for family life that adds significant value to your home.
The sense of accomplishment from a successful DIY project is immense. However, this is a demanding job that requires significant physical labor and attention to detail. If the project feels overwhelming, or if you want guaranteed professional results without the stress and physical strain, hiring an expert is an excellent choice.
Alliance Pavers has 25 years of experience creating beautiful outdoor living spaces for families in the St. Cloud, FL area. We deliver exceptional craftsmanship and a stress-free experience, ensuring your project is completed on time and on budget.
Whether you choose to DIY or work with our team, your dream patio is within reach.