DIY Railroad Tie Retaining Wall: A Project You Can Tackle
Learn how to install a railroad tie retaining wall yourself! Our guide covers planning, safety, and step-by-step construction for your backyard.
Turning a Sloping Yard into Usable Space
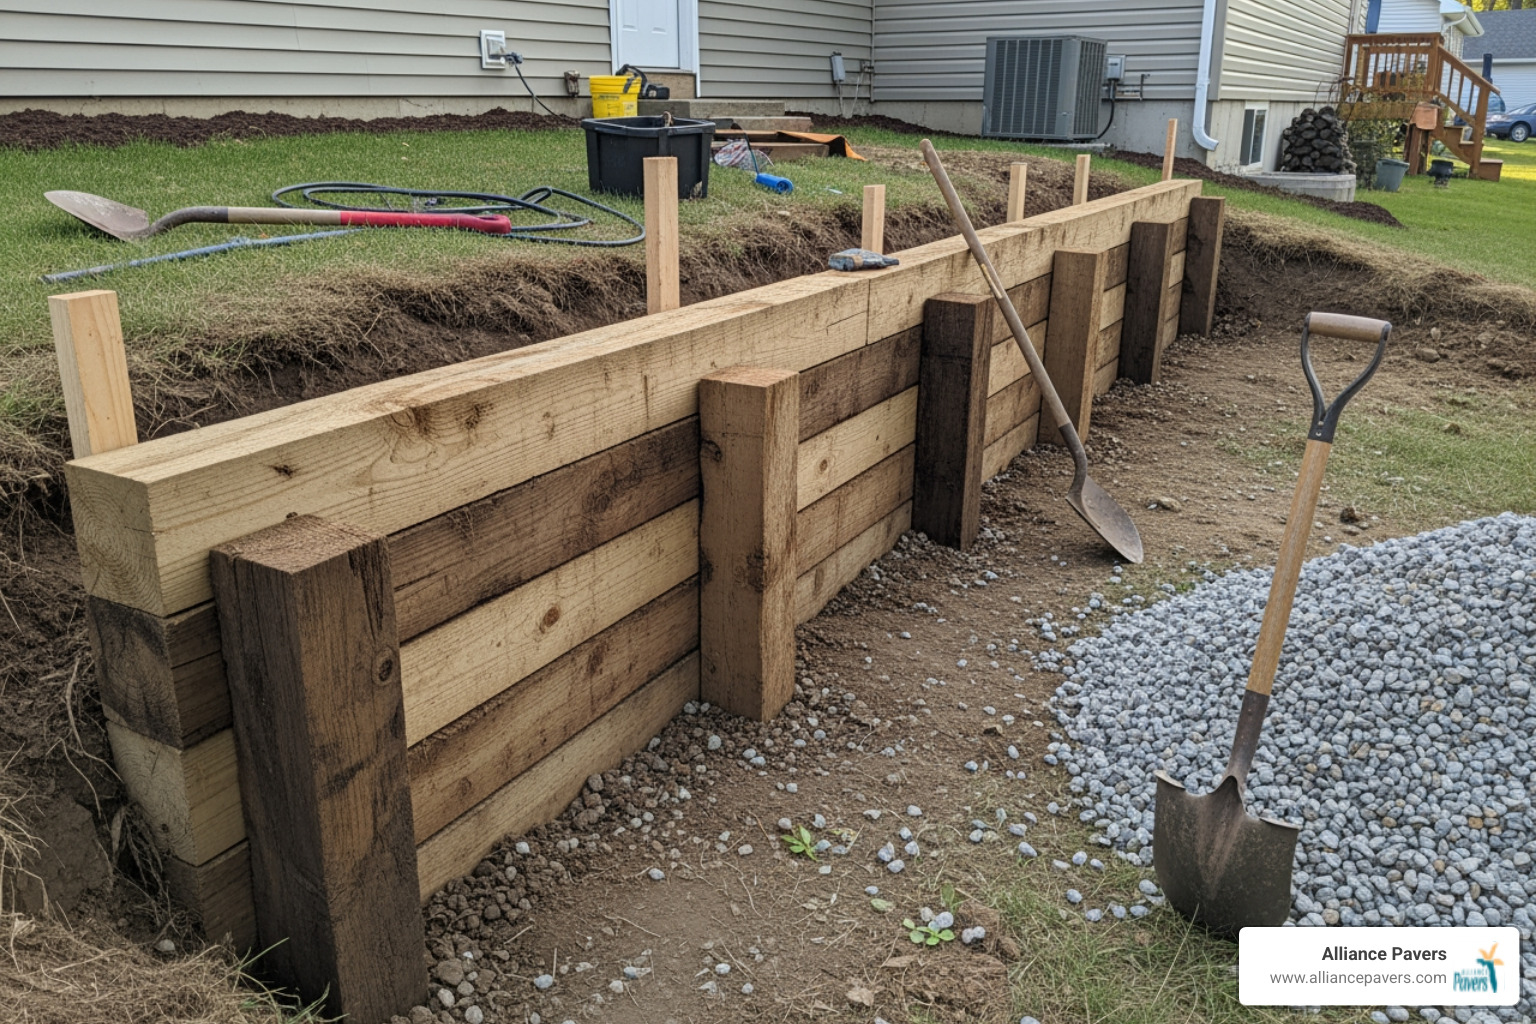
How to install a railroad tie retaining wall is a DIY-friendly project that can transform a sloping Central Florida yard into functional, level space. The process involves excavating a trench, laying a gravel base, stacking and securing ties with rebar, and backfilling for drainage. This practical solution combats erosion and adds a rustic aesthetic to your landscape.
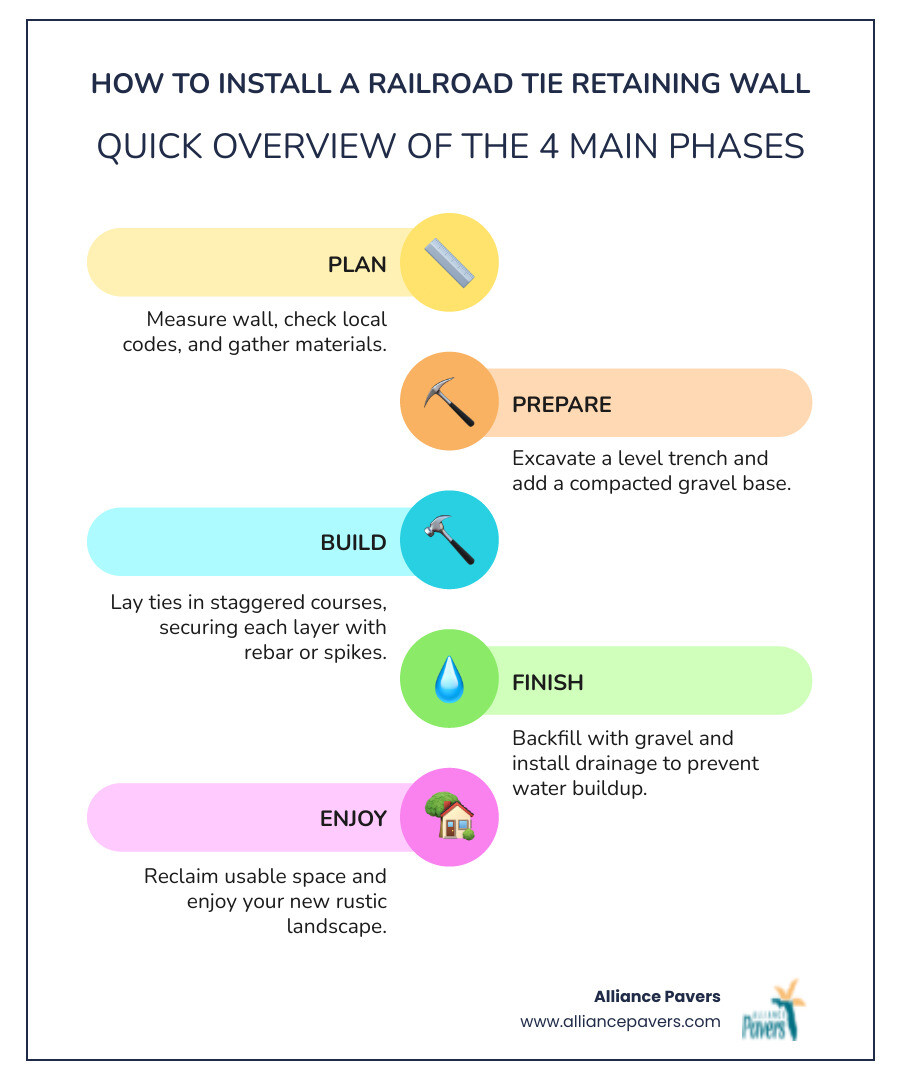
Quick Overview: Installing a Railroad Tie Retaining Wall
- Plan - Measure your wall, check local codes, and gather materials.
- Prepare - Excavate a level trench and add a compacted gravel base.
- Build - Lay ties in staggered courses, securing each layer with rebar or spikes.
- Finish - Backfill with gravel and install drainage to prevent water buildup.
A sloping yard is often unusable space that's difficult to mow or landscape. A railroad tie retaining wall effectively holds back soil, creating level terraces for gardening or entertaining while giving your property a distinctive character that fits well with Central Florida's natural settings.
Before you start, it's worth understanding preventing soil erosion with retaining walls and deciding if a DIY approach is right for you. Walls under four feet tall on stable ground are typically manageable weekend projects. However, taller or more complex installations may require professional guidance to ensure structural integrity and compliance with local building codes.
Before You Begin: Planning, Materials, and Safety
Proper planning is just as important as the construction itself. Start by determining your wall's dimensions. A wall under 4 feet tall (about 4 ties stacked) is generally a manageable DIY project. For anything higher, you'll likely need professional engineering and must adhere to stricter local building codes. Always call your local Central Florida building department in Orlando, Winter Park, or your community to check for permit requirements and height restrictions before you begin.
Next, assess your site. Is the ground firm or soft? Where does water collect? Understanding your terrain helps you plan for the drainage and reinforcement needed for a long-lasting wall. For more on how retaining walls protect your property, see our guide on preventing soil erosion with retaining walls.
Safety First: The Deal with Creosote
Most railroad ties are treated with creosote, a wood preservative the EPA considers hazardous. It can cause skin and respiratory irritation and may contaminate soil, so it's not recommended for use near vegetable gardens or play areas. Handling these ties requires proper safety precautions.
Personal protective equipment (PPE) is mandatory:
- Heavy-duty gloves to prevent skin contact.
- Long sleeves and pants to protect your arms and legs.
- Safety glasses, especially when cutting or drilling.
- A respirator or dust mask when cutting to avoid inhaling particles.
Always wash your hands thoroughly after handling ties. For projects near sensitive areas, consider lining the back of the wall with heavy-duty plastic or using safer alternatives like untreated landscape timbers or concrete blocks.
Tools and Materials for the Job
Gathering all your tools and materials beforehand will make the project run smoothly. Here's a checklist:
Materials You'll NeedTools You'll NeedRailroad ties (calculate based on your wall dimensions)Shovel for excavationGravel or crushed stone (for base and backfill)Level (a long one works best)Rebar or long spikes (for securing layers)Drill with a long auger bitPerforated drain pipe (4-inch diameter)Sledgehammer for driving stakesLandscape fabric (to prevent soil migration)Hand tamper or plate compactorTape measureChainsaw or reciprocating saw
Standard ties are typically 8 feet long. You'll need enough gravel for the foundation and backfill, plus rebar or spikes (at least 18 inches long) to pin the layers together. A drill with a long auger bit is essential for creating pilot holes.
Planning Wall Height and Reinforcement
Wall height determines the construction method. Walls under 4 feet are typically gravity walls, relying on their own weight for stability. Taller walls, or those on unstable soil, require reinforcement with deadman anchors.
Deadman anchors are ties that extend perpendicularly from the wall back into the hillside, creating a T-shaped connection that prevents the wall from tipping. As a general rule, place them every four courses high and every 8 to 10 feet horizontally. The anchors should extend back into the slope at least as far as the wall is tall (e.g., a 4-foot wall needs 4-foot anchors).
For steep slopes or walls over 4 feet, professional guidance is valuable. Our guide on how to build a stone retaining wall on a slope covers additional considerations that apply to any retaining wall. Don't hesitate to call an expert when a project's complexity exceeds the basics.
How to Install a Railroad Tie Retaining Wall: A Step-by-Step Guide
Building a railroad tie retaining wall requires careful attention to each step. A solid foundation and proper building techniques are the secret to a structure that will stand strong for years. Rushing the early steps can lead to a leaning or uneven wall, so take your time to get the basics right.
Step 1: Site Preparation and Trenching
Every great wall starts with a great trench. This is the most critical part of the project.
First, mark the wall's location using stakes and a string line for straight sections or a garden hose for curves. Dig a trench that is at least 12 inches wide and deep enough to bury the entire first course of ties plus 4 to 6 inches for a gravel base. For a 6-inch tie, this means a trench 10 to 12 inches deep.
A level base is absolutely critical. Use a long carpenter's level to ensure the trench bottom is perfectly flat, both lengthwise and across its width. Any tilt will be magnified as you add layers. Finally, use a hand tamper or plate compactor to compact the soil in the trench bottom to prevent future settling.
Step 2: How to Install a Railroad Tie Retaining Wall's Foundation
With the trench prepared, it's time to build the foundation that will support your entire wall.
Pour 4 inches of gravel or crushed stone into the trench. This layer provides a stable, level bed for the ties and helps channel water away. Compact the gravel in 2-inch layers, checking for level as you go.
Place your first course of railroad ties onto the compacted gravel. Use your level to ensure each tie is perfectly level from front-to-back and side-to-side, adding or removing small amounts of gravel to make adjustments.
To anchor this base course permanently, drill holes through the ties about 12 inches from each end with a long auger bit. Drive 2-foot sections of 1/2-inch rebar through the holes and deep into the ground until they are flush with the tie's surface. This first course must not move.
Step 3: Stacking, Staggering, and Securing Subsequent Layers
With a solid foundation, building upward is a straightforward process of stacking and securing.
Stagger the joints like a brick pattern. Each tie in an upper course should overlap the joint between two ties below it. This pattern distributes weight and prevents weak spots.
Before placing each new tie, drill pilot holes for your fasteners about a foot from each end. Position the tie with the joints staggered and secure it by driving 18- to 24-inch sections of 1/2-inch rebar (or 10- to 12-inch spikes) through the pilot holes and into the tie below. For taller walls, drive additional rebar through multiple courses and into the ground for extra anchoring.
Check for level after every course. A slight tilt now will become a major problem later. Make small adjustments as you go to keep the wall straight and true.
Ensuring Longevity: Drainage and Structural Support
Even a well-built wall can fail if water accumulates behind it. The resulting hydrostatic pressure can push a structure outward, causing it to bulge, crack, or collapse. That's why preventing wall failure is about managing water from day one. Proper drainage is your wall's invisible shield, as noted in our guide to inspecting your retaining wall for water damage.
The Critical Role of Drainage
Proper drainage is non-negotiable. As you build, you must create a system to redirect water away from the back of your wall.
- Backfill with Gravel: As you add each course of ties, backfill the space behind the wall with a 6- to 8-inch layer of clean, coarse gravel or crushed stone. This creates a drainage column that allows water to filter down instead of pooling against the wood. Compact the gravel in 3- to 4-inch layers as you go.
- Use Landscape Fabric: Before adding the gravel, line the area behind the wall with landscape fabric. This acts as a filter, letting water pass through while preventing soil from clogging the gravel.
- Install a Drain Pipe: For walls over 4 feet tall or in very wet areas, install a 4-inch perforated drain pipe at the base of the wall, on top of the first gravel layer. This pipe collects water and carries it away.
- Vent to Daylight: The drain pipe must slope gently downward and exit at a lower point on your property where water can safely disperse. This ensures water is actively removed from behind the wall. Plan an exit point every 50 feet for long walls.
How to Install a Railroad Tie Retaining Wall with Extra Support
For most residential walls under 4 feet, proper stacking and drainage are enough. However, taller walls or those on challenging slopes need extra reinforcement with deadman anchors.
A deadman anchor is a tie set perpendicularly back into the hillside, creating a T-shaped connection that holds the wall against soil pressure. They are typically recommended for walls exceeding 4 feet in height or on steep, unstable slopes.
Install deadman anchors approximately every four courses high and every 8 to 10 feet horizontally. The anchor tie should extend back into the slope at least as far as the wall is tall (e.g., a 6-foot wall needs 6-foot anchors). This adds significant stability but also complexity to the project. For taller structures, modern alternatives like segmental retaining walls offer engineered reinforcement options.
The work you do behind and beneath the wall is just as important as the visible structure. Get the drainage and reinforcement right, and your wall will serve you well for years.
Frequently Asked Questions about Railroad Tie Walls
It's natural to have questions before starting a project like this. Here are answers to some of the most common concerns we hear from Central Florida homeowners.
How long will a railroad tie retaining wall last?
The lifespan of a railroad tie wall varies from 5 to over 15 years, depending on several key factors:
- Moisture Exposure: This is the biggest factor. In constantly wet conditions with poor drainage, ties may rot and fail in as little as 5 to 7 years.
- Dry Conditions: A wall with excellent drainage in a relatively dry location can easily last 10 to 15 years or more.
- Tie Quality and Construction: Using well-preserved ties and following proper construction techniques—a solid foundation, good drainage, and secure anchoring—will significantly extend the wall's life.
Can I build a railroad tie wall on a slope?
Yes, building on a slope is the primary reason for retaining walls. However, it requires extra attention to detail. You will need additional reinforcement, such as longer rebar pins and deadman anchors, to counteract the increased pressure from the slope. Proper drainage is also critical, as water naturally runs downhill and will build up behind the wall without an escape route. The base course should be fully buried to create a solid footing.
While modest slopes are manageable for a DIYer, very steep or unstable slopes should be assessed by a professional. Our team has extensive experience with complex slope work and other professional options like stone retaining orlando fl.
What are some alternatives to railroad ties?
While railroad ties have a rustic appeal, several excellent alternatives are available, depending on your budget, aesthetic, and concerns about creosote.
- Interlocking Retaining Wall Blocks: These engineered concrete blocks are durable, easy for DIYers to install, and come in many styles and colors. Our interlocking retaining wall blocks complete guide has more information.
- Natural Stone: For a timeless, organic look, natural stone is an excellent choice. It can be dry-stacked or mortared and can last for generations. For a dramatic effect, consider using large boulders for retaining walls.
- Pressure-Treated Timber: These offer a similar wood look without the creosote. They have uniform dimensions and are treated to resist rot and insects.
- Concrete Blocks: Standard concrete masonry units (CMUs) are a cost-effective and durable solution, especially for taller walls that can be faced with veneer or stucco.
For more complex projects, segmental retaining walls are another modern, engineered option worth exploring.
Conclusion
Completing a railroad tie retaining wall is a satisfying achievement. You've transformed a challenging slope into a functional and beautiful landscape feature, adding both curb appeal and utility to your Central Florida property. The key to a long-lasting wall lies in the fundamentals: a solid foundation, securely stacked courses, and, most importantly, excellent drainage to combat water pressure.
While this is an achievable project for a motivated homeowner, not every situation is ideal for a DIY approach. For larger or more complex hardscaping projects, professional expertise ensures a beautiful and lasting result. Steep slopes, walls over four feet, or projects requiring engineered solutions benefit from an experienced hand.
At Alliance Pavers, we've spent 25 years helping families throughout St. Cloud, Lake Nona, Winter Park, and Kissimmee create outdoor spaces they love. Our team provides the craftsmanship and attention to detail that turns a functional wall into a landscape feature you'll enjoy for decades, handling everything from design to installation.
If you're ready to discuss your retaining wall vision or want expert guidance, we'd love to hear from you. Visit us at More info about our retaining wall services to learn more about what we can do for your property.