Mastering Paver Installation: Your Guide to a Solid Foundation
Learn how to lay pavers on dirt properly! Our guide shows you how to build a solid foundation for a beautiful, lasting paver patio.
Why You Can't Skip the Foundation When Installing Pavers
How to lay pavers on dirt is a common question among Florida homeowners. The short answer: you shouldn't lay pavers directly on dirt for permanent installations. While it might seem like a shortcut, skipping proper base preparation leads to shifting, sinking, weed growth, and costly repairs. A successful paver installation requires a properly prepared foundation of excavated ground, a compacted gravel base, sand bedding, and edge restraints.
Quick Answer: The Proper Way to Lay Pavers
- Excavate 7-13 inches deep depending on traffic type
- Compact the subgrade soil thoroughly
- Install geotextile fabric to prevent soil mixing
- Add 4-10 inches of crushed gravel in 2-inch lifts, compacting each layer
- Screed a 1-inch sand bedding layer
- Lay pavers with consistent gaps
- Install edge restraints to prevent movement
- Fill joints with polymeric sand and compact
If you're considering a professional paver installation for your property, understanding these steps helps you appreciate the craftsmanship involved. For expert results without the stress, contact Alliance Pavers to discuss your project.
Many Central Florida homeowners find too late that laying pavers directly on dirt creates more problems than it solves. Florida's soil types directly impact your paver installation's longevity. Without a proper foundation, you're building on an unstable surface. The good news is that with the right approach, you can create a stunning, durable outdoor space that lasts for decades.

How to lay pavers on dirt helpful reading:
Why a Proper Foundation is Non-Negotiable
We understand the temptation to get your beautiful pavers down quickly. However, when it comes to how to lay pavers on dirt, taking shortcuts with the foundation is a recipe for disappointment. For any permanent paver installation, whether it's a patio in Windermere or a driveway in Sanford, a robust base is essential. Your paver project is only as strong as what's underneath it.
The soil beneath your pavers constantly reacts to environmental changes. In Florida, clay soil can swell and shrink, while sandy soil can shift if not properly contained. Laying pavers directly on this unstable ground leads to significant problems:
- Shifting Pavers and Uneven Surfaces: Without a stable, compacted base, pavers will inevitably shift and settle unevenly, creating an unstable surface and dangerous tripping hazards.
- Weed Growth: Laying pavers directly on dirt provides a fertile ground for weeds to sprout through the joints, requiring constant maintenance.
- Poor Drainage and Water Pooling: A proper base allows water to drain away. Without it, water pools on the surface, leading to algae, staining, and further destabilization. This is crucial in rainy areas like Orlando and Lake Nona. Proper drainage is key, as we emphasize in our guide on proper stone patio drainage doctor phillips.
- Structural Failure and Reduced Lifespan: An improperly installed paver area will not last. The lack of support causes pavers to crack and separate, leading to structural failure. An installation that should last decades might fail in a single season.
- Costly Repairs: Fixing a failed paver installation often means tearing everything up and starting over—a far more expensive task than doing it right the first time. Many calls we get for paver repair stem from poor initial preparation.
- Voided Warranties: Manufacturer and installer warranties are almost always contingent on proper installation, including the base. Skipping these steps could void your coverage.
The message is clear: for a lasting, beautiful, and safe paver installation, a well-engineered base is non-negotiable. For more insights, check out our article on prevent brick patio settling in doctor phillips.
Essential Tools and Materials for Your Paver Project
Before starting, it's crucial to gather the right tools and materials. A successful installation depends on proper preparation.
Essential Tools
Having the right tools ensures efficiency and quality.
- Shovel and Rake: For excavation and spreading materials.
- Wheelbarrow: To transport dirt, gravel, and sand.
- Plate Compactor or Hand Tamper: Essential for compacting the subgrade and base. A plate compactor is highly recommended for superior compaction on larger projects.
- Level (Long and Short): To ensure correct slope and level surfaces.
- Rubber Mallet: For tapping pavers into place without damage.
- String Lines and Stakes: To mark the project area and maintain straight lines.
- Measuring Tape: For accurate measurements.
- Masonry Saw (with diamond blade) or Splitter/Chisel: For cutting pavers to fit edges and curves. Always use safety glasses.
- Broom: For sweeping joint sand.
- Garden Hose with Spray Nozzle: For moistening base layers and activating polymeric sand.
- 2x4 Lumber and 1-inch PVC Pipes: For screeding the sand layer.
Materials for a Solid Base
Choosing quality materials is just as important as using the right tools.
- Pavers: Order 10%-15% extra for cuts and breakage.
- Crushed Gravel Aggregate (¾-inch minus): Forms the stable base. Use 4-6 inches for pedestrian areas and 8-12 inches for driveways.
- Coarse Bedding Sand (Concrete Sand): Creates a uniform 1-inch layer for pavers to sit on.
- Edge Restraints: Critical for preventing paver spread. Options include plastic, concrete, or metal.
- Geotextile Fabric: A barrier between soil and gravel to prevent mixing and ensure stability.
- Joint Sand (Polymeric Sand recommended): Locks pavers in place, inhibits weeds, and deters ants.
Choosing the Right Paver Type
Paver choice affects aesthetics and installation. Our guide to the different types of pavers has more detail, but here's a summary:
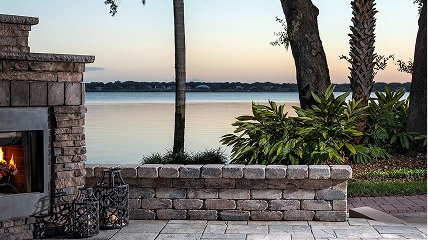
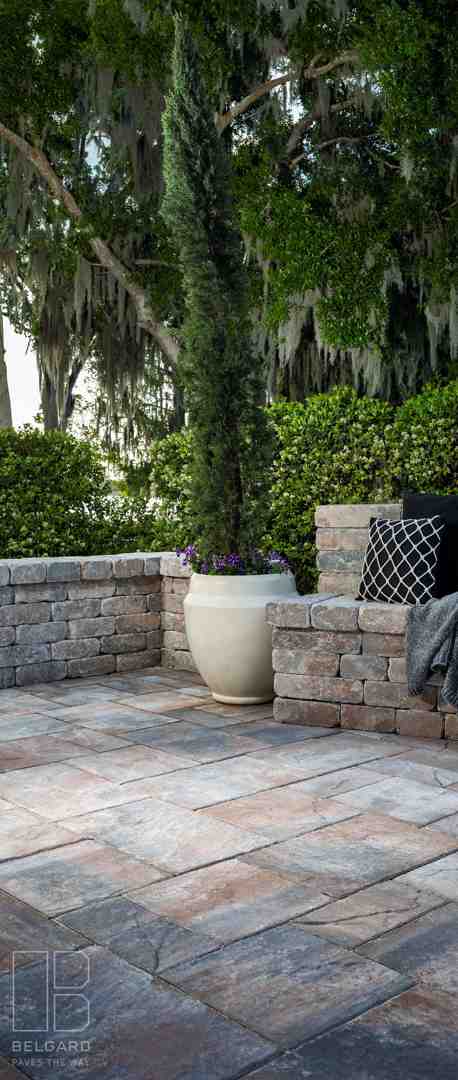
- Concrete Pavers: Versatile, durable, and affordable. A great choice for patios in Heathrow or driveways in St. Cloud.
- Natural Stone Pavers: Offer a luxurious look. Travertine and flagstone are popular for high-end patios in Windermere and may require sealing. See our stone patio installation ultimate guide for more.
- Brick Pavers: A classic, timeless choice with a long life, suitable for many Central Florida homes.
- Porcelain Pavers: Highly resistant to stains, scratches, and fading. They offer a modern look and are exceptionally durable.
While paver type can slightly influence base depth, the fundamental need for a solid foundation is universal.
How to Lay Pavers on Dirt: The Professional Step-by-Step Method
Now that we have our tools and materials ready, let's walk through the proper, professional method for how to lay pavers on dirt to create a lasting, beautiful hardscape. This process ensures stability and durability, which is paramount in Florida's climate.
Step 1: Excavation - The First Step for How to Lay Pavers on Dirt
Proper excavation sets the stage for a stable installation.
- Marking the Area: Use stakes and string lines to outline your project, extending markings 6 inches beyond the final edge for base support. Square your corners and always call 811 to locate utilities before digging.
- Calculating Depth: Your total excavation depth must accommodate the pavers, a 1-inch sand bed, and the gravel base. This is typically 7-9 inches for patios and walkways, and 10-13 inches for driveways.
- Establishing Slope for Drainage: A critical step in Central Florida is creating a slight slope away from any structures to ensure water runoff. A grade of 1 inch per 4 feet is generally sufficient. Our expertise in working with slopes in hardscape design ensures effective water management.
- Compacting the Subgrade Soil: After excavating, compact the exposed soil to at least 95% density to prevent settling. Remove any roots or organic matter that could decompose and cause instability.
Step 2: Building the Gravel Base
The gravel base provides structural support and drainage.
- Laying Geotextile Fabric: Lay geotextile fabric over the compacted subgrade, overlapping seams by at least 6 inches. This barrier prevents soil from mixing with the gravel, ensuring long-term stability.
- Adding Crushed Gravel: Install a 4-6 inch deep layer of crushed gravel for pedestrian areas, or an 8-12 inch layer for driveways. This robust layer distributes weight and allows for drainage.
- Compacting in 2-inch Lifts: To achieve maximum density, add the gravel in 2-inch "lifts" or layers. Thoroughly compact each layer with a plate compactor, lightly moistening the gravel to aid compaction.
- Checking for Level and Slope: Continuously check that you are maintaining the established slope throughout the gravel installation to ensure your final surface will be smooth and drain correctly. This is vital for projects like how to build paver driveway.
Step 3: Screeding the Sand Bedding
The sand bedding creates a perfectly smooth surface for the pavers.
- 1-inch Sand Layer: Spread a uniform 1-inch layer of coarse, washed concrete sand over the compacted gravel base.
- Using Screed Rails: Lay 1-inch diameter PVC pipes parallel on the gravel to act as rails.
- Leveling the Sand: Spread sand between the pipes and use a straight 2x4 board to "screed" or drag across the rails, leveling the sand to a precise 1-inch thickness. Remove the pipes and carefully fill the voids.
- Creating a Smooth Bed: The goal is a perfectly smooth, undisturbed sand bed. Avoid walking on the screeded sand. This step is vital for a flawless finish, as detailed in our guide on putting in a patio with bricks.
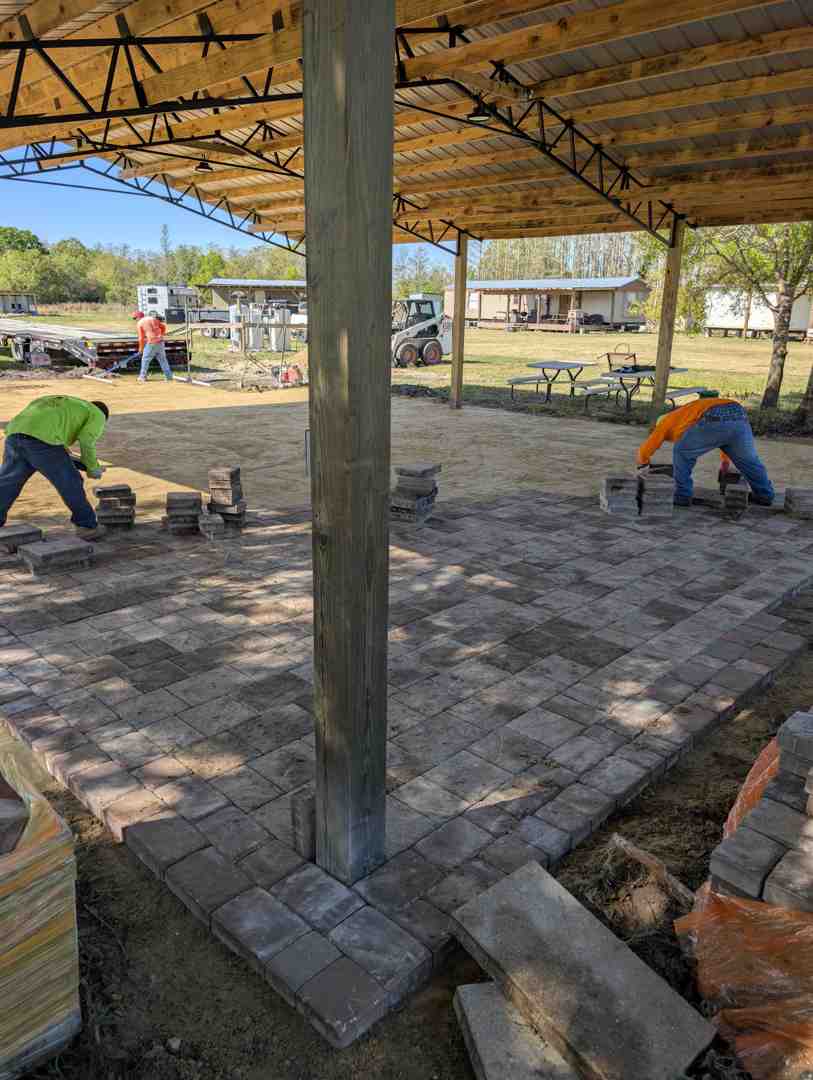
Step 4: Laying the Pavers
This is where your vision takes shape.
- Starting from a Corner: Begin laying pavers from a fixed edge or corner, working across the sand bed to maintain alignment.
- Click-and-Drop Method: Place each paver straight down onto the sand using a "click-and-drop" method. Never slide pavers, as this disrupts the sand. Maintain a consistent gap of 1/16" to 3/16" between pavers.
- Maintaining Alignment: Use string lines periodically to check for straightness, ensuring the pattern remains true. For intricate designs like those in driveway paver patterns, precision is key.
- Cutting Pavers: Use a masonry saw with a diamond blade for precise cuts to fit edges and curves. Always wear safety glasses. For vehicular surfaces, avoid cutting pavers smaller than one-third of a whole paver to maintain structural integrity.
Finishing Your Installation for Long-Term Stability
Laying the pavers is a milestone, but the finishing touches lock your investment in place.
Installing Edge Restraints
Edge restraints are crucial for preventing the lateral movement of pavers, which causes gaps and shifting. They act as a sturdy border, holding the paver field together.
- Types of Restraints: Popular choices include flexible plastic edging for curves, robust concrete curbs for driveways, and sleek metal edging.
- Securing: Proper installation with spikes (for plastic/metal) or mortar (for concrete) is essential to prevent pavers from migrating. Our guide on paver edging ideas offers more solutions.
Applying Joint Sand and Compacting
Filling the gaps with joint sand interlocks the pavers and prevents shifting.
- Polymeric Sand Benefits: We highly recommend polymeric sand. When moistened, it hardens to lock pavers in place, inhibit weed growth, deter ants, and resist erosion from rain.
- Sweeping Sand into Joints: Spread dry polymeric sand over the surface and use a stiff broom to sweep it completely into all the gaps.
- Activating with Water: Carefully mist the surface with a garden hose to activate the polymers, causing the sand to harden. Apply water slowly to avoid washing it out.
- Final Compaction: After the sand is in place, perform a final compaction with a plate compactor (using a rubber mat). This settles the pavers into the sand bed and locks the joints, ensuring a tight, stable surface, similar to the process for how to seal paver driveway.
Long-Term Paver Maintenance
With proper care, your paver surface will last for decades.
- Regular Cleaning: Sweep regularly to remove debris. Use paver-specific cleaners for tough stains.
- Weed Control: Promptly remove any stray weeds that appear.
- Fixing Uneven Pavers: If a paver settles, it can be fixed by removing it, adjusting the sand bedding, and resetting it. Our guide on how to fix a loose paver provides detailed steps.
- Efflorescence: A white, powdery deposit called efflorescence may appear but usually fades over time. It can be removed with specialized cleaners.
- Re-sanding and Sealing: To maintain protection and appearance, re-sand the joints and reapply a quality paver sealer every 2-5 years. This protects against stains and UV fading. Our article on paver patio maintenance offers more tips.
Frequently Asked Questions about Paver Installation
We often get questions from homeowners about the intricacies of paver installation. Here are some of the most common ones we hear, providing clarity on how to lay pavers on dirt (the right way!) and other related concerns.
How deep should I dig for a paver patio?
The depth of excavation depends on the type of project (pedestrian or vehicular traffic) and the thickness of your chosen pavers. As a general rule, we calculate the total depth by adding the following:
- Paver Thickness: (e.g., 2-3 inches for standard pavers)
- 1-inch Sand Bed: This provides the leveling layer.
- Gravel Base:
- 4-6 inches for pedestrian areas (patios, walkways)
- 8-12 inches for driveways (to support heavier loads)
So, for a typical paver patio with 2.5-inch thick pavers, you'd be looking at approximately 2.5 (paver) + 1 (sand) + 4-6 (gravel) = 7.5 to 9.5 inches of excavation depth. For a driveway, it could be 11.5 to 15.5 inches. Always ensure this depth includes a slight slope for drainage.
What is the best base for pavers instead of dirt?
The best base for pavers is a multi-layered system designed for stability, drainage, and longevity. Directly laying pavers on dirt is not recommended for permanent installations. Our preferred, professional method involves:
- Compacted Subgrade: The native soil, excavated and then heavily compacted to at least 95% density.
- Geotextile Fabric: A layer placed directly on the compacted subgrade to prevent the mixing of soil and gravel, enhancing stability and drainage.
- Compacted Gravel Aggregate: A substantial layer (4-12 inches, depending on traffic) of crushed gravel (like ¾-inch minus) installed in 2-inch lifts and thoroughly compacted. This provides the primary structural support.
- 1-inch Sand Bedding: A precisely screeded layer of coarse concrete sand that creates a perfectly smooth and level surface for the pavers to rest on.
This robust base system ensures your pavers remain level, stable, and beautiful for decades.
When is it advisable to hire a professional paver installer versus attempting a DIY installation?
This is a great question, and the answer often comes down to a few key factors:
- Project Size and Complexity: For small, simple projects like a stepping stone path in a well-drained area, DIY might be feasible. However, for larger patios, intricate designs, or driveways that require significant excavation, heavy compaction, and precise grading, a professional is highly recommended. The sheer labor involved, especially with moving tons of material, can be daunting.
- Tool Access and Expertise: Professionals have access to specialized equipment like plate compactors, masonry saws, and laser levels, which are crucial for a high-quality installation. They also possess the experience to handle various soil types, drainage challenges, and complex paver patterns.
- Time Commitment: A proper paver installation is a multi-day, labor-intensive project. If your time is limited, hiring a professional can save you weeks of weekend work.
- Desire for a Guaranteed, Long-Lasting Result: While DIY can be rewarding, a professional installation comes with the assurance of expertise, proper techniques, and often a warranty on workmanship. This peace of mind is invaluable, ensuring your investment stands the test of time.
At Alliance Pavers, we've spent 25 years perfecting our craft, delivering exceptional craftsmanship and a stress-free experience. If you're looking for a guaranteed, long-lasting, and beautiful result without the hassle, our team is ready to help. Find the benefits of professional paver installation with us.
Conclusion
The question of how to lay pavers on dirt is fundamental to any hardscaping project. While the idea of a shortcut might whisper in your ear, we've learned through decades of experience that a solid foundation is not just important—it's absolutely non-negotiable. Skipping the proper base preparation, which includes careful excavation, thorough subgrade compaction, geotextile fabric, a robust gravel base, and a precise sand bedding layer, leads to inevitable problems like shifting, uneven surfaces, weed growth, and poor drainage.
Your paver patio, walkway, or driveway is a significant investment in your home's beauty and functionality. By understanding and implementing these professional steps, you ensure that investment will stand strong against the test of time, weather, and traffic. A solid foundation is the silent promise of durability and lasting appeal.
For a stress-free project with guaranteed results, trust the experts. At Alliance Pavers, we pride ourselves on exceptional craftsmanship, delivering on-time and on-budget outdoor spaces that improve your home. Let us help you Create the driveway of your dreams or any other stunning paver feature you envision.