From Dirt to Dream: Installing Your Own Brick Patio
Learn how to DIY your dream patio! This guide covers everything you need for putting in a patio with bricks, from planning to finishing.
Transform Your Outdoor Space with a DIY Brick Patio
Putting in a patio with bricks is a rewarding home improvement project that combines DIY satisfaction with the lasting beauty of natural materials.
Quick Overview:
- Skill Level: Intermediate
- Time Required: 2-3 days for an average-sized patio
- Main Steps: Excavate → Install base layers → Lay pavers → Fill joints
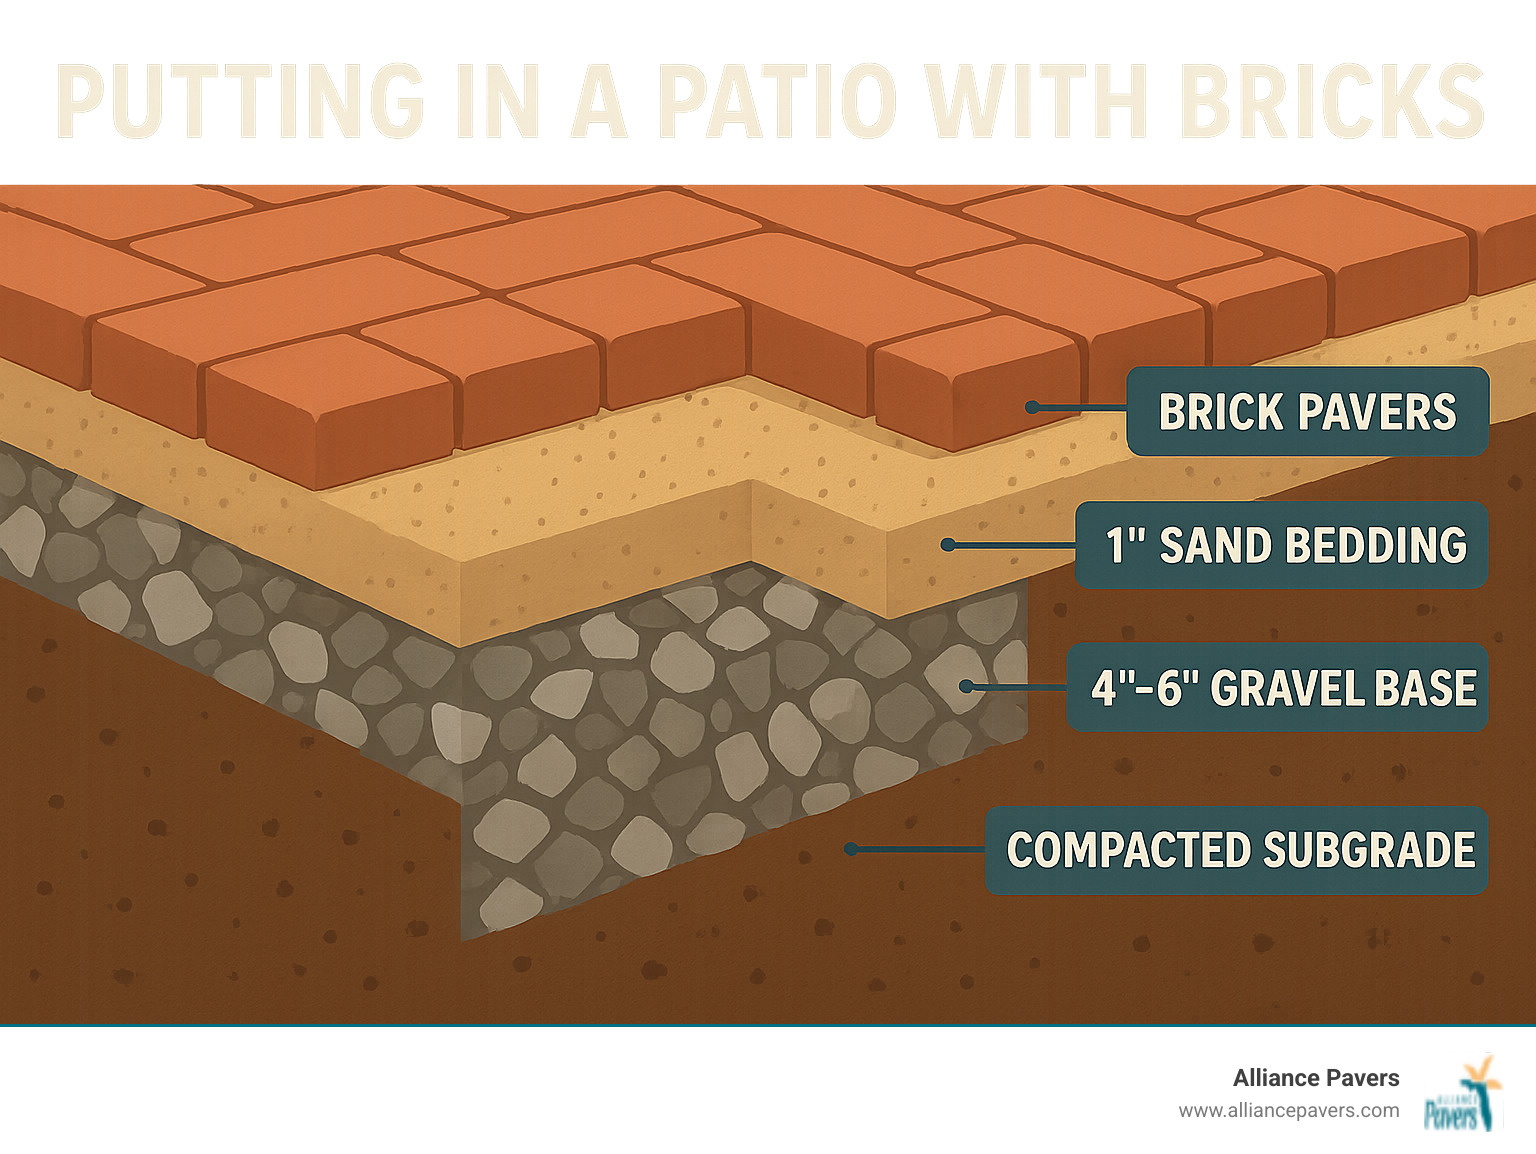
- Key Success Factor: Proper base preparation with 4-6 inches of compacted gravel
Building your own brick patio offers great value. You gain complete control over the design and quality, plus the pride of relaxing on a beautiful patio you built yourself.
The process involves creating a stable foundation with graded base materials, carefully laying each paver, and securing everything with joint sand. While it requires physical effort, the techniques are straightforward once you understand the basics.
Modern brick patios can last for decades when installed using the flexible pavement method. This approach allows individual pavers to move slightly with ground conditions, preventing the cracking common with solid concrete surfaces.
Whether you're dreaming of morning coffee on a cozy patio or hosting weekend barbecues, this guide will walk you through every step of the installation process.
Phase 1: Planning Your Perfect Brick Patio
Careful planning is the secret to a stunning, long-lasting patio. A good plan saves time, prevents costly mistakes, and ensures you'll love the final result.
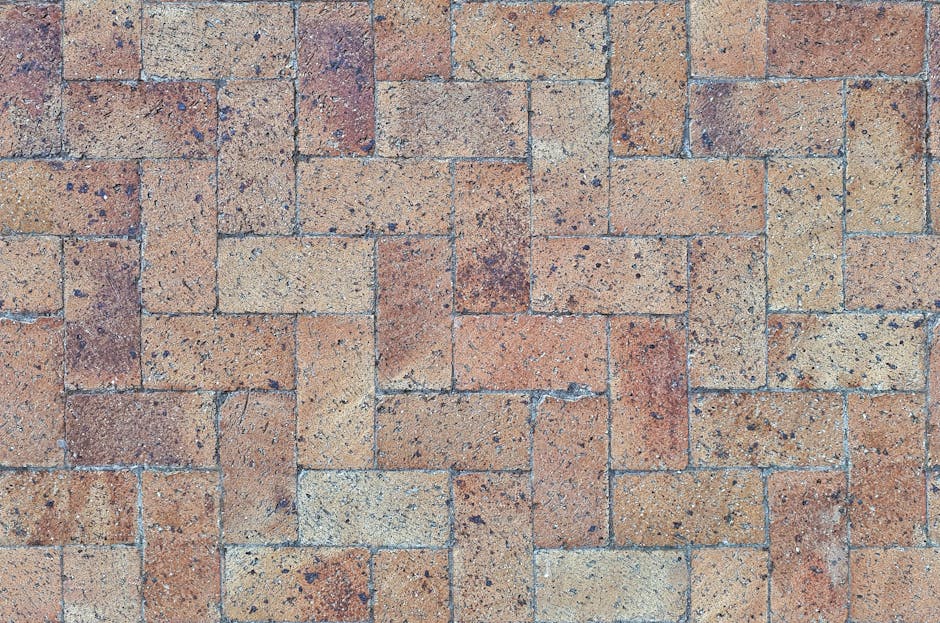
Putting in a patio with bricks starts with design. The pattern you select defines your patio's personality. A classic herringbone pattern offers a timeless look. For beginners, a running bond pattern has clean, straight lines that are easier to install. A basketweave design provides rustic charm with minimal cutting—a bonus for DIYers!
Site selection requires careful thought. Look for a relatively level area that's easily accessible from your house. Proper drainage is absolutely critical; your patio must slope away from your house at a rate of 1/4 inch per foot to direct water away from the foundation.
Before you dig, call 811 for utility marking. This free, legally required service marks all underground lines (gas, electric, water, cable) and can prevent an expensive, dangerous accident.
Also, check with your local building department about building codes and permits. Setback requirements, drainage regulations, and other local codes can affect your project, so it's better to know upfront.
The flexible pavement installation method we're using has excellent drainage capabilities. Unlike rigid concrete, a brick patio allows water to drain through the joints, preventing the freeze-thaw damage that plagues solid surfaces.
When finalizing your pattern, consider aesthetics and practicality. Standard paving bricks are 4x8x2 inches, and some patterns require more cutting, which affects time and material costs. For more options, see A guide to the different types of pavers.
Finally, plan for your patio's edges, which need restraints to prevent shifting. Explore various Paver Edging Ideas to find the perfect complement to your design.
Essential Tools and Materials for Putting in a Patio with Bricks
Having the right tools and materials ready prevents frustrating mid-project trips to the store.
- Excavation Tools: You'll need a sharp spade shovel, a standard shovel, and a quality Wheelbarrow for moving soil, gravel, and sand.
- Measuring & Leveling: Gather a measuring tape, garden stakes, mason's line, a 2-foot level, and a 4-foot level to check the overall grade.
- Compaction: A tamper or plate compactor is crucial. For patios over 100 square feet, rent a gas-powered plate compactor for superior results.
- Laying & Finishing: You'll need a rake, a straight 2x4 for screeding sand, a rubber mallet for adjustments, and a masonry saw for cuts. Always use safety gear: gloves, eye protection, and a dust mask.
- Materials:
- Brick Pavers: Order 10% extra for cuts and future repairs.
- Gravel Base: Crushed stone or road base for a 4-6 inch compacted layer.
- Landscape Fabric: To place between soil and gravel to prevent settling and weeds.
- Bedding Sand: Coarse, washed concrete sand for the 1-inch paver cushion.
- Edging Restraints: Plastic, aluminum, or steel to contain the pavers.
- Polymeric Sand: To fill joints, lock pavers, and prevent weed growth.
Phase 2: The Step-by-Step Guide to Putting in a Patio with Bricks
This phase turns your design into reality. Building a patio is manageable when broken down into these logical steps, a process we've perfected over 25 years of helping homeowners in Central Florida.
Site Preparation
Proper site preparation is the key to a solid foundation. Everything depends on correct excavation and soil preparation.
First, mark the patio's boundaries using stakes and mason's line. Use the 3-4-5 triangle method for square corners: measure 3 feet along one side, 4 feet along the perpendicular side, and the diagonal should be exactly 5 feet.
Next, establish the proper slope for drainage. Set your mason's line with a line level to create a gentle 1/4-inch per foot slope away from the house. This prevents water from pooling on the patio or against your foundation.
Now it's time for excavation. Dig 6-8 inches deep to accommodate a 4-6 inch gravel base, 1 inch of sand, and the 2-inch thick pavers. Proper depth ensures the finished patio sits slightly above ground level. Remove any roots, rocks, or debris. Dig a slightly deeper trench around the perimeter for the edging.
Level the subgrade, checking frequently with a long level to maintain a smooth, even surface that follows your drainage slope. Any imperfections now will show in the final product.
Finally, compact the exposed soil. This prevents future settling. For any area larger than a small walkway, we strongly recommend using a machine from a rent a plate compactor service for results far superior to hand tamping. The principles of a solid base are the same for any project, from a small patio to a large one like in our guide on How to Build Paver Driveway.
Preparing the Base: The Key to a Long-Lasting Patio
A properly prepared base is what separates a patio that lasts for decades from one that fails in a few years.
First, install landscape fabric. This barrier prevents the gravel base from mixing with the soil below. Overlap seams by 12-18 inches for complete coverage.
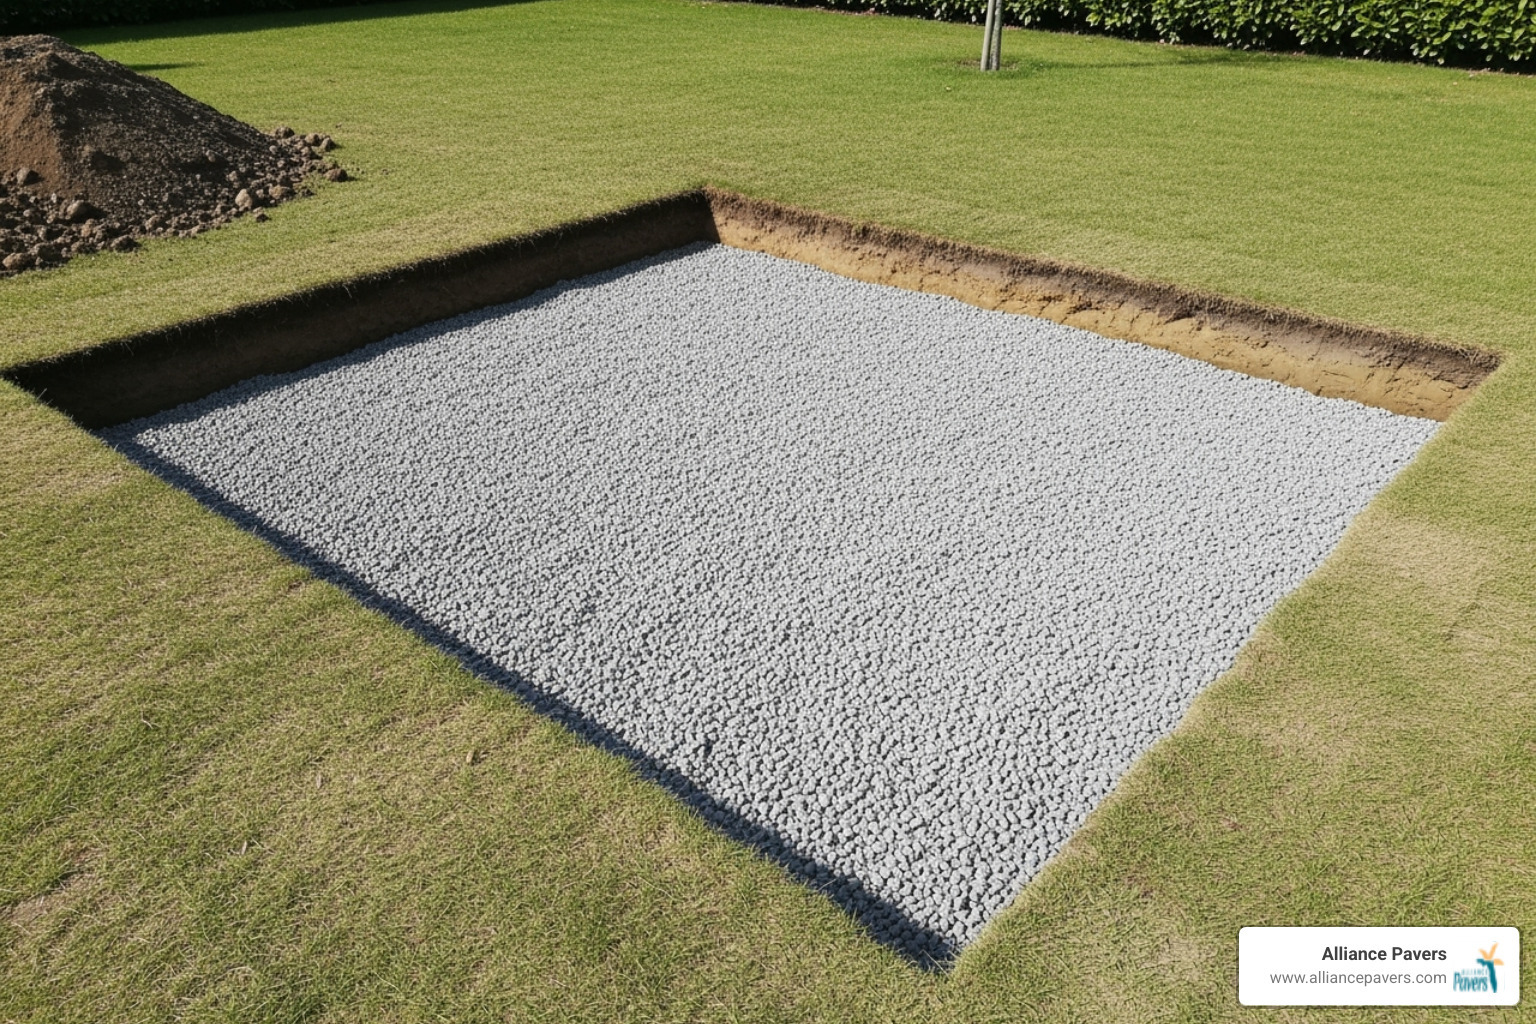
Next is the gravel base installation. Spread crushed stone in 2-inch lifts, compacting each layer thoroughly before adding the next. This method ensures density throughout the entire 4-6 inch base. Lightly misting the gravel with water helps the particles lock together during compaction.
Now, create the sand bed. Spread coarse, angular sand to create a uniform 1-inch cushion for the pavers.
Screeding the sand creates the perfectly level surface your pavers need. Set up two parallel pipes or conduit as rails and drag a 2x4 screed board across them to level the sand. Remove the pipes, fill the channels, and smooth the surface, ensuring it maintains the drainage slope. This detail is crucial to Prevent Brick Patio Settling in Doctor Phillips and other Central Florida areas.
Laying, Cutting, and Securing the Bricks
Now it's time to lay the bricks. Patience and attention to detail are key.
Start from a corner, preferably against the house, to establish a straight reference line and maintain pattern consistency.
Use a proper laying technique: place each brick straight down into the sand. Do not slide or drag them, as this will disturb the leveled bed. Aim for 1/8-inch gaps between bricks for the joint sand.
A gentle tap with a rubber mallet seats each brick and ensures it is level with its neighbors.
Check for level constantly. Use a short level on individual bricks and a long level across multiple bricks to maintain the overall slope. Use your mason's line as a guide to keep rows straight.

Cutting bricks is necessary at edges. A Masonry saw with a diamond blade provides the cleanest cuts. Safety gear is non-negotiable: wear eye and ear protection, a dust mask, and gloves. Mark cut lines clearly and cut slowly.
Finally, install paver edging. These restraints go around the perimeter to prevent pavers from shifting. Secure plastic or aluminum edging with long spikes driven deep into the ground. This step locks the patio in place and provides a clean, professional finish.
Phase 3: Finishing Your Patio for a Professional Look
This final phase transforms your hard work into a professional-looking patio. Filling the joints locks the pavers together, allowing for natural movement while ensuring stability. This step is what gives a DIY project a professional finish.
First, spread the joint sand. Pour your chosen sand generously across the entire patio surface.
Using a push broom, sweep the sand into the joints. Work diagonally across the pavers in multiple directions to ensure every gap is filled from top to bottom.
Next, run your plate compactor over the entire patio. Compaction vibrates the sand deep into the joints, creating a crucial interlock between pavers. Make several passes in different directions.
After the first compaction, the sand level in the joints will drop. This is a good sign. Repeat the process: add more sand, sweep it in, and compact again. Continue until the joints are completely full, with the sand sitting just below the paver surface.
Perform a final sweep to remove all excess sand from the paver surfaces. This is critical when using polymeric sand, as leftover grains can stain the bricks when activated with water.

If using polymeric sand, activate it with a gentle misting from a garden hose. This turns the loose sand into a solid, flexible bond. Use a light, even spray to avoid washing the sand out of the joints.
Once cured, your patio is ready for enjoyment. To keep it looking its best, see our guide on How to Clean Brick Pavers and Keep Them Looking New.
Polymeric Sand vs. Regular Sand: What's the Best Choice?
While regular sand is budget-friendly, polymeric sand is the superior choice for a lasting, low-maintenance patio.
Regular sand is inexpensive but requires frequent maintenance. It washes out in heavy rain, allows weed and ant intrusion, and requires seasonal re-sanding.
Polymeric sand contains polymers that harden when wet, creating a firm yet flexible joint. This locks pavers in place, resists erosion, and prevents weeds and insects.
FeatureRegular SandPolymeric SandDurabilityLoose, prone to washing out, shifts over time.Hardens when wet, creating a strong, flexible bond. Less prone to erosion.Weed PreventionMinimal. Weeds can easily sprout through.Significantly inhibits weed growth due to hardened joints.Insect ControlLittle to none. Ants can easily tunnel through.Discourages ant colonies and other insects from nesting in joints.CostLess expensive upfront.More expensive upfront, but saves money on maintenance and re-sanding.InstallationSweep in, compact, re-sweep.Sweep in, compact, re-sweep, then activate with a gentle mist of water. Must be completely dry before wetting.MaintenanceFrequent re-sanding needed.Requires less frequent re-sanding.Joint StabilizationProvides basic friction.Locks pavers firmly in place, increasing patio stability and load distribution.
The weed prevention alone makes polymeric sand worth the extra cost. Its installation is only slightly more complex: the patio surface must be completely clean and dry before misting with water. After activation, the patio needs about 24 hours to cure.
For more on the science, check out the Benefits of Polymeric Sand.
The bottom line: Unless the budget is an absolute constraint, polymeric sand is the clear winner for anyone who wants to enjoy their patio rather than constantly maintain it.
Frequently Asked Questions about Brick Patios
Here are answers to the most common questions about putting in a patio with bricks, based on our 25 years of experience helping Florida homeowners.
How do you maintain a brick patio over time?
Brick patios are surprisingly low-maintenance. A little regular care will keep your patio looking great for decades.
- Regular Sweeping: A quick sweep each week keeps leaves and dirt from accumulating, which prevents stains and weed growth in the joints.
- Cleaning Stains: Most stains from spills or patio furniture can be removed with a specialized paver cleaner and some scrubbing. Always test cleaners on an inconspicuous spot first. For general cleaning, mild detergent and water are effective. A pressure washer on a low setting can also refresh the surface.
- Topping Off Joint Sand: Over time, joint sand may settle. This is normal. Simply sweep more polymeric sand into the joints to maintain the interlock and keep weeds out.
- Sealing: While not required, sealing your patio every few years with a clear masonry sealer can improve the brick color, make cleaning easier, and add protection against stains and weather.
- Fixing Loose Pavers: If a paver becomes loose, address it quickly. Lift it, add more bedding sand underneath, and set it back in place. For more details, see How to Fix a Loose Paver.
What are common mistakes when putting in a patio with bricks?
Avoid these common DIY mistakes to ensure your project is a success:
- Improper Base Preparation: Rushing the base is the biggest mistake. Skipping proper compaction or using too little gravel will lead to a patio that settles and becomes uneven.
- Forgetting Drainage: A patio must have a gentle slope (1/4-inch per foot) away from your house. A perfectly flat patio will lead to puddles and potential water damage.
- Inadequate Compaction: Every layer—the subgrade, the gravel base, and the final pavers—needs to be thoroughly compacted to prevent shifting over time.
- Skipping Edge Restraints: Without proper edging, pavers will gradually spread outward, creating gaps and ruining the pattern.
- Mishandling Polymeric Sand: Leaving excess polymeric sand on paver surfaces before wetting it will create a permanent, hazy film. Sweep carefully before activating with water.
Is a brick patio more cost-effective than a deck?
When comparing costs, a brick patio often provides better long-term value than a deck.
- Material Costs: Materials for a DIY brick patio are generally more budget-friendly and have more stable pricing than lumber for decks.
- DIY Complexity: Paver installation is physically demanding but less technically complex than deck construction, which requires carpentry skills and structural knowledge.
- Long-Term Value & Maintenance: A properly installed brick patio can last for decades with minimal maintenance. Unlike wood decks that need regular staining and sealing, brick patios resist rot, warping, and insects. Individual pavers are also easier to replace than deck boards.
- Durability: Brick patios are exceptionally durable and handle Florida's climate well, leading to lower maintenance costs over the years.
For a full comparison, see our analysis in Deck vs Paver Patio. While both are great home additions, a DIY brick patio is often a more accessible and cost-effective option.
From Project to Paradise: Enjoy Your New Patio
Congratulations on completing your project! You've transformed your yard into a beautiful outdoor sanctuary and built a space for making memories. Putting in a patio with bricks is about creating something lasting with your own hands.
Step back and admire your handiwork. That level surface and those crisp joints are the result of your effort. You've mastered the techniques and built a patio from the ground up, adding significant value and enjoyment to your home.
Your new patio is built to last. With proper maintenance, this flexible pavement system will serve your family for decades, handling Florida's intense weather while maintaining its charm.
Perhaps your vision is bigger than a single project. You might be dreaming of an outdoor kitchen, intricate patterns, or a multi-level design with retaining walls. Sometimes, the scope of our dreams calls for professional expertise.
At Alliance Pavers, we understand both the satisfaction of DIY and the peace of mind that comes with professional installation. As a family-owned company with 25 years of experience across Central Florida, we've helped countless homeowners bring their outdoor visions to life. From Altamonte Springs to The Villages, we know the unique challenges and opportunities of our local climate and soil.
When you're ready for a more ambitious project, or if you simply want to enjoy the results without the sweat equity, we're here to help. Our team specializes in paver installation, outdoor living spaces, and retaining walls. We deliver a stress-free, on-time, on-budget experience so you can focus on enjoying your beautiful new space.
Contact us for your brick installation in St. Cloud, FL and let's explore what's possible when professional craftsmanship meets your outdoor dreams. Every great patio tells a story—let us help you write yours.