A Practical Guide to Stone Patio Installation
Plan, build, & maintain your perfect patio. Get expert tips for flawless Stone Patio Installation and a lasting outdoor oasis.
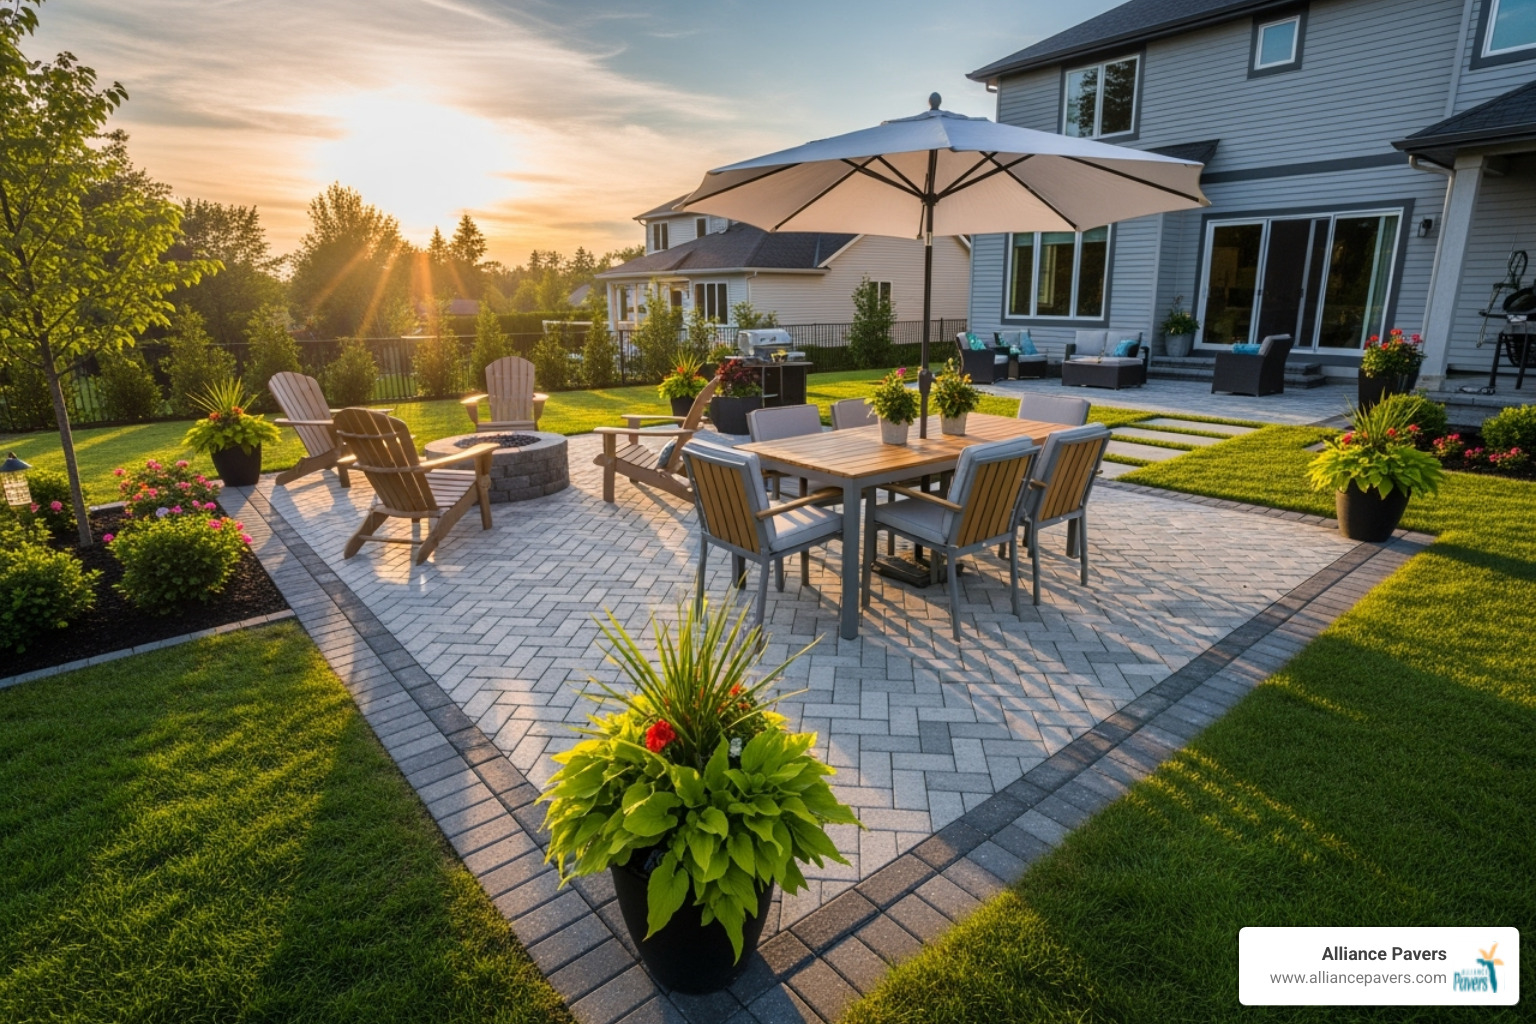
Why Stone Patio Installation Creates the Perfect Outdoor Living Space
Stone patio installation transforms your backyard into a beautiful, functional outdoor living area that adds significant value to your Central Florida home. A properly installed stone patio provides decades of durability while creating the perfect space for entertaining, relaxing, and enjoying Florida's year-round outdoor weather.
Quick Overview: Stone Patio Installation Process
- Planning - Choose stone type, measure space, and design layout
- Excavation - Dig 6-12 inches deep depending on your climate zone
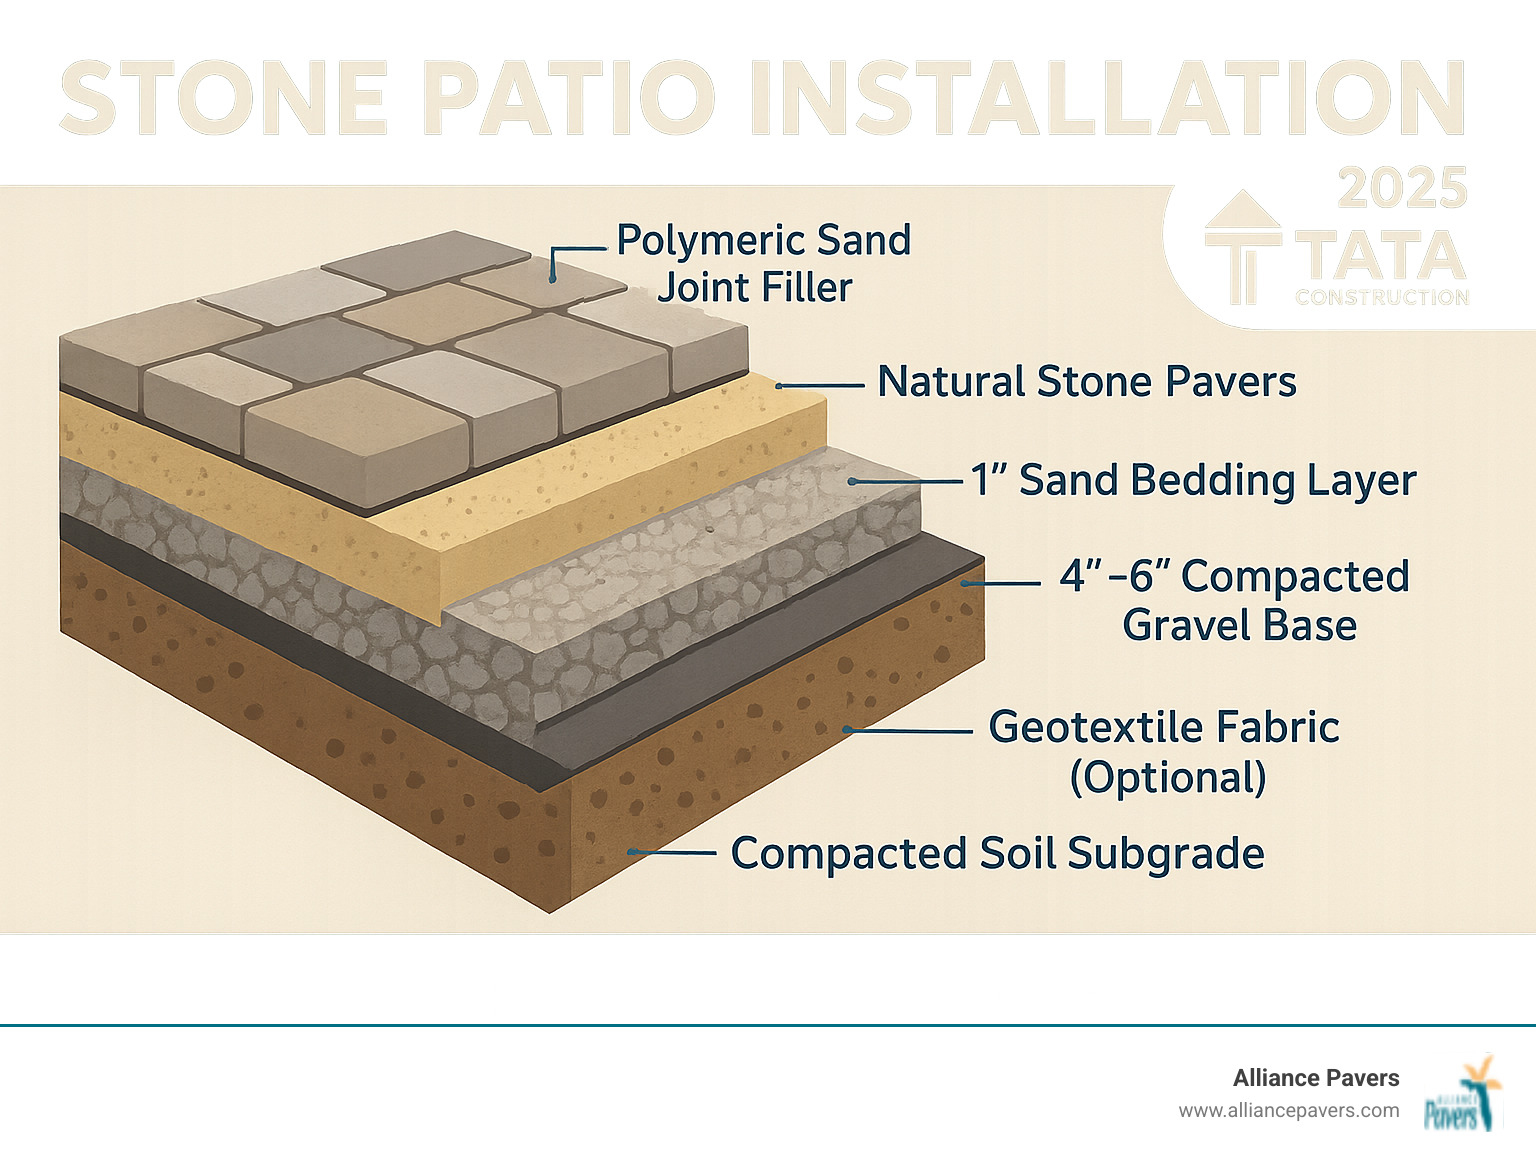
- Base preparation - Install compacted gravel base and sand bedding layer
- Stone placement - Lay pavers with proper spacing and leveling
- Finishing - Fill joints with sand, install edging, and seal if desired
Stone patios offer best longevity compared to other outdoor flooring options. While wooden decks require constant maintenance and concrete can crack over time, natural stone pavers can last for generations with minimal upkeep. The initial investment pays dividends through increased home value, reduced maintenance costs, and improved outdoor living experiences.
The key to a successful stone patio lies in proper foundation preparation. As experienced contractors know, "You can't build a great patio with a weak base." The multi-layer foundation system - including proper excavation, drainage slope, compacted gravel base, and sand bedding - ensures your stone patio remains level and stable for years to come.
Whether you're planning an intimate seating area or a large entertainment space, stone patio installation requires careful attention to drainage, material selection, and proper construction techniques to achieve lasting results.
Planning Your Perfect Stone Patio
The secret to a stunning stone patio installation starts long before any shovels hit the ground. Planning is the blueprint for your outdoor dreams, turning your vision of lazy Sunday mornings or backyard barbecues into a stone reality.
Every great patio starts with understanding how you want to use your space. Are you dreaming of intimate dinner parties? Do you need a durable surface for kids' play? Or are you envisioning an outdoor kitchen? Your intended use guides every decision.
The planning phase involves three crucial steps: patio design that matches your lifestyle, thorough site assessment to understand the workspace, and precise material calculation so you get exactly what you need. Getting these details right upfront saves time, prevents headaches, and ensures your finished patio exceeds expectations.
For homeowners ready to explore design possibilities, our team offers comprehensive patio services to bring your outdoor vision to life.
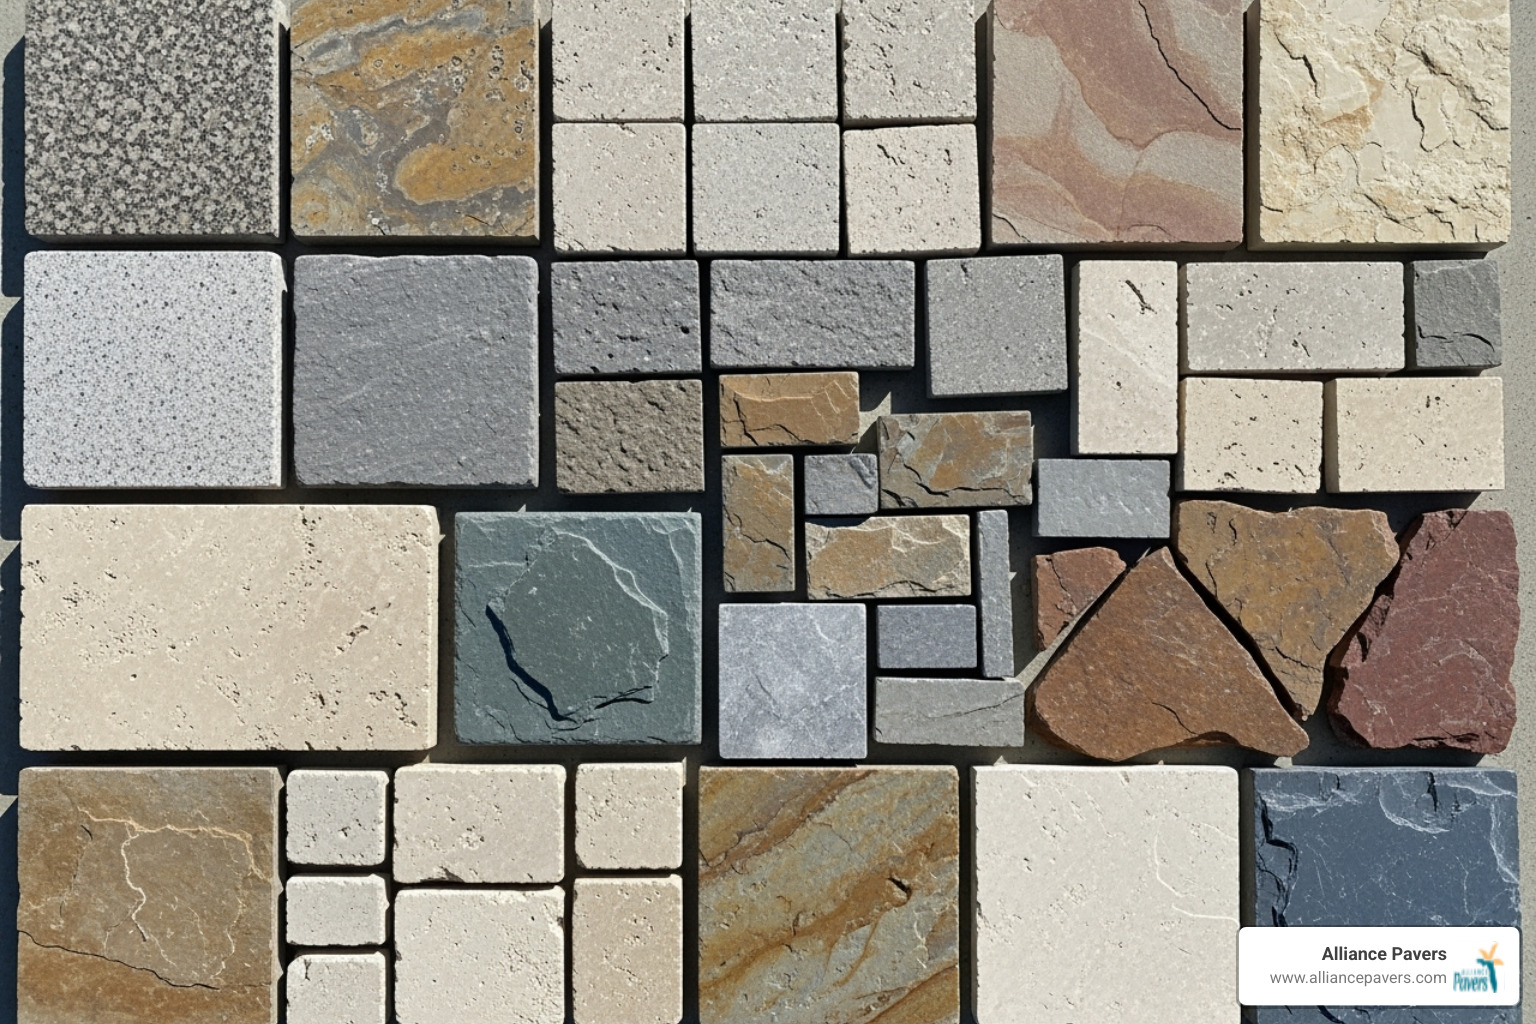
Choosing the Right Natural Stone
Selecting the star of your stone patio installation is an exciting step. The natural stone you choose sets the tone for your outdoor space, and each stone has its own personality.
Flagstone brings an effortless, organic charm. Its irregular shapes and earthy tones create a rustic look that works beautifully in Florida landscapes. The varied thickness requires more skill during installation.
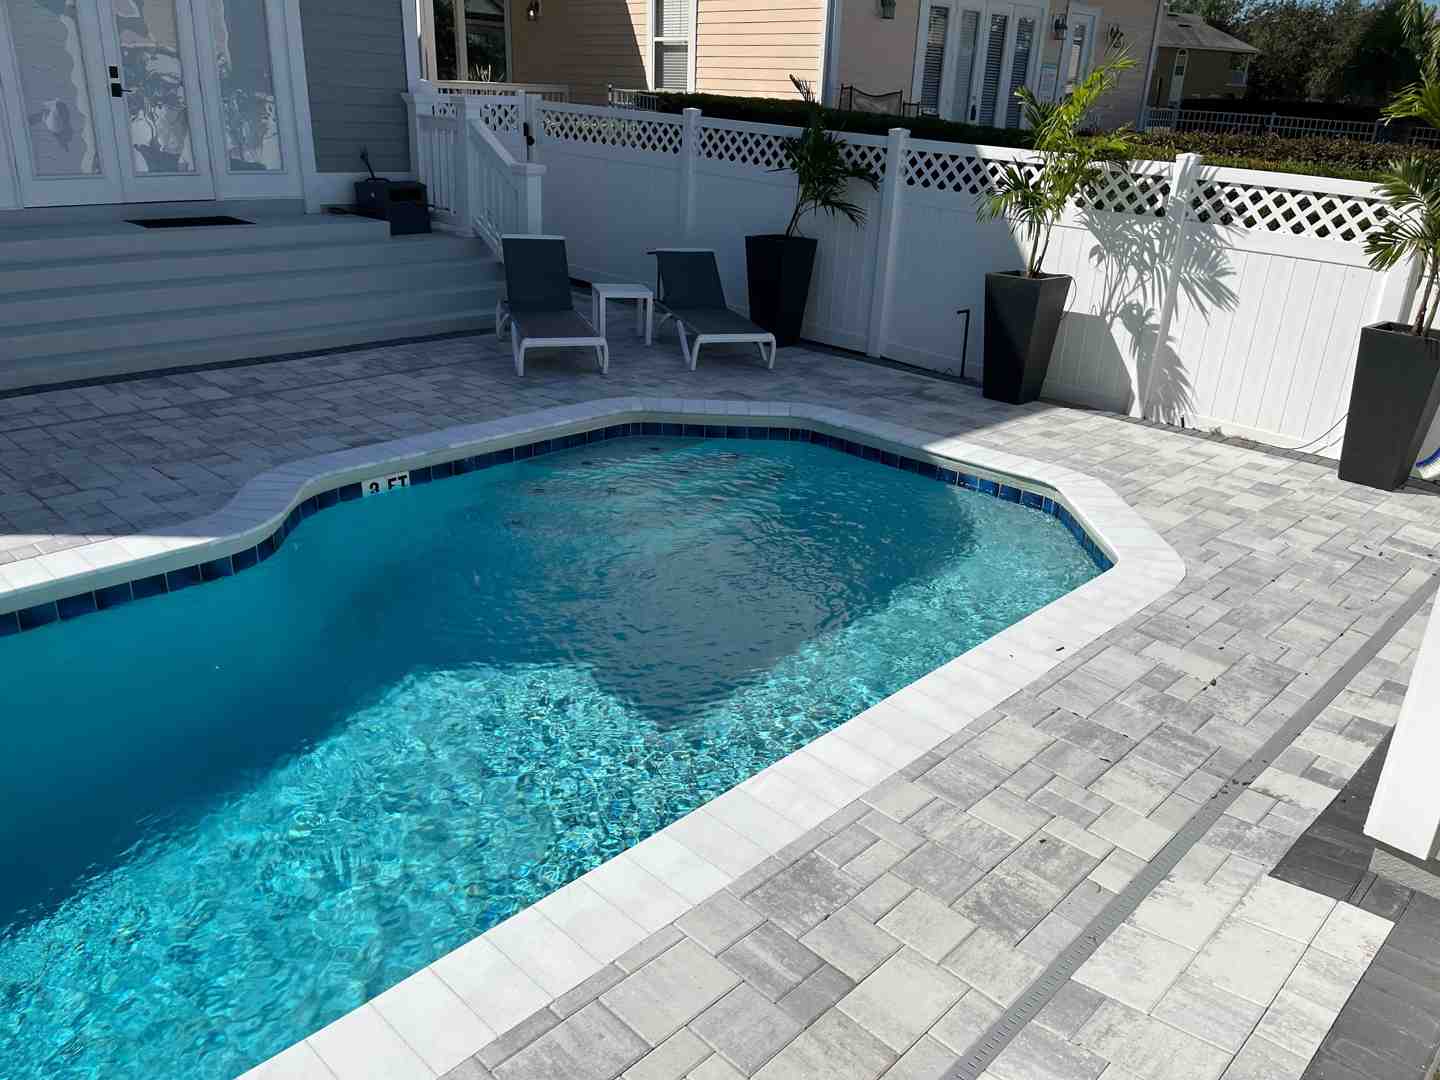
Travertine is ideal for Florida living. This limestone stays cooler underfoot, making it perfect around pools. Its warm, neutral colors and porous texture provide excellent slip resistance when wet.
Bluestone offers natural beauty with uniform precision. This dense sandstone comes in gorgeous blue-gray hues and handles Florida weather with ease. We recommend 1½ to 2-inch thick bluestone for patios that stand the test of time.
Granite pavers are the workhorses of natural stone. Extremely durable and available in many colors with speckled patterns, granite is ideal for high-traffic areas and adds sophisticated elegance.
Slate brings dramatic, layered texture and rich, dark tones for stunning visual impact. We recommend it for decorative applications like accents and pathways rather than heavy-use zones due to its natural brittleness.
When helping you choose, we consider more than just looks. Each stone's durability, natural texture, available color options, and suitability for climate all play important roles in creating a patio that's both beautiful and practical for Central Florida living.
Key Considerations for Your Stone Patio Installation
Beyond selecting your stone, several key factors shape the project's success. Patio size determines material quantities and the scope of excavation. A small space creates an intimate retreat, while larger patios can accommodate outdoor kitchens and multiple seating areas.
The patio shape affects both aesthetics and function. Simple rectangles are classic and cost-effective, while curved or multi-level designs add visual interest and can work with your landscape's contours.
Your intended use influences technical decisions. A quiet reading nook requires a different base than a space designed for heavy furniture or a fire pit. Pool-adjacent patios need slip-resistant stones and improved drainage.
Don't forget about local regulations – we always check with St. Cloud and surrounding municipalities about building codes, setback requirements, and permit needs before starting any project. This protects you and ensures everything meets local standards.
A well-designed stone patio can significantly increase your home's value while creating the outdoor living space you've always wanted. It's an investment that pays dividends in both enjoyment and equity.
Ready to explore how we can transform your entire outdoor space? Check out our full range of hardscaping services to see all the possibilities.
Preparing the Foundation: The Key to Longevity
Foundation preparation is the essential, unseen work that makes your stone patio installation last for decades. It's the unsung hero doing the heavy lifting to keep everything stable, level, and looking fantastic year after year.
With 25 years of experience, we know cutting corners on foundation prep leads to future problems. That's why we take our time with excavation, grading, proper drainage slope, thorough compaction, and when needed, geotextile fabric. Each step builds on the last to create a rock-solid foundation that stands up to Florida weather and daily use.
Ground Excavation and Creating the Proper Slope
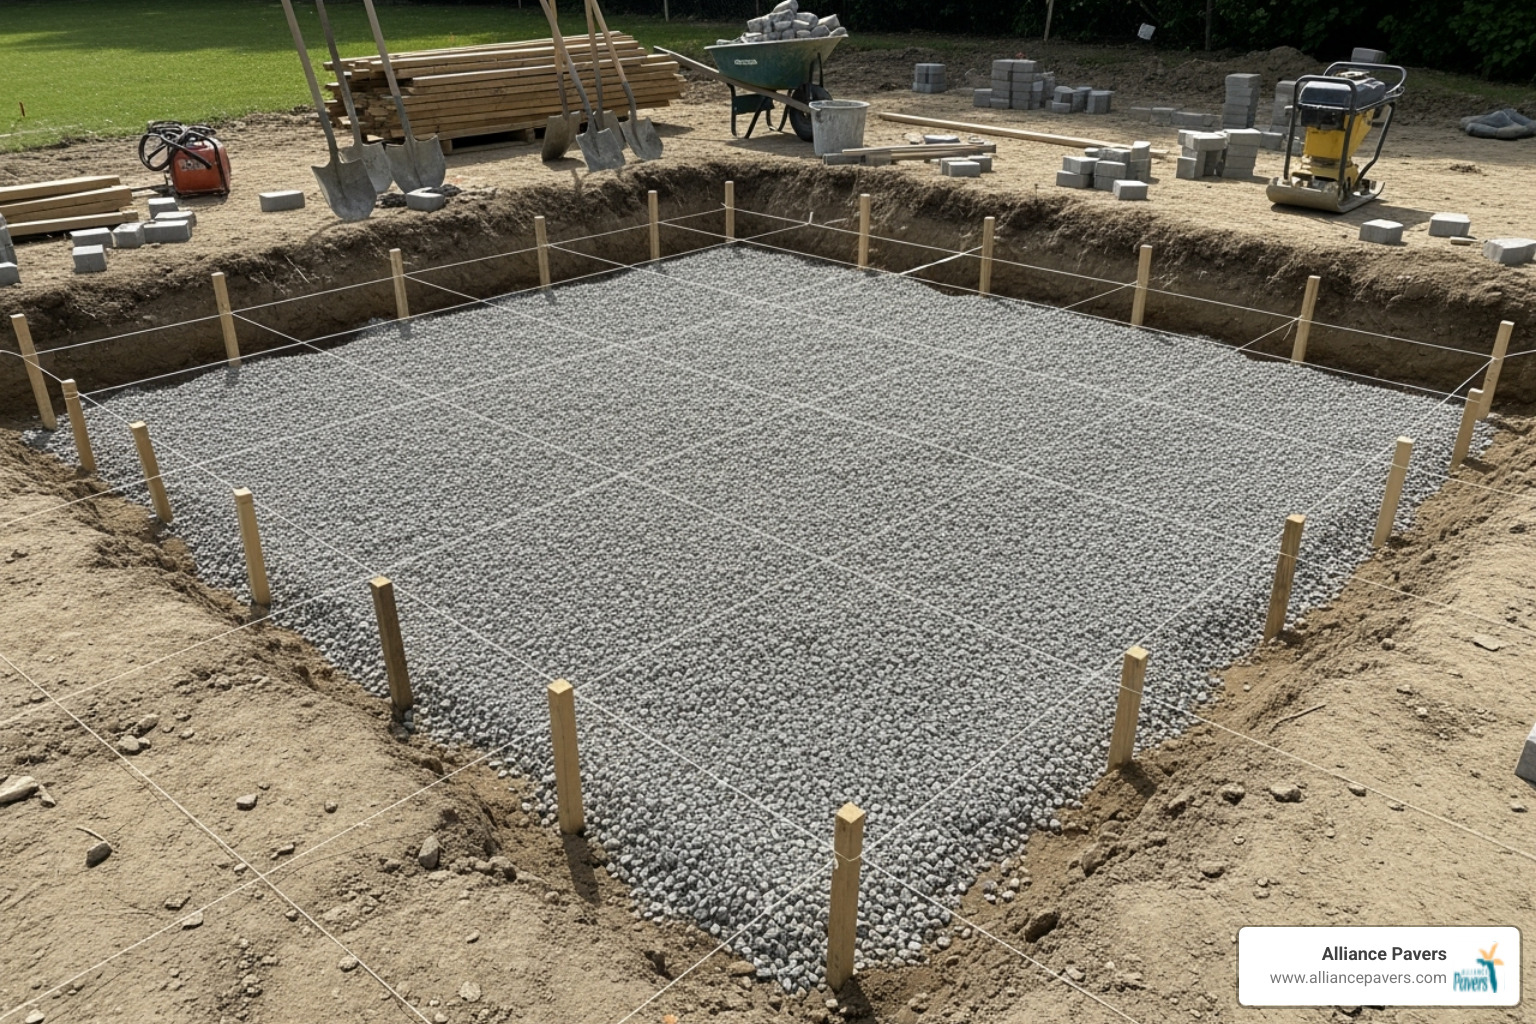
Before moving any dirt, we call 811 (Call Before You Dig) to locate underground utilities—a crucial safety step. Once clear, we mark the patio area with stakes and string lines to guide our work.
The excavation depth varies by climate. In colder regions with ground freeze, contractors dig 12 inches or more below the frost line. In Central Florida's mild climate, we typically excavate 6 to 8 inches, which provides ample room for a solid base.
Removing soil is more than just digging; we're creating a precisely graded foundation. We clear all vegetation and topsoil, then shape the area to establish the proper slope using our string lines for consistency.
Establishing slope is critical for longevity. Water must drain away from your patio and home. We create a gentle slope of 1/8 to 1/4 inch per foot away from any structures. This subtle grade is unnoticeable but effectively directs water runoff.
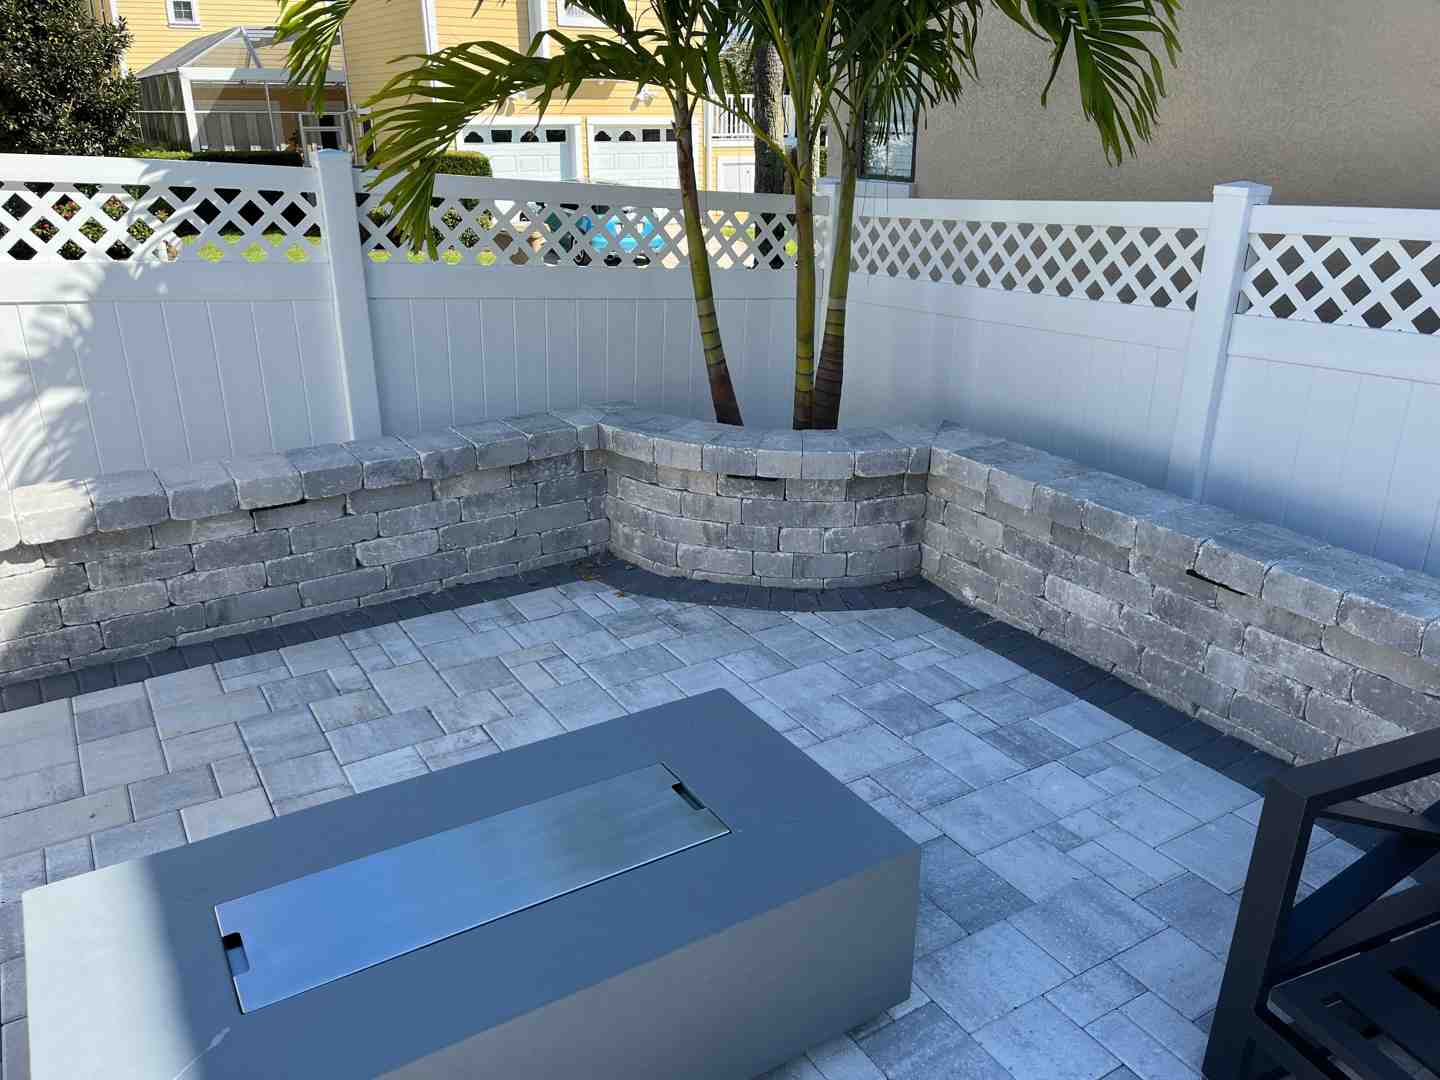
For projects that need extra structural support or changes in elevation, we also specialize in stone retaining walls that can improve your overall landscape design.
Installing the Patio Base
Once excavation is complete and graded, we build the foundation. This is a carefully engineered system that handles drainage, prevents settling, and keeps everything rock-solid.
We start with the compacted subgrade – the native soil at the bottom of the excavation. We use a plate compactor to make this layer firm and eliminate soft spots.
Next comes our base materials. Crushed gravel is the workhorse of the system. We typically use 3/4-inch crushed limestone with fines or a High Performance Bedding material. The base depth is crucial; we recommend 6-12 inches of properly compacted crushed stone for maximum stability.
We add this gravel in "lifts." Instead of dumping it all at once, we spread and compact it in 3-4 inch layers, compacting in lifts with a plate compactor. Each layer is thoroughly compacted before adding the next. Lightly misting the gravel can help it lock together even better.
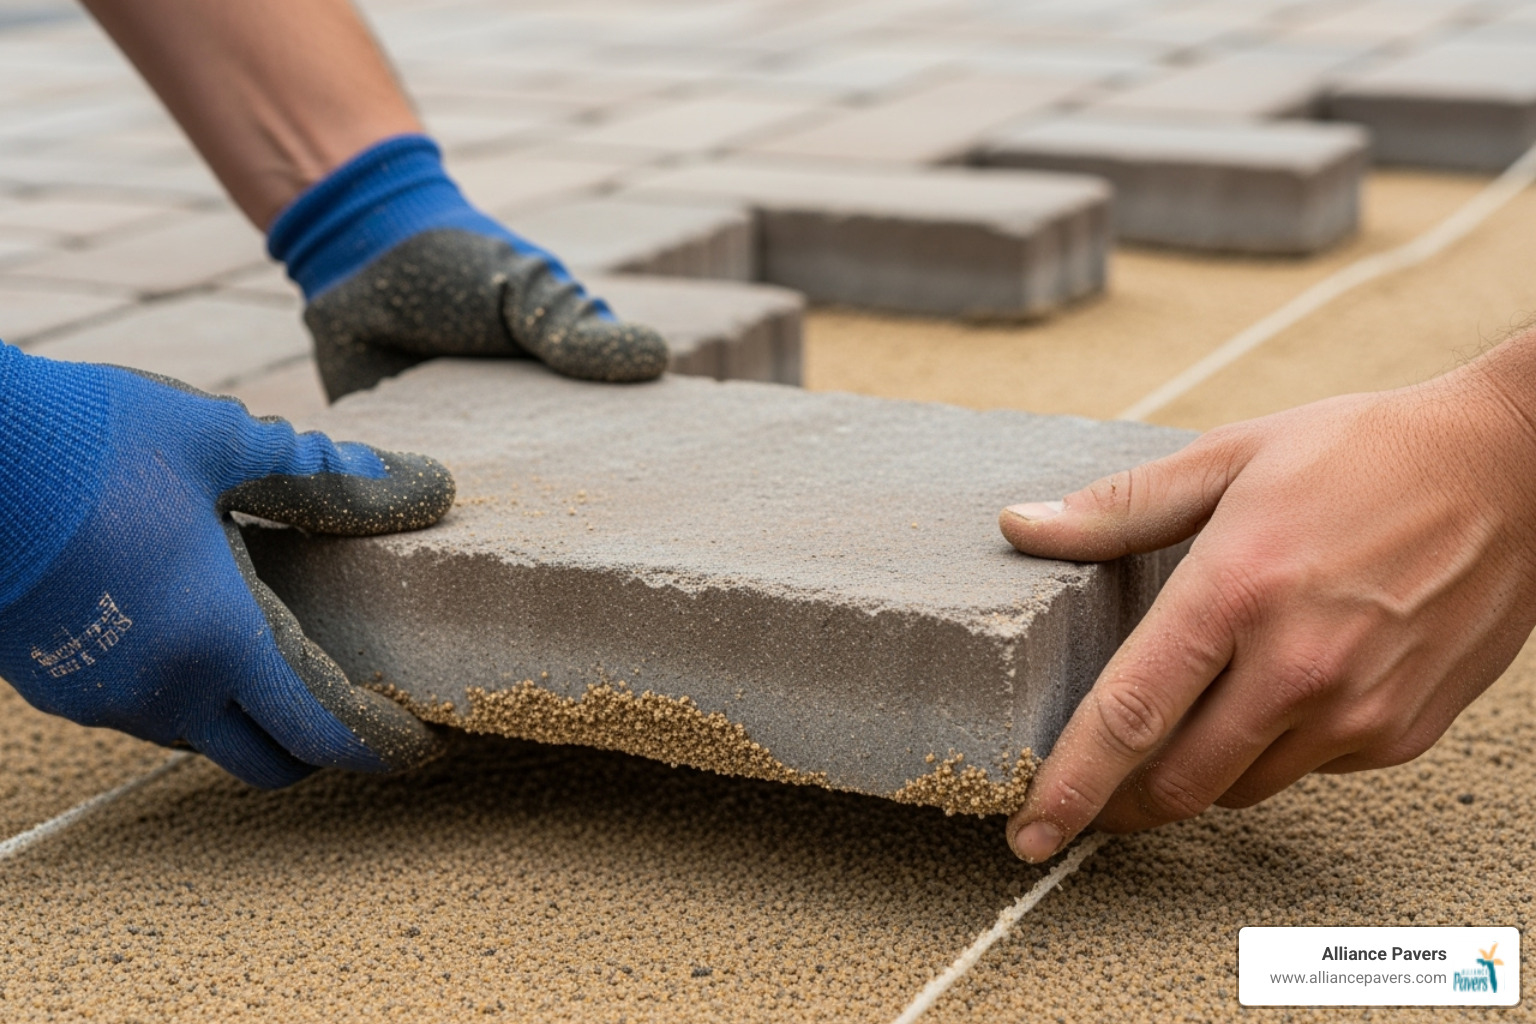
The final layer is our leveling sand layer. We spread exactly one inch of coarse paver sand over the compacted base. This creates the perfect setting bed for the stone pavers and allows for fine adjustments.
To ensure this sand layer is uniform, we use a technique called screeding. We place guides on the base, pour sand between them, and drag a straight board across the guides to smooth and level the surface, creating a flawless bed for your stone pavers.
The Stone Patio Installation Process
With your foundation perfectly prepared, we reach the most exciting part of your stone patio installation: watching your vision come to life as each stone finds its place. This is where months of planning and careful preparation pay off, changing that leveled sand bed into the outdoor oasis you've been dreaming about.
The paver installation process requires a blend of artistry and precision. Every stone must be perfectly seated in its setting bed, maintaining the proper laying pattern while ensuring each piece is level with its neighbors. It's like putting together a giant puzzle, except this one will last for decades and dramatically improve your outdoor living space.
The beauty of this phase lies in watching the change happen stone by stone. What started as an excavated area gradually becomes a stunning patio that perfectly matches your original design. Whether you're tackling this as a DIY project or working with professionals, understanding the process helps ensure the best possible outcome.
For those interested in a more hands-on approach, this resource provides excellent step-by-step guidance: How to Build a Patio: a DIY Stone Paver Patio Tutorial.
Laying and Leveling the Pavers
The secret to a professional-looking patio starts with choosing the right starting point. We always begin from a straight edge or corner, typically against the house or another fixed structure. This approach gives us a solid reference line and helps maintain pattern consistency throughout the entire installation.
Placing each stone requires patience and precision. Each paver goes straight down into the sand bed without any sliding or dragging that might disturb the carefully prepared surface. Think of it like placing a delicate piece of art – you want it exactly where it belongs the first time.
The rubber mallet becomes your best friend during this phase. A gentle tap here and there ensures each stone sits firmly and evenly with its neighbors. If a stone sits too high, we lift it out, remove a bit of sand, and try again. Too low? A small amount of additional sand does the trick.
Maintaining proper gaps between stones is crucial for both aesthetics and functionality. Most installations work best with gaps of about 3/8 to 1/2 inch, providing enough space for joint filler while keeping the stones properly supported.
Checking for level happens continuously throughout the process. We use a standard level across multiple stones to ensure everything stays uniform and maintains that all-important drainage slope. It's better to catch and fix any issues now rather than after the entire patio is complete.
How to Cut Stone Pavers
Even the most carefully planned patio will need some custom cuts, especially around edges, obstacles, or when creating intricate patterns. The good news? With the right tools and techniques, cutting stone pavers is completely manageable.
Measuring and marking comes first. We take precise measurements and clearly mark the cutting line with chalk or a marker. The old carpenter's rule applies here: measure twice, cut once. Stone doesn't forgive measurement mistakes!
Safety equipment is absolutely non-negotiable when cutting stone. Heavy-duty gloves protect your hands, safety glasses shield your eyes from flying debris, and a quality respirator guards against harmful stone dust. Trust us – your lungs will thank you later.
For clean, professional cuts, a masonry saw (also called a wet saw) with a diamond blade is the gold standard. The water keeps the blade cool and dramatically reduces dust. For smaller adjustments or detail work, an angle grinder with a diamond blade works perfectly.
Fitting edge pieces requires extra attention to detail. These cut stones need to maintain the overall pattern while fitting precisely into their designated spots. When done correctly, even an expert eye won't be able to tell which stones were cut and which came straight from the pallet.
The cutting process might seem intimidating at first, but it's really about taking your time and prioritizing safety. Each cut brings you one step closer to a perfectly fitted patio that looks like it was always meant to be part of your landscape.
Finishing Touches and Long-Term Maintenance
With the pavers laid and leveled, your patio is taking shape. Now, the finishing touches transform the stones into a cohesive, professional outdoor living space. These final steps lock everything in place, improve stability, and give your patio a polished look.
Think of this phase as the final polish on your stone patio installation. Once your stunning new outdoor space is complete, a little routine care will keep it looking its best for decades.
Filling Joints and Adding Edging
Those gaps between your pavers play a crucial role in your patio's long-term success. Proper joint filling prevents shifting, stops weeds, and avoids maintenance headaches.
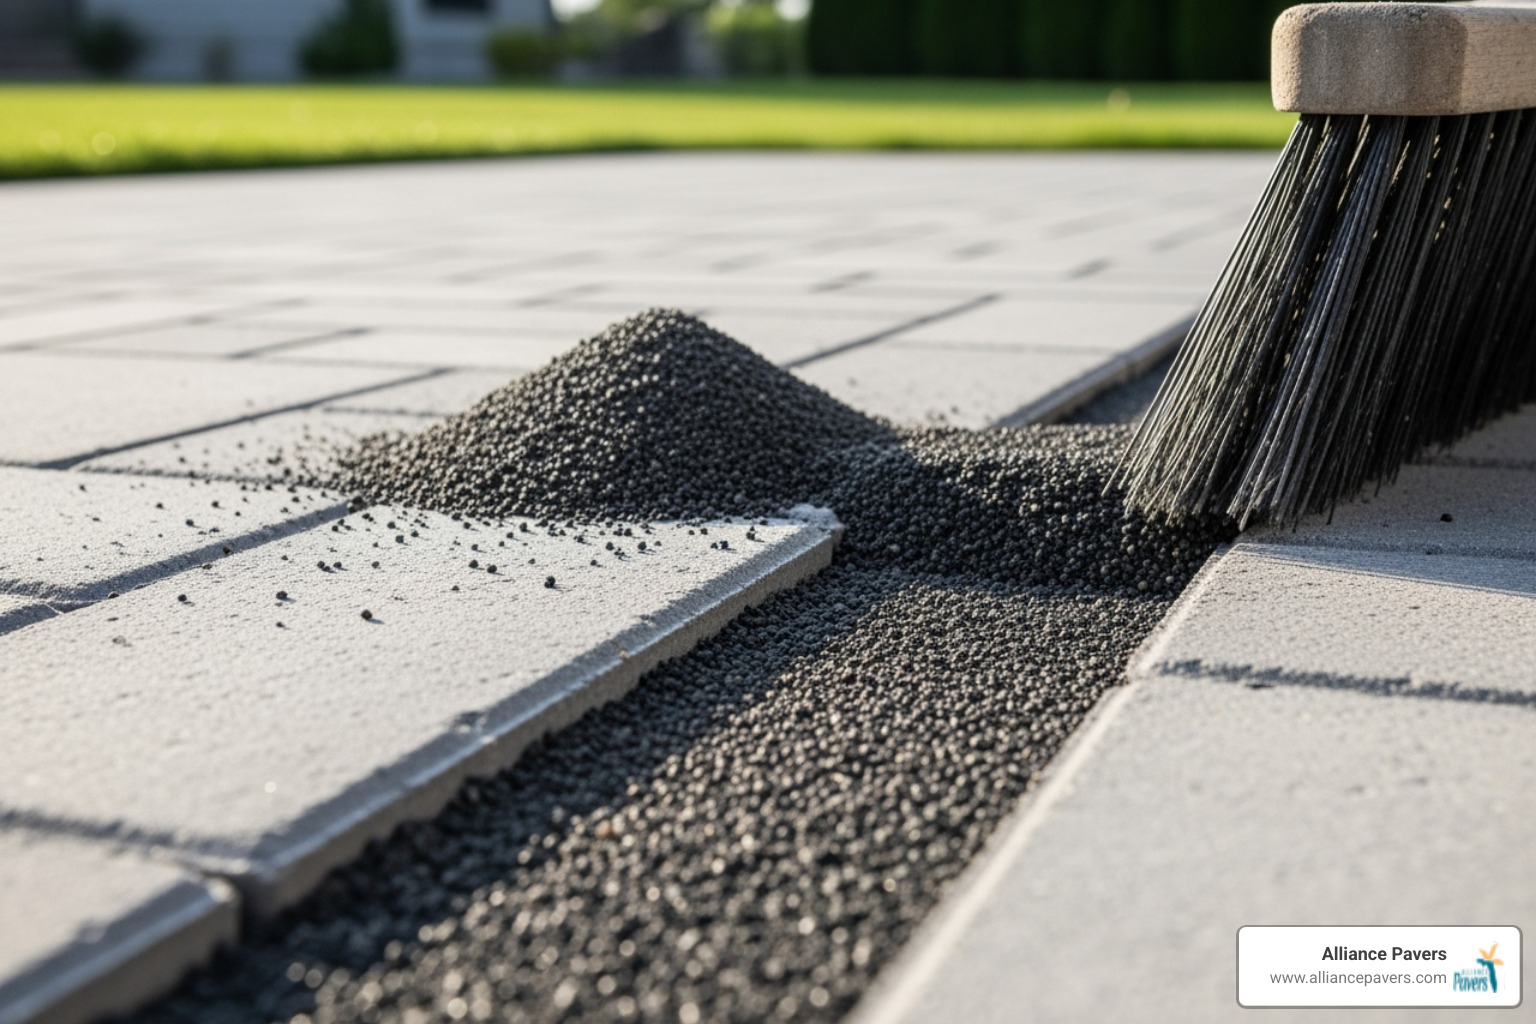
Polymeric sand is our secret weapon. This isn't ordinary sand; it's an engineered blend of sand and polymer additives. We spread this polymeric sand across the patio, using a stiff push broom to work it into every joint until completely packed.
Once filled, we lightly mist the patio with water. This activates the polymers, which harden to create a strong, durable bond that locks the pavers together. The result is a surface that resists shifting and discourages weeds.
For flagstone patios or stones with wider, irregular joints, stone dust often works better. It compacts beautifully and creates stable joints. We sweep it in and add a light water spray to help it settle.
Edge restraints are essential. Without them, outer pavers would creep outward, creating gaps and an uneven surface. We install rigid plastic or metal paver edging along the perimeter, staking it securely into the ground to keep everything tight and aligned.
For a more substantial look, concrete edging provides a permanent solution. We create a concrete foundation and set decorative edging stones like cobblestones for a classic, finished appearance.
The final step involves running our plate compactor over the entire surface one more time. This settles the pavers into the sand bed, consolidates the joint material, and unifies the patio into a single surface.
Maintaining Your New Stone Patio
The best news about your new stone patio installation is its low-maintenance nature. Unlike wood decks or concrete, natural stone pavers handle Florida's weather with minimal fuss.
Regular sweeping is your patio's best friend. It removes leaves, dirt, and debris before they can settle into joints or cause stains. An occasional rinse with water from a garden hose covers most maintenance needs.
For inevitable stains, a mild detergent solution and a stiff brush usually work. For stubborn spots, a pressure washer on a gentle, fanned setting can be used without damaging the pavers.
Weed and moss control is occasionally necessary. When you spot unwelcome visitors, remove them by hand or with a weeding tool. A granulated weed killer designed for pavers can help prevent future growth. If polymeric sand wears over several years, adding fresh material can refresh the joints.
Most natural stone benefits from resealing every three to five years. A quality paver sealant protects against stains, improves the stone's natural colors, and extends its lifespan.
With this simple routine, your stone patio will continue to provide endless outdoor enjoyment, improving your Florida lifestyle year after year.
Frequently Asked Questions about Stone Patio Installation
Homeowners planning their dream outdoor space often have questions. With 25 years of stone patio installation experience, we've compiled answers to the most common concerns to help you feel confident in your investment.
How do you ensure proper drainage for a stone patio?
Proper drainage is critical for a successful stone patio installation, preventing pooling water, shifting pavers, and potential foundation damage.
We use two essential methods. First, we establish a subtle but effective slope of 1/8 to 1/4 inch for every foot away from your house. This gentle grade directs rainwater away from your foundation and off the patio surface.
The second method is our well-compacted, permeable gravel base. This crushed stone compacts for stability while allowing water to drain through. Any water that seeps through the joints drains down through this base instead of getting trapped underneath.
What is the best base material for a stone patio?
The best base is a multi-layered system designed for maximum stability, proper compaction, and excellent drainage.
We start with a compacted subgrade (the native soil), followed by the workhorse layer: 6-12 inches of compacted crushed gravel. Our go-to materials are 3/4-inch crushed limestone with fines or High Performance Bedding (HPB).
We spread gravel in thin 3-4 inch "lifts" and compact each layer thoroughly before adding the next. This meticulous process ensures maximum density and prevents future settling.
Finally, we add a perfectly smooth 1-inch layer of coarse bedding sand over the compacted gravel. This sand layer gets screeded to create an absolutely level surface, providing the perfect cushioned bed for your stone pavers.
Should I install a stone patio myself or hire a professional?
We often get asked about DIY vs. professional installation. While a DIY project can be satisfying, the difference between amateur and professional results in stone patio installation can be dramatic.
DIY installation can save on labor costs, but it requires heavy physical labor, specialized tools, and a significant time investment—often weeks of work. More importantly, DIY projects are prone to common mistakes like improper drainage or inadequate base preparation, which can lead to settling and costly repairs.
Professional installation brings decades of experience, the right tools, and the expertise to handle unexpected challenges safely and efficiently. We guarantee our work, so if something goes wrong, we fix it. Considering tool rentals, materials, and your time, professional installation often makes the most financial sense.
Our clients enjoy watching their vision come to life without the backbreaking work, confident in the long-term durability of their investment.
For a stress-free experience that guarantees exceptional craftsmanship and a beautiful, long-lasting patio, we'd love to discuss your project. You can learn more about our process and see how we make stone patio installation enjoyable for our clients from start to finish.