Mastering the Edge: Simple Steps to a Beautiful Garden Border
Learn how to edge a garden! Explore DIY methods, materials like pavers, and installation tips for a beautiful, defined landscape.
Why a Clean Garden Edge Makes All the Difference
To edge a garden, you need to create a defined boundary between your planting beds and lawn, which can be achieved through trenching, installing edging materials like plastic or metal strips, or using permanent solutions like pavers or brick. The best method depends on your budget, desired aesthetic, and how much maintenance you're willing to do.
Quick Answer: How to Edge a Garden
- Natural Trench: Dig a V-shaped trench 4-6 inches deep along the bed line using a flat spade
- Strip Edging: Install plastic, metal, or rubber strips partially buried along the border
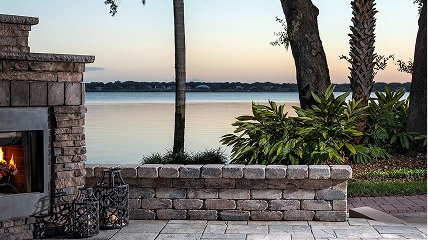
- Paver Edging: Set pavers, bricks, or natural stone for a permanent, durable edge
- Living Edge: Plant low-growing perennials or herbs to create a natural border
If you're a Central Florida homeowner, you know the struggle: your mulch washes into the lawn after every afternoon rain, grass creeps into your flower beds no matter how often you trim, and your once-beautiful garden looks messy and undefined. Without proper edging, your outdoor spaces lose their polish, and you're stuck doing constant maintenance just to keep things looking decent. A well-defined garden edge solves these problems by creating a physical barrier that keeps grass out, mulch in, and gives your landscape that finished, professional look that boosts curb appeal.
Whether you're planning a simple weekend DIY project or considering a complete outdoor living design change, understanding your edging options helps you make the right choice for your property. For homeowners ready to upgrade to durable, beautiful solutions that last, explore professional paver installation to transform your landscape.

Planning Your Perfect Garden Edge
Before we even think about shovels or materials, the first crucial step to a beautiful garden border is planning. A well-designed edge starts with a strong bed line form. This is our chance to shape beds and borders, ensuring they complement our Central Florida landscape and home. We can use a garden hose to define new lines for beds, allowing us to visualize and adjust the shape before we start digging. This simple trick helps us achieve either straight, formal lines or gently curving ones, depending on our taste and the overall aesthetic we're aiming for.
When designing bed lines, consider the form of the lawn in conjunction with the beds for a unified landscape. We want to avoid narrow strips of grass that are difficult to mow. Instead, we should carry beds right up to existing boundaries like walkways, driveways, and patios. For practical maintenance, it's a good idea to terminate bed lines at right angles to paths and driveways, making mowing and trimming much easier.
Our choice of garden style—whether modern, rustic, or formal—will heavily influence the type of edging we choose. For instance, a formal garden might call for crisp, straight lines and defined materials, while a rustic garden could accept more natural, flowing edges. The goal is to improve the aesthetic appeal of our outdoor space and create visually appealing boundaries that reflect our personal style.
Methods to Edge a Garden: From Natural Trenches to Durable Pavers
When we're ready to create that perfect garden border, we have more options than you might think. The right choice for your landscape depends on a few key factors: how long you want it to last, what look you're going for, what you're comfortable spending, and whether you're tackling this as a weekend project or calling in the pros.
The good news? Whether you're working with a tight budget or ready to invest in a permanent solution, there's an edging method that'll work beautifully for your Central Florida garden. Let's walk through your options, from simple and natural to seriously impressive.
The Natural Look: Trenching and Living Edges
Sometimes the simplest solutions are the best. If you want to edge a garden without spending a dime on materials, trenching might be your answer. This classic approach creates a clean, professional-looking line using nothing more than a good sharp spade and a bit of elbow grease.
The Victorian trench method has been around for generations, and there's a reason it's still popular today. Here's how it works: First, we take that sharp flat spade and dig straight down about 3 inches along the outer edge of the lawn. Then we make a second cut at a 45-degree angle toward the garden bed, creating a V-shaped trench. The extra soil we remove can go right into the compost pile.
This V-shaped trench, ideally 4-6 inches deep, works surprisingly well at keeping grass roots from sneaking into your flower beds. It's also fantastic at preventing mulch from washing into the lawn during those afternoon thunderstorms we know so well here in Central Florida.

Now, I'll be honest with you—this natural edge needs attention. You'll want to re-cut it at least once a year, removing any grass that's trying to cross the border and freshening up that clean line. Yes, it's more maintenance than permanent solutions, but the crisp look and zero material cost make it worth considering, especially if you enjoy spending time in the garden anyway.
Another natural approach is creating living edges with plants themselves. This involves planting densely along your garden borders to create a natural barrier that slows grass encroachment. Think of low-growing perennials like daylilies, herbs like lemon balm, or evergreen groundcovers. These living edges not only define your space beautifully but add that soft, organic feel that makes a garden look established and welcoming. You can mow right up to them, and they'll keep filling in year after year.
DIY-Friendly Materials: Plastic, Metal, and Wood
If you want something more permanent than a trench but still want to tackle the project yourself, several materials hit that sweet spot between budget-friendly and durable.
Plastic strip edging is probably what you've seen at the home improvement store—it comes in rolls and bends easily for curved borders. The affordable price is tempting, but here's what you need to know: thickness matters enormously. Those lightweight versions that are only 3-4 inches high have a frustrating habit of working their way out of the soil. They also don't stand up well to lawnmower wheels. Heavy-duty plastic edging (5 inches or taller) performs much better, though it can still lift on sharp curves. Under our intense Florida sun, plastic can become brittle over time, which means you might be replacing it sooner than you'd like.
Metal edging is where we start getting into more serious territory. Steel or aluminum strips create that clean, refined line that looks professional and modern. Cor-Ten steel is particularly interesting—it develops a protective rust-colored patina over time that actually prevents further corrosion, making it incredibly long-lasting. Metal edging works beautifully for both straight lines and curves, and once it's in, it stays put. Installation takes a bit more effort than plastic, but the durability and sleek appearance make it worth the extra work.
Wood edging brings warmth and a natural, rustic charm to your garden borders. You can find pre-constructed log edging with stakes for straight sections, or work with individual pieces for more custom designs. Here's the trade-off: wood looks beautiful, but it's going to break down eventually, especially in our humid climate. Treated wood lasts longer, though you'll want to be careful using it around vegetable gardens. If you love the look and don't mind replacing it every few years, wood can create that cottage-garden feel that's hard to achieve with other materials.
For the creative souls out there, recycled materials offer endless possibilities. We've seen homeowners create stunning borders using glass bottles, salvaged bricks, terra cotta pots, and all sorts of found materials. If you've got imagination and some interesting materials lying around, you can create a truly one-of-a-kind garden edge without spending much at all.
The Ultimate Upgrade: Using Pavers to Edge a Garden
When you're ready to create something that'll still look stunning decades from now, pavers are in a class by themselves. This is where function meets serious curb appeal. Pavers won't decay, won't break down under our Florida sun, and they laugh off lawnmower wheels and string trimmers. For homeowners who want to invest once and be done, this is the way to go.
The beauty of pavers is that they give you the best of everything—durability that outlasts every other option, design flexibility to match any style, and that polished, finished look that makes your whole property feel more valuable. And honestly? They just make maintenance easier. No annual re-cutting, no replacing broken pieces, no worrying about whether they'll hold up.
Brick pavers bring timeless charm to any landscape. They're incredibly sturdy against foot traffic and weather, and you can lay them in different patterns—soldier borders, sailor courses, or more creative arrangements. That classic brick look complements everything from historic homes to modern designs.
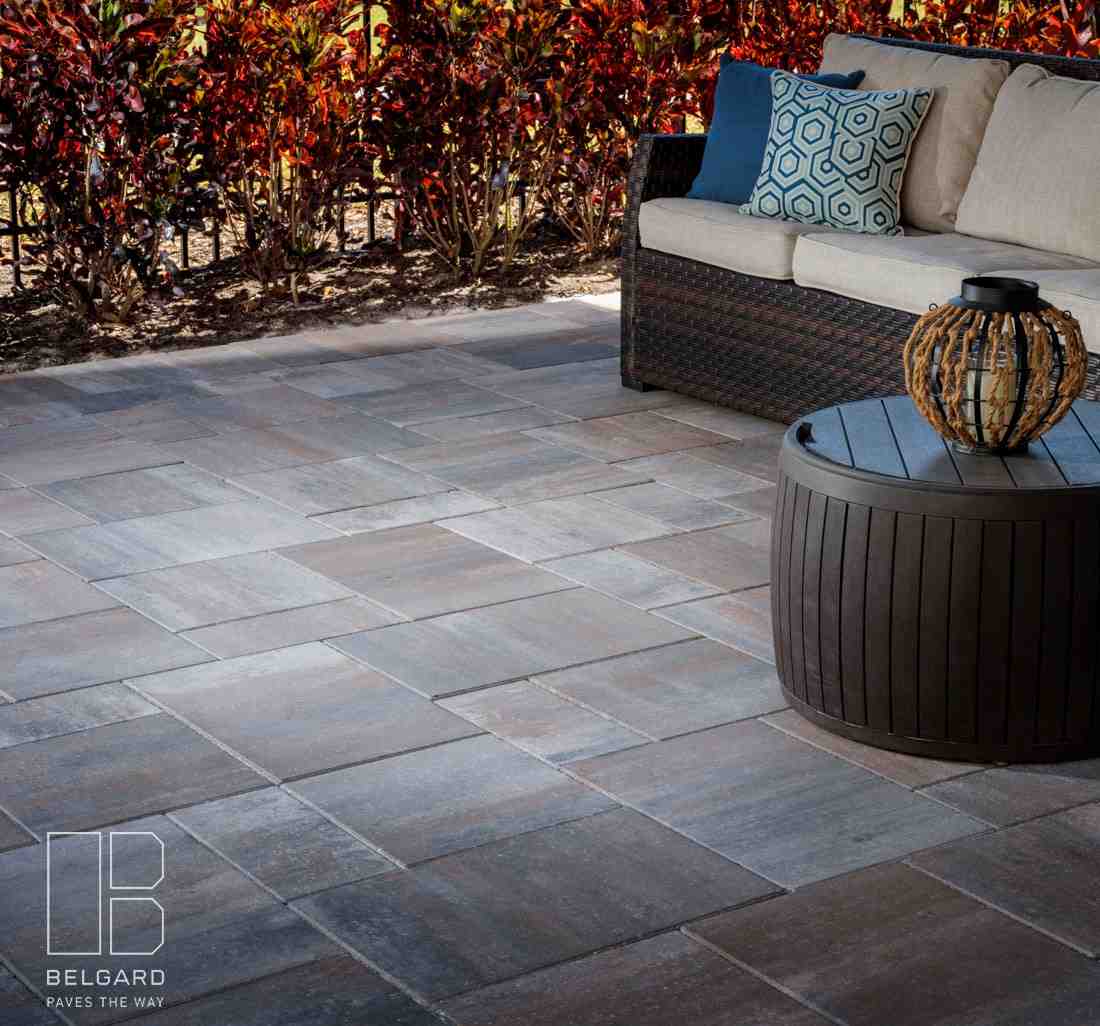
Natural stone pavers like limestone, granite, or flagstone create that high-end, organic aesthetic that never goes out of style. Each stone has its own unique texture and color variations, playing with light and creating visual interest. They blend seamlessly with the natural landscape while still providing that defined border you need. It's the kind of look that makes neighbors slow down as they drive by.
Concrete pavers offer incredible versatility. They come in specific shapes, sizes, and colors, so you can create almost any design you can imagine. They're built to handle heavy loads and tough weather, and they're more budget-friendly than natural stone while still delivering serious durability. Modern concrete pavers can even be stained or stamped to mimic natural stone, giving you that premium look with more flexibility.
If you're considering raised garden beds, you're already halfway there—the structure itself creates a natural edge. Metal raised beds, in particular, offer excellent corrosion resistance and eliminate the need for separate edging entirely.

Using pavers to edge a garden creates a solid physical barrier that keeps grass roots exactly where they belong—in the lawn. They contain your mulch perfectly, so those afternoon rains won't leave your landscape looking messy. The result is a property that looks professionally maintained year-round, which isn't just satisfying to look at—it genuinely increases your home's value.
Want to explore more design possibilities? Check out our paver edging ideas and landscape paver designs for inspiration on what's possible with this versatile material.
Tools and Step-by-Step Installation Guide
Before we grab our shovels and start digging, let's talk about what we'll actually need to create that perfect garden edge. The good news? Most of these tools are probably already sitting in our garage or shed.
A sharp garden spade is our workhorse here—it's essential for cutting clean lines, digging trenches, and removing grass clods. If we're going for that crisp Victorian trench look, a half-moon edger makes the job significantly easier and gives us that razor-sharp edge we're after. For the detail work, a hand trowel comes in handy, especially when we're tucking in smaller materials or working around existing plants.
When we're installing pavers or other hardscaping materials, a rubber mallet becomes our best friend. It lets us gently tap everything into place without chipping or cracking our beautiful new edging. A level—ideally a 6-foot one—ensures our lines stay straight and even, which makes all the difference in the final look. A bullet level can also help us keep things perfectly vertical.
Don't forget the basics: sturdy garden gloves to protect our hands, a garden hose for laying out our design, and a wheelbarrow or tarp for hauling away soil and debris. A versatile garden knife (also called a Hori Hori) is surprisingly useful for digging, cutting, and dealing with stubborn roots.
For those ready to tackle a more permanent paver installation, our comprehensive paver installation guide walks through the process in greater detail.
A Simple Guide to Creating Your Edge
Now comes the satisfying part—actually creating our garden edge. Whether we're going with a simple trench or a permanent paver border, these steps will get us there.
Step 1: Outline the bed. Grab that garden hose and lay it out on the ground to create the shape we want. This is our chance to experiment—walk around it, look at it from different angles, adjust until it feels right. There's no rush here. Once we're happy with the shape, we use a sharp spade or half-moon edger to slice into the turf along this line, creating our guide. For paver installations, this outline shows us where we'll need to excavate.
Step 2: Clear grass and debris. Time to remove the grass and any debris from our bed area. If we're creating a trenched edge, that turf we're pulling up can go straight into the compost pile—waste not, want not. For paver installation, we'll need to excavate deeper, making room for the base material and the pavers themselves.
Step 3: Dig a trench. Here's where things differ based on our chosen method. For a simple Victorian trench to edge a garden, we dig straight down about 3 inches along our line, then make a second slice at a 45-degree angle toward the bed, creating that classic V-shape. For installing rigid materials like plastic strips, metal edging, or pavers, we need a shallow trench along the perimeter. The exact depth and width depend on what we're installing—deeper for aggressive grass roots, shallower for decorative borders.
Step 4: Install the edging material. If we've gone with a natural trenched edge, we're already done—just maintain that clean V-shape. For plastic or metal strips, we place them in the trench with the top edge at our desired height (usually flush with or slightly above ground level) and secure them with the provided stakes.
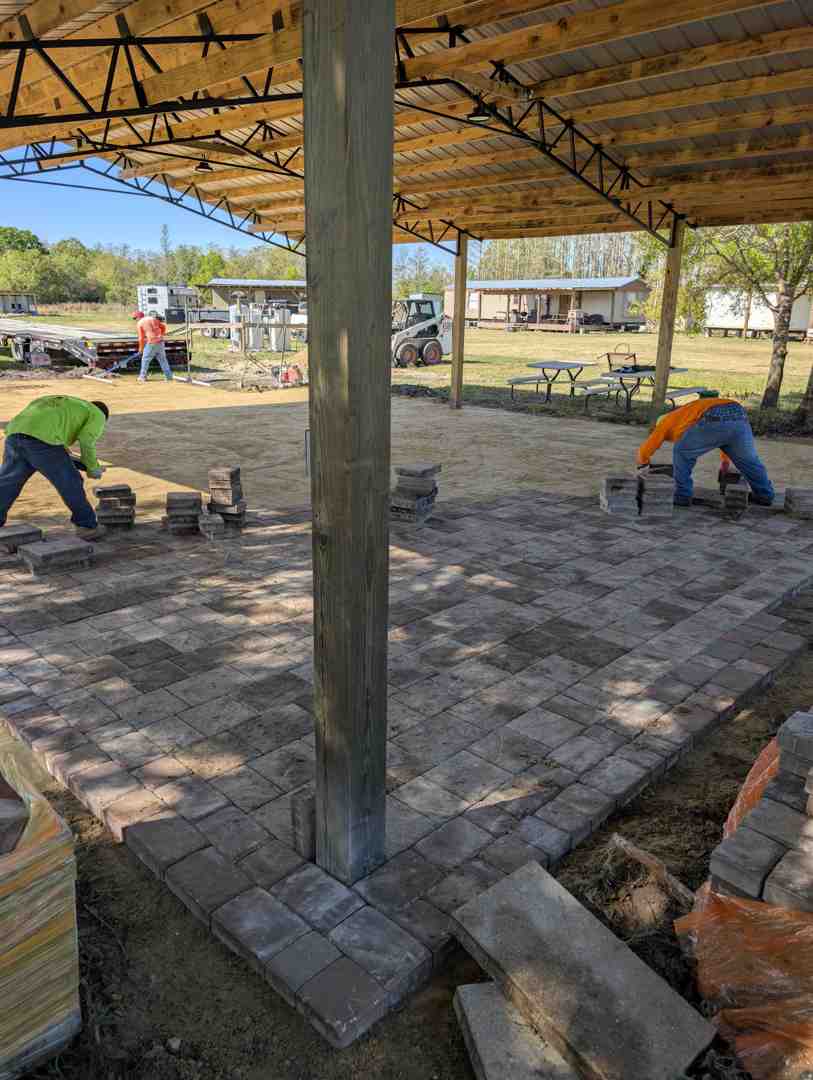
Installing pavers is more involved but worth the effort. We start with a compacted gravel base, add a layer of sand bedding, then carefully set each paver using our rubber mallet and level to ensure everything sits evenly. Edge restraints are crucial here—they keep our pavers locked together and prevent that frustrating shifting that can happen over time. It's a bit more work upfront, but the result is a permanent, beautiful border that handles Central Florida's weather like a champ.
Step 5: Backfill and compact soil. The finishing touch involves filling any gaps around our new edging with soil, sand, or mulch, then gently compacting it to lock everything in place. For paver edging, we sweep joint sand into the gaps between pavers and compact it thoroughly. This final step gives us that polished, professional look and helps stabilize our new border so it stays put through afternoon thunderstorms and lawn mowing sessions.
Long-Term Care: Maintaining Your Garden Edge
Installing a beautiful garden edge is just the beginning of our journey—keeping it looking sharp is what truly makes the difference. The good news? With a little regular attention, maintaining that crisp line between lawn and garden isn't complicated, and it'll save us hours of frustration down the road.
If we've chosen a trenched edge or living border, we'll need to show it some love at least once a year. The best time to refresh our trench is in late winter or early spring, right before Central Florida's growing season kicks into high gear. We'll grab that trusty flat spade and re-cut the V-shaped trench, removing any ambitious grass roots that have tried to sneak across the border. It's a bit like giving our garden a fresh haircut—it takes an hour or two of work, but the results are instantly gratifying.
Living edges need similar attention. We should trim back and shape our border plants regularly to keep them from getting leggy or overgrown. When low-growing perennials or herbs start creeping beyond their intended space, a quick pruning session brings back that defined look we're after.
Weed control along the border matters for every type of edge we might have installed. Even the best-planned garden edge can't completely stop determined weeds. For a natural approach, we can mix equal parts white vinegar and water in a spray bottle and hit those weeds on a sunny day. Boiling water poured directly on stubborn invaders works surprisingly well too. Sometimes, though, the most effective solution is simply getting down there with our gloves and pulling weeds out by their roots—it's honest work that gives us a chance to really see what's happening in our garden.
When it comes to cleaning paver edging and other installed materials, we're looking at less frequent but still important maintenance. Metal edging is wonderfully low-maintenance—we just need to walk the border occasionally and check that nothing has shifted or been damaged by our lawn mower. Plastic edging might need a bit more attention, especially checking that it hasn't lifted or become brittle from sun exposure.
For those of us who've invested in paver edging, regular sweeping makes a world of difference. Dead leaves, grass clippings, and general debris can accumulate between pavers, making them look dull and neglected. A quick sweep every few weeks keeps them looking fresh. Once a year, we should treat our pavers to a thorough cleaning with a pressure washer—it's amazing how much brighter they look afterward. Applying a concrete sealer after cleaning protects our investment and makes future cleanups even easier. Our hardscaping services team can help with professional cleaning and sealing if we'd rather leave it to the experts.
Managing plant overgrowth is the final piece of the maintenance puzzle. Our garden plants should complement our beautiful edge, not hide it completely. When perennials start flopping over the border or groundcovers begin their march across our carefully placed pavers, it's time for a trim. This doesn't mean we're being harsh with our plants—we're simply reinforcing the edge line and keeping the visual definition that makes our landscape look intentional and well-cared-for.
The reality is that maintaining a garden edge isn't about perfection—it's about consistency. A little attention throughout the year means we won't face a massive cleanup project when company's coming or when we finally notice the border has disappeared under grass and weeds. Whether we're working with a simple trench or premium pavers, regular care keeps our Central Florida garden looking polished and professional.
Frequently Asked Questions about Garden Edging
What is the most budget-friendly way to edge a garden?
If you're working with a tight budget, the good news is you don't need to spend a dime to edge a garden beautifully. The most budget-friendly method is creating a natural, spade-cut trench using the Victorian method we discussed earlier. All you need is a sharp flat spade and a bit of elbow grease to create that clean, defined line between your lawn and garden beds. There are no material costs involved, just your time and effort.
Another creative no-cost option is to look around your property for recycled materials you already have on hand. We've seen Central Florida homeowners create stunning borders using glass bottles, wood scraps, terra cotta pots, and other found materials. These recycled edges not only save money but also add unique character and personality to your garden that you simply can't buy at a store.
How does garden edging prevent grass from spreading into beds?
Garden edging works as a physical barrier that stops grass from invading your carefully tended flower beds. Grass spreads through lateral root growth and runners that creep along or just below the soil surface. When you install proper edging, you're essentially creating a wall that blocks this horizontal movement.
This is especially important for us here in Central Florida, where aggressive grasses like Bermuda and St. Augustine can be relentless in their quest to take over every inch of your yard. Deeper edging materials, such as properly installed metal strips, concrete borders, or paver edging, are significantly more effective because they extend several inches below ground level. This depth prevents those determined grass roots from sneaking underneath and popping up in your beds.
Without this barrier, grass will constantly compete with your garden plants for water, nutrients, and space. A well-installed edge keeps the grass exactly where it belongs—in your lawn—while your flowers, herbs, and ornamentals can thrive without unwanted competition.
How deep should a garden edge be?
The ideal depth for your garden edge depends on which method you choose. For a simple trenched edge, we recommend digging 4-6 inches deep. This V-shaped trench creates enough of a deterrent to slow down most surface-spreading grasses and helps prevent mulch from washing into your lawn during those heavy Central Florida afternoon storms.
When you're installing edging materials like plastic strips, metal borders, or pavers, the required depth varies based on the specific product and what you're trying to accomplish. The general rule is that your edging should always be deep enough to prevent grass roots from growing underneath it and to keep the material stable and secure over time.
For paver edging specifically, you'll need to account for more than just the paver's thickness. The total depth includes the paver itself plus the necessary compacted gravel base and sand bedding layers underneath. This proper foundation ensures your pavers won't shift, sink, or heave over the years, giving you a beautiful, lasting border that stands up to Central Florida's unique climate challenges.
Conclusion
There's something deeply satisfying about standing back and admiring a freshly edged garden—those crisp, clean lines that make everything look intentional and cared for. Whether you've chosen the classic simplicity of a trenched edge or invested in the lasting beauty of pavers, you've taken an important step toward changing your Central Florida landscape into something truly special.
The journey to edge a garden isn't just about keeping grass out of your flower beds or preventing mulch from washing away during our afternoon thunderstorms. It's about creating outdoor spaces that genuinely improve your daily life and make you proud to come home. A well-defined garden border brings order to chaos, makes weekend maintenance less of a chore, and gives your property that polished, professional appearance that neighbors notice and potential buyers value.
Every method we've explored—from natural trenching to living edges, from DIY-friendly strips to permanent paver installations—offers its own path to achieving that beautiful garden border you've been picturing. The right choice depends on your budget, your style, and how much time you want to spend on maintenance down the road. But here's the truth: whatever method you choose, the effort you put into proper edging pays you back many times over in reduced maintenance, improved aesthetics, and pure satisfaction.
For those ready to make a lasting investment in their outdoor living spaces, professionally installed paver edging combines exceptional durability with timeless beauty. After 25 years of helping Central Florida homeowners create stunning outdoor environments, we've seen how quality hardscaping transforms not just properties, but how families use and enjoy their yards.
If you're ready to create something extraordinary, we'd love to help. For durable and professionally installed solutions like paver patio designs and comprehensive landscape edging that truly lasts, trust the family-owned experts who've been perfecting their craft for over two decades. Contact us for your paver project and let's start building the outdoor oasis you've been dreaming about.