Slice and Dice: How to Cut Retaining Wall Caps Like a Pro
Cut retaining wall caps like a pro! Discover essential tools, safety, & techniques for precise cuts on straight, curved, & corner walls.
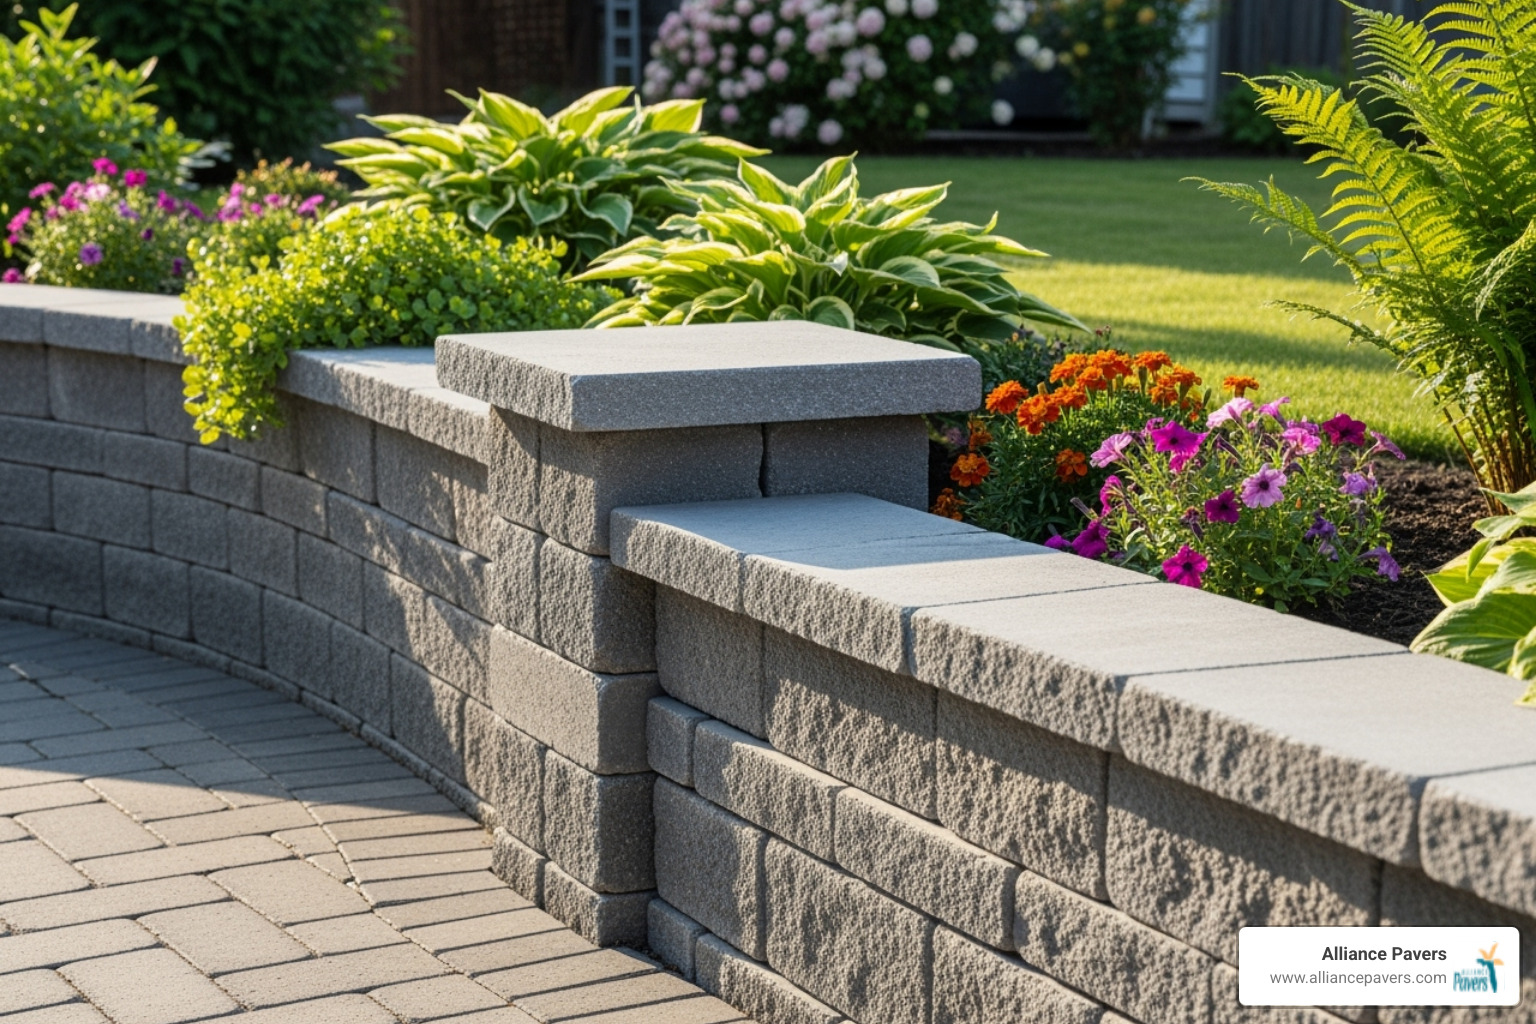
Why Cutting Retaining Wall Caps Matters for Your Project
Cutting retaining wall caps is the secret to a professional finish, especially on curved walls and corners. Without proper cuts, you're left with wide, unprofessional gaps that collect debris. With the right technique, your wall will have a custom, high-end appearance.
Quick Answer for Cutting Retaining Wall Caps:
- For Curves: Use the three-cap method—place two caps with a gap, set a third cap on top, mark the overlap from underneath, and cut along straight lines.
- For Corners: Stack caps perpendicular to each other, mark intersection points, and cut at 45-degree angles.
- Best Tools: A wet masonry saw with a diamond blade offers the cleanest cuts, but a circular saw with a diamond blade works for smaller projects.
- Key Safety: Always wear safety glasses, a dust mask, and hearing protection.
- Target Joint Gap: Aim for under 1/8 inch for a professional look; 1/4 inch is too wide.
Many DIYers struggle to make straight caps fit a curved wall. The good news is you don't need years of masonry experience. With the right tools, safety gear, and marking techniques, you can achieve tight joints and clean cuts for any project, from a serpentine garden border to sharp 90-degree corners.
This guide will walk you through everything from choosing a saw to the professional methods for marking and cutting, ensuring your caps stay secure for decades.

Cutting retaining wall caps basics:
Gearing Up: Essential Tools and Safety First
Before you start cutting, gathering the right tools and safety gear is non-negotiable. Cutting retaining wall caps involves powerful saws and flying debris, so preparation is key to a safe and successful project.
Must-Have Safety Gear
Safety isn't optional. Cutting concrete or stone creates fine silica dust, sharp chips, and damaging noise levels. Your essential safety kit must include:
- Impact-rated safety glasses that offer full protection.
- An N95 dust mask to protect your lungs.
- Hearing protection (earplugs or earmuffs).
- Heavy-duty gloves to protect from rough edges.
- Steel-toed boots to guard against dropped capstones.
As the experts at Allan Block state: "SAFETY FIRST: Always wear safety glasses when splitting or cutting concrete retaining wall blocks. A dust mask is recommended when cutting blocks." We'd add hearing protection to that essential list.
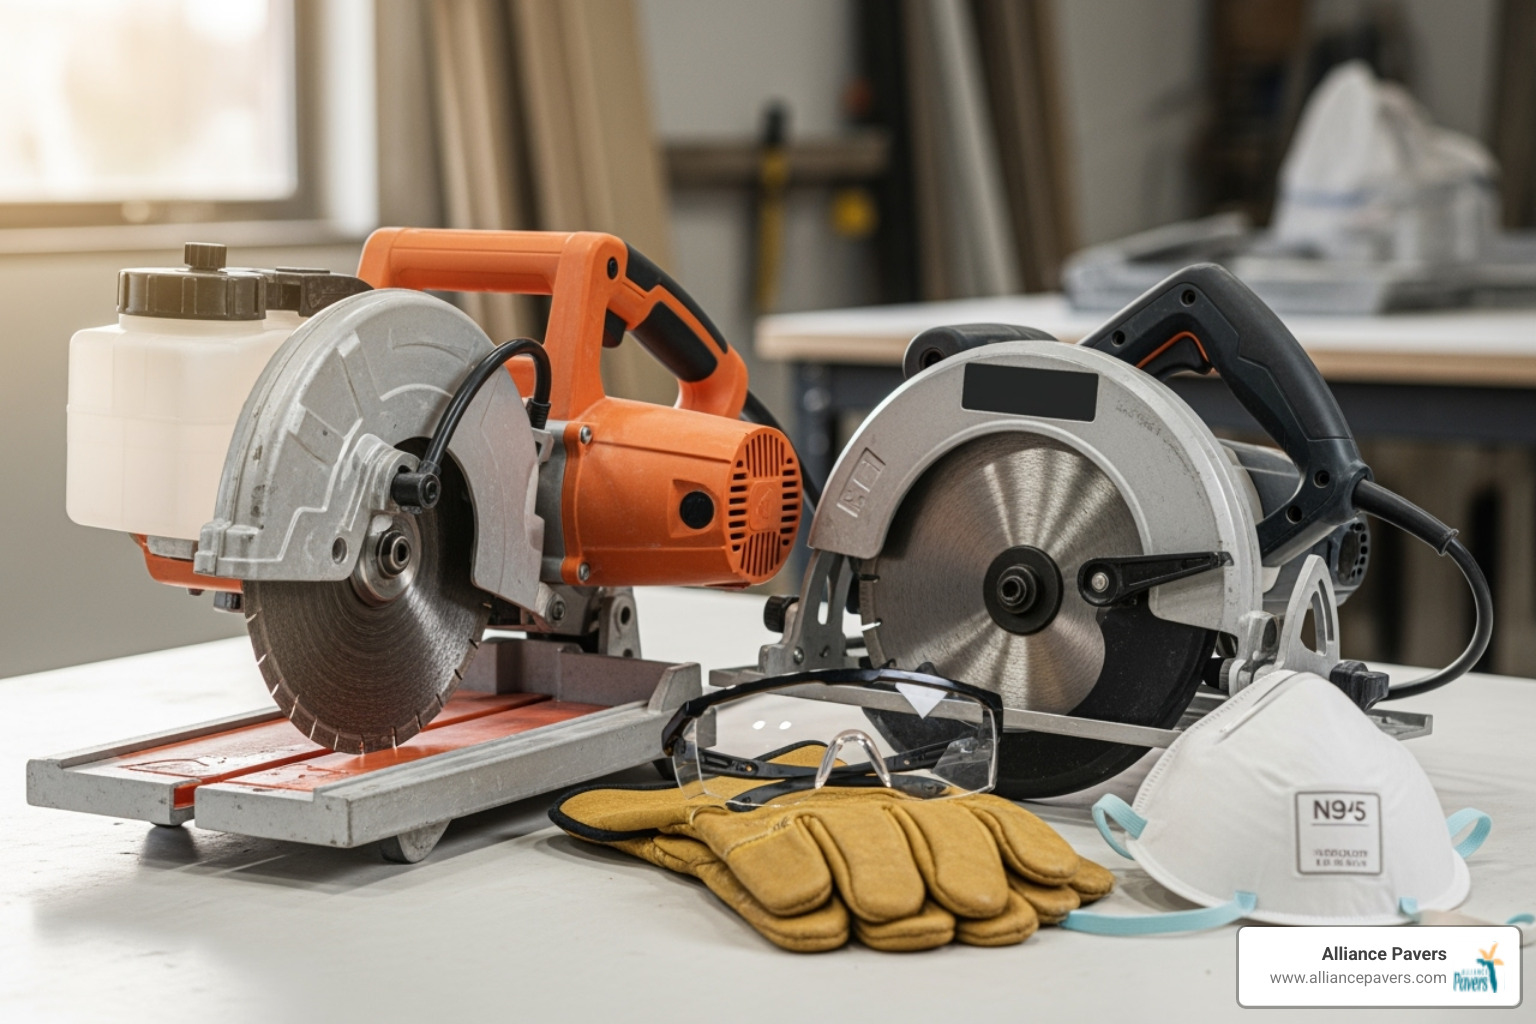
Choosing Your Tools: Saws and Blades
The right saw makes all the difference. For cutting retaining wall caps, you have a few options:
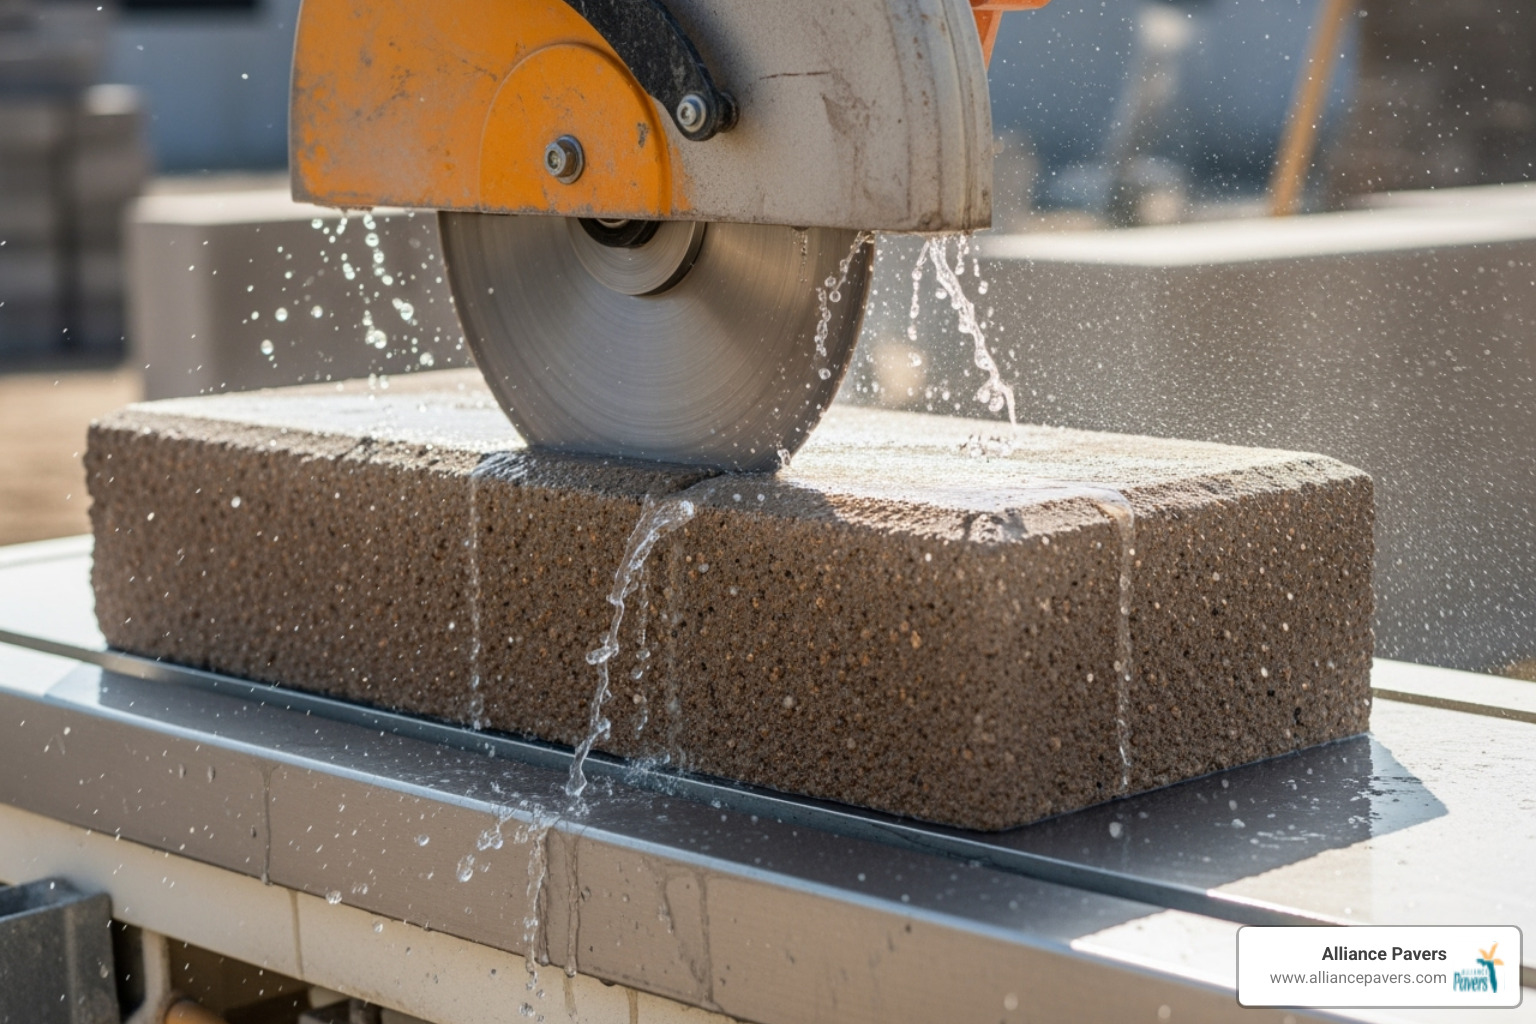
- Wet Masonry Saw: This is the professional's choice. It uses water to cool the blade and eliminate dust, resulting in clean, precise cuts. It's ideal for projects with many cuts, like curved walls.
- Circular Saw with Diamond Blade: A great option for smaller projects. It's portable and effective, but be prepared for significant dust. Keep a water hose nearby to spray the blade and reduce the dust cloud.
- Angle Grinder: Best for detail work and cleaning up edges, not for long, straight cuts.
- Handheld Cut-off Saw: A powerful option for slicing through thick material quickly.
No matter which saw you choose, a diamond masonry blade is essential. Standard blades will dull almost instantly on concrete or stone. When deciding between wet cutting versus dry cutting, wet cutting is superior for dust control, blade life, and cut quality.
Renting Equipment for Your Project
Unless you plan on a new hardscaping hobby, buying a professional wet saw is likely unnecessary. Most home improvement and rental centers offer masonry saws for a reasonable daily or weekly rate. As Today's Homeowner notes, "renting a masonry saw for occasional use is more cost-effective than purchasing one."
Renting gives you access to professional-grade equipment without the high cost of ownership, storage, or maintenance. For most DIYers tackling a single retaining wall, renting is the smartest and most economical choice.
Managing Dust and Debris
Cutting concrete creates a fine dust that is messy and a health hazard. The best solution is wet cutting, which turns the dust into a manageable slurry.
If you're dry cutting, use a garden hose with a spray nozzle to direct a light stream of water at the blade. This knocks down most of the dust and cools the blade. Set up a designated cutting area away from your house and garden, and lay down tarps to simplify cleanup. After cutting, sweep up large debris and rinse the area to remove any remaining fine dust.
The Blueprint: Measuring and Marking for a Perfect Fit
Your cuts are only as good as your marks. Rushing the measuring phase is a common mistake that leads to poor results. Think of marking as the blueprint for your project—get it right, and the cutting becomes much easier.
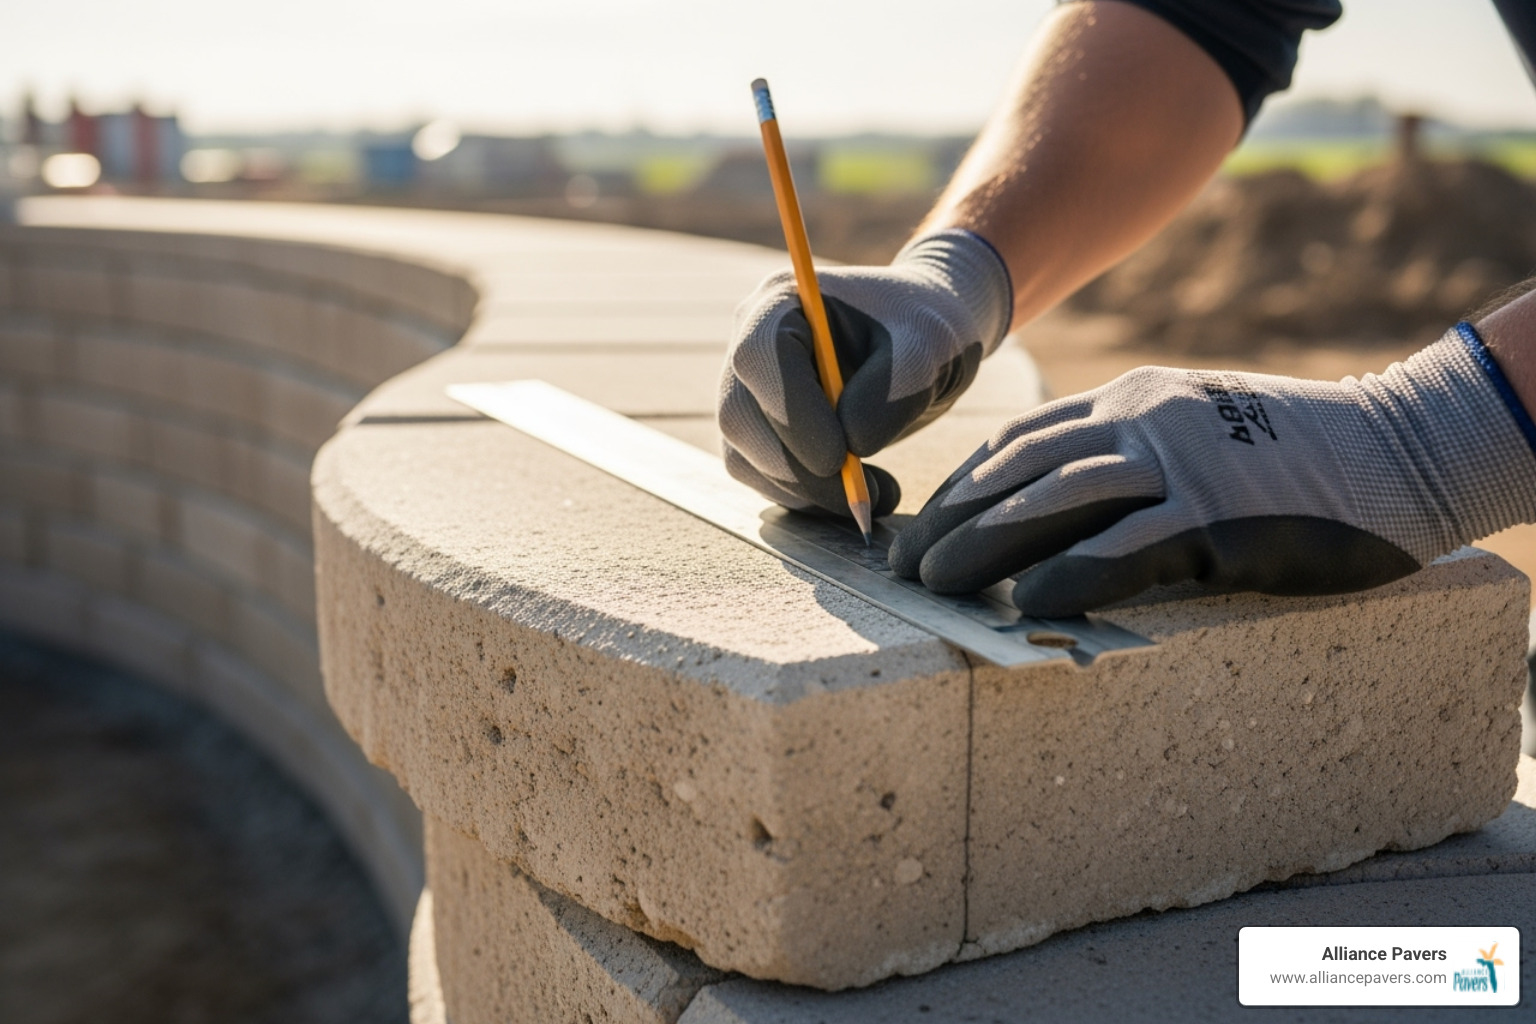
Tools for Precision Marking
Gather a simple marking toolkit for the best results:
- Carpenter's or grease pencil: Shows up well on concrete and won't smudge easily.
- Straight edge: A 12-inch level or metal ruler works well for connecting marks.
- Speed square or combination square: Essential for accurate 90-degree and 45-degree angles.
- Measuring tape: A locking steel tape is a must.
- Cardboard template: For complex curves or repetitive cuts, a template saves time and ensures consistency.
Marking Caps for Curves
The secret to perfectly capped curves is the three-cap method. It's a simple trick that delivers professional results.
- Place two uncut caps on the wall, following the curve and leaving a gap between them.
- Lay a third cap on top, bridging the gap and overlapping both caps below.
- Reach underneath the top cap and trace the outline of the two bottom caps onto it.
- Flip the top cap over. You'll see two marks. Connect them with a straight edge to form a wedge shape.
This wedge is what you'll cut out. When placed back on the wall, the cap will fit snugly between its neighbors. Repeat this process for each cap along the curve. Each piece becomes custom-fitted to that specific spot on your wall. For more details, see the resources at Allan Block about modifying retaining wall blocks for curves.
Marking 45-Degree Cuts for Corners
Crisp corners are a hallmark of quality work. A brilliant no-measure method ensures a perfect fit every time.
- Place one capstone flat on your work surface. Set a second cap vertically on top of the first, positioned as they would meet at the corner.
- Mark the exact intersection point on both caps.
- Swap the caps (horizontal becomes vertical, and vice versa) and repeat the process, marking the new intersection point.
- You will now have two marks on each cap. Connect them with a straight edge.
This line creates a perfect 45-degree angle without any need for a protractor. When cut, the two pieces will form a tight 90-degree corner.
The Main Event: A Guide to Cutting Retaining Wall Caps
With your caps marked, it's time to cut. This is where patience and proper technique turn your marks into reality. Before you begin, double-check that you're wearing all your safety gear: glasses, dust mask, hearing protection, and gloves.
Achieving Precise 45-Degree Cuts for Corners
For professional-looking corners, crisp 45-degree angles are a must.
- Set up your saw. If using a wet saw or chop saw, set the blade angle to 45 degrees. With a circular saw, you'll rely on your marked lines.
- Secure the cap. A shifting cap is dangerous and will ruin the cut. Use the sliding table on a wet saw or place the cap on a stable surface and hold it firmly.
- Cut slowly. Guide the saw along your marked line without forcing it. For thick caps, make several shallow passes instead of one deep cut. This minimizes chipping and gives you better control.
- Dry-fit the pieces. After cutting, place both caps on the corner to check the fit. They should form a tight 90-degree angle. Use an angle grinder for any minor adjustments before applying adhesive.
For a visual guide, you can watch how to cut corner caps to see this process in action.
Techniques for Cutting Retaining Wall Caps on Curves
For curves, you'll be making two straight cuts to remove the wedge shape you marked using the three-cap method.
Align your saw blade with one of the marked lines and make your first cut. Let the saw do the work; don't force it. Make gradual passes, especially on thick caps, to ensure a clean edge. After the first cut, repeat for the second line to remove the wedge.
The most important step is to dry-fit each piece immediately after cutting. Place it on the wall to check the fit against its neighbor. The goal is a tight joint, ideally under 1/8 inch. A gap of 1/4 inch or more will look unprofessional. Continue this cut-and-fit rhythm around the entire curve for a smooth, flowing result.
Pro Tips for a Flawless Finish
Small details make a big difference. Lift your work with these professional touches:
- Maintain a consistent 1-inch overhang. This creates a finished look and helps direct water away from the wall face. Use a 1-inch scrap piece of wood as a guide.
- Smooth the cut edges. Even the best cuts can be slightly rough. Use a rubbing stone or an angle grinder to smooth any sharp edges for a more refined appearance.
- Check for level as you go. Use a small level on each cap and a rubber mallet to gently tap it into the perfect position.
The Final Touches: Securing Caps and Avoiding Common Pitfalls
Your caps are cut and fit beautifully, but the job isn't done. Securing the caps with adhesive is a crucial final step to ensure your hard work lasts for years.
How to Securely Adhere Your Cut Caps
As pros say, "If you take the time to cut stone caps, take the time to glue stone caps." An unglued cap is a hazard waiting to happen.
- Clean both surfaces. Brush all dust and debris from the top of the wall blocks and the bottom of the caps. Adhesive needs a clean, dry surface to bond properly.
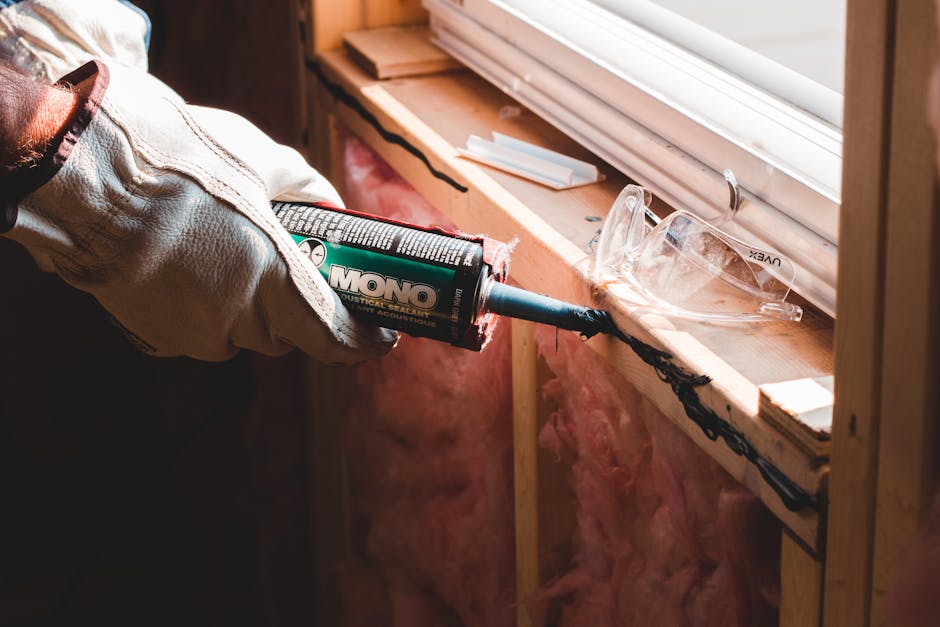
- Choose the right adhesive. Use a high-strength construction adhesive formulated for landscape blocks and stone, such as Liquid Nails landscape block, stone & timber adhesive.
- Apply the adhesive. Use a caulk gun to apply a generous, continuous bead of adhesive to the top of the wall blocks.
- Set the cap. Carefully place the cap, check your overhang, and press down firmly to spread the adhesive.
- Let it cure. Allow the adhesive to cure fully according to the manufacturer's instructions (typically 24 hours) before disturbing the caps.
Common Mistakes When Cutting Retaining Wall Caps and How to Avoid Them
Avoid these common pitfalls for a professional result:
- Inaccurate Measurements: Always measure twice and cut once. Rushing the marking stage is the root of most problems.
- Large Joint Gaps: Aim for joints under 1/8 inch. This comes from careful marking and dry-fitting.
- Skipping the Dry-Fit: Always test the fit of each piece before applying adhesive. It's easy to adjust a dry stone but difficult to fix a glued one.
- Forgetting Adhesive: The weight of the caps is not enough to hold them in place. Always use construction adhesive.
- Inconsistent Overhang: Use a 1-inch guide block to ensure your overhang is uniform around the entire wall.
- Incorrect Corner Cuts: Don't cut caps from corner to corner. Use the stacking method described earlier for a tight miter joint.
Maintaining Your Capped Retaining Wall
Your wall needs a little ongoing care. As part of your seasonal yard work, inspect for any loose or cracked caps. Sweep away debris and wash the caps with a garden hose as needed. Most importantly, ensure your wall's drainage system is clear and functioning correctly to protect its structural integrity. Proper drainage prevents water buildup that can cause shifting and damage. For more on this, see our guide on inspecting your retaining wall for water damage.
Frequently Asked Questions about Cutting Caps
Here are answers to some of the most common questions we hear from homeowners about cutting retaining wall caps.
What's the best saw for cutting retaining wall caps?
For the cleanest cuts and best dust control, a wet masonry saw is the top choice. The water cools the blade and eliminates dust, making it ideal for projects with many cuts. For smaller DIY projects, a circular saw with a quality diamond blade is a perfectly viable alternative, provided you use water to manage dust and take proper safety precautions.
How do you cut caps for a curved wall without special tools?
You don't need special tools, just the "three-cap method." Place two caps on the wall to follow the curve, leaving a gap. Lay a third cap over the gap, then reach underneath to trace where the bottom caps overlap it. Flip the top cap over, connect your marks with a straight edge, and cut out the resulting wedge. This creates a custom-fit piece for that exact spot on the curve.
How tight should the joints be between retaining wall caps?
Aim for joints under 1/8 inch. This creates a seamless, professional appearance. Gaps of 1/4 inch or more look unpolished and can collect debris, weeds, and water. Achieving tight joints comes down to careful marking, patient cutting, and always dry-fitting each piece before you glue it down.
Conclusion
You now have the knowledge to cut retaining wall caps like a pro. The secret to success lies in a few key principles: prioritize safety, mark accurately, cut patiently, dry-fit every piece, and secure your caps with quality construction adhesive. Following these steps will result in a finished masterpiece with tight joints and a consistent overhang that looks professionally installed.
Here at Alliance Pavers, we've spent 25 years perfecting hardscaping in Central Florida. We treat every project like it's our own, bringing meticulous attention to detail to every wall we build.
While many projects are achievable for a dedicated DIYer, complex curves or large-scale walls can be challenging. If your project feels overwhelming, bringing in experienced professionals can save you time, frustration, and costly mistakes. A beautifully capped retaining wall adds significant visual appeal and value to your property.
Ready to bring your vision to life with exceptional craftsmanship? Explore our Stone Retaining Walls services in St. Cloud and let's discuss your project. The team at Alliance Pavers is ready to deliver a stress-free experience and a result you'll love for years to come.