Retaining Wall Installation Made Easy
Learn to build a paver wall with our easy, step-by-step guide. Get tools, materials, and tips for a strong, beautiful retaining wall.
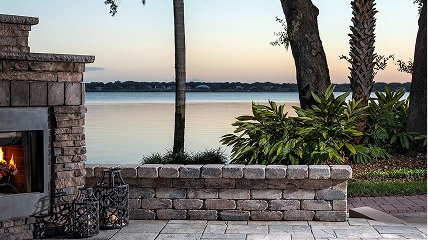
Why Building a Paver Wall Transforms Your Outdoor Space
Build a paver wall to control erosion, create level planting areas, or add functional beauty to your sloped Central Florida yard. Whether you're managing a hillside, defining garden beds, or carving out usable space from uneven terrain, a properly built paver retaining wall combines structural strength with lasting curb appeal. Many homeowners struggle with choosing the right materials, understanding drainage requirements, and ensuring their wall won't shift or fail over time.
Quick Answer: How to Build a Paver Wall
- Plan and prepare: Mark layout, check permits, excavate trench (bury first course)
- Build the base: Add 6-8 inches of compacted crushed stone
- Lay blocks: Install first course level, stagger subsequent courses
- Add drainage: Place perforated pipe behind wall, backfill with gravel
- Finish: Secure capstones with adhesive, compact final backfill
The good news? With the right approach, building a paver wall is a manageable project that delivers years of maintenance-free service. Retaining walls aren't just about holding back soil—they transform yards, add property value, and create outdoor living spaces you'll actually use. The key is understanding the fundamentals: proper excavation, a stable base, effective drainage, and careful stacking.
For more outdoor hardscaping ideas, explore our paver installation services, or get a free estimate to discuss your project with our team.
Planning Your Paver Wall: Tools, Materials, and Layout
The difference between a retaining wall that lasts decades and one that fails after a few seasons? Planning. Before you touch a single shovel or stack your first block, you need to understand what you're working with—the slope, the soil, how water moves through your yard, and what your wall needs to accomplish.
Start by walking your property with stakes and string in hand. You'll use these to mark exactly where your wall will go, creating a visual guideline that helps you see the project before it exists. This simple step does more than look official—it lets you measure the total length and height accurately, which means you'll know exactly how many materials to order. There's nothing worse than running out of blocks halfway through and finding your supplier is backordered for two weeks.
For walls taller than four feet, most Central Florida municipalities require building permits. Some even want an engineer's stamp on your plans. It might seem like bureaucratic hassle, but these regulations exist for good reason—they ensure your wall won't become a liability. Check with your local building department in Orlando, Kissimmee, Lake Mary, or wherever you're building. The small investment in a permit beats the cost of tearing down and rebuilding a non-compliant wall.
Before any digging happens, call 811. This free service locates underground utility lines—gas, electric, water, fiber optic cables—and marks them with colorful flags. It takes a few days for the locators to arrive, so plan ahead. Hitting a gas line isn't just expensive; it's dangerous.
Here's something we've learned after 25 years in the hardscaping business: building a paver wall looks straightforward until you're three courses in and realize your base isn't level or your drainage is inadequate. Small mistakes compound quickly. While many homeowners successfully tackle smaller walls as DIY projects, professional installation often saves money in the long run by getting it right the first time. If you're considering professional help, we'd love to discuss your project and provide a free estimate.
Essential Tools for the Job
The right tools transform a backbreaking job into a manageable one. You don't need a contractor's entire arsenal, but you do need the essentials.
A shovel handles excavation and material moving—nothing fancy required. For compaction, you have two options: a hand tamper works for smaller projects, but a plate compactor is worth renting if you're serious about professional results. That vibrating beast ensures your base and backfill are rock-solid, which directly affects how long your wall stands.
You'll need two levels: a torpedo level for checking individual blocks in multiple directions, and a 4-foot or 6-foot level for verifying entire sections and courses. A rubber mallet adjusts blocks into position without chipping corners or cracking faces.
For cutting blocks, a masonry saw or block splitter becomes essential when you need custom sizes or want to stagger joints properly. Block splitters give you that natural, rough-hewn look, while a gas-powered cutoff saw makes precise, clean cuts. Both have their place.
Don't forget the basics: a wheelbarrow for hauling materials, measuring tape for accuracy, and string line with stakes for maintaining straight lines and consistent heights. Finally, protect yourself with safety glasses, work gloves, and sturdy boots. If you're cutting blocks, add a respirator mask—masonry dust isn't something you want in your lungs.
Materials You Will Need
Quality materials matter as much as quality installation. Here's what goes into a paver wall that actually lasts.
Interlocking paver blocks form the structure itself. In Central Florida's climate, engineered stone and concrete blocks handle temperature swings and humidity beautifully. Look for solid blocks rather than hollow ones—they're easier to split for custom fits and don't require individual backfilling.
Capstones finish the top of your wall, giving it a polished look while protecting the structure from rain and sun. They're not optional—they're the finishing touch that makes your wall look intentional rather than incomplete.
The foundation starts with crushed stone or paver base. We prefer angular crushed stone between half-inch and three-quarter-inch diameter. Why angular? Because those sharp edges interlock and compact better than smooth river rock. You'll need enough for a base layer—typically two to six inches deep depending on your wall's height.
Behind the wall, you'll backfill with gravel to reduce soil pressure and allow water to drain. Speaking of drainage, a perforated drain pipe at the base is essential in areas with heavy rain or significant slopes. It gives water somewhere to go besides pushing against your wall.
Landscape fabric acts as a filter between soil and gravel, preventing fine particles from washing into your drainage layer and clogging it over time. Think of it as insurance for your drainage system.
For securing capstones, use landscape block adhesive—not regular construction adhesive. The specialty stuff stays flexible as your wall experiences tiny movements from temperature changes and settling. Regular adhesive cracks and fails.
One more item for your shopping list: a soapstone pencil for marking cuts. Unlike grease pencils or permanent markers, soapstone washes off easily after you've made your cut.
Here's a tip from two and a half decades of building walls: order ten percent more material than you calculate. Blocks get damaged, cuts don't always go as planned, and running short mid-project is frustrating. That extra ten percent is cheap insurance against delays.
How to Build a Paver Wall: A Step-by-Step Guide
Building a paver wall is a project that combines precision with physical effort. Whether you're undertaking a small decorative wall or a more substantial retaining structure, following a clear, step-by-step process is key to achieving a durable and aesthetically pleasing result. The structural integrity of your wall hinges on careful preparation and execution at each stage.
Step 1: Excavate and Prepare the Trench
The trench is the foundation of your paver wall, so getting it right is paramount.
- Mark the Layout: Using your stakes and string line, clearly mark the exact path of your wall. For curves, a garden hose can be a great guide. Ensure the layout is level.
- Call 811: Before any digging, always call 811 to have underground utilities marked. This is a non-negotiable safety step across Central Florida.
- Excavate the Trench: We'll dig a trench that is wide enough for the block and at least 8 inches of space behind it for backfill. The depth is critical: it should be deep enough to bury at least half the height of your first course of blocks plus 3 inches of paver base. For taller walls, say over 3 feet, a full block may need to be buried. A general guideline, known as the "1/3 rule," suggests burying about 1/3 of the wall's total height below ground for stability. For instance, a 6-foot wall should have about 2 feet underground.
- Remove Organic Material: All surface vegetation and organic materials must be removed from the excavation area, as they cannot be used as backfill and will decompose, leading to settlement.
- Compact the Soil: Once excavated, compact the soil at the bottom of the trench thoroughly using a hand tamper or plate compactor. This prevents future settling and provides a firm base for your wall. If the soil is dry, lightly wetting it can aid compaction.
Step 2: Create a Stable, Level Base
A stable base is arguably the most important element for a long-lasting paver wall. This base will distribute the weight of the wall and its retained soil evenly.
- Add Base Material: Fill the trench with 2 to 6 inches of 1/2" to 3/4" crushed stone or paver base material. The amount depends on the wall's height and soil conditions. This angular crushed stone is superior to rounded gravel or river rock for its interlocking properties and drainage capabilities, especially important with Central Florida's climate.
- Level the Base: Rake the crushed stone smooth and ensure it is level across the entire length and width of the trench. Use a long level and check frequently.
- Compact the Base: Compact the base material thoroughly using a plate compactor or hand tamper. We'll do this in lifts (layers) of no more than 8 inches, making at least two passes with the compactor. Proper compaction is key to preventing settling and ensuring the wall remains level over time.
Step 3: Lay the First and Subsequent Courses
This is where your wall begins to take shape. Precision here will dictate the success of the entire project.
- Lay the First Course: Start at the lowest end of your trench. Place the first block directly on the leveled and compacted base, ensuring it's centered within the trench. Use a torpedo level to check that each block is level from side-to-side and front-to-back. Adjust with a rubber mallet or by manipulating the paver base underneath. This first course must be perfectly level and aligned, as any irregularities will magnify with height.
- Check Alignment: After laying several blocks, use your longer level to check the entire section for levelness and alignment. You can also sight down the back of the blocks to ensure a straight line.
- Stagger Subsequent Courses: As you build upward, stagger each new row like bricks to interlock them and improve strength. This means the vertical seams of blocks in adjacent courses should be offset by at least 1/4 the block length. For even-numbered courses, you'll typically start with a half block, which may require cutting.
- Cut Blocks: Use your block splitter for a rough, natural finish on visible ends or a masonry saw for smooth, precise cuts. Mark your cuts with a soapstone pencil.
- Keep Joints Tight: Try to keep the butt joints between blocks as tight as possible to prevent water and sediment pathways. Sweep blocks clean before stacking to ensure proper alignment, as even a small pebble can throw a block out of alignment.
- Step-Ups for Slopes: If building on a slope, you'll need to create "step-ups" in the trench. This involves burying the first two full courses below grade on the lower side of the step-up, then transitioning to the next level.
Step 4: Install Drainage and Backfill
Proper drainage is critical for the longevity of your paver wall, especially in Central Florida where we can experience heavy rainfall. Poor drainage is a common mistake that can cause water pressure to push walls over time, leading to cracking or collapse.
- Install Drainage Pipe (Optional but Recommended): For walls over 4 feet tall, or in areas with heavy rain or clay soils (which retain water), we recommend installing a perforated drain pipe. Lay the pipe at the base of the wall, on top of the compacted gravel base, with the perforations facing down. Ensure it slopes gently towards an outlet where water can drain away from the wall, ideally to daylight or a storm drain. Vent the pipe every 50 feet if possible.
- Add Landscape Fabric: Line the back of the wall and over the drainage pipe with landscape fabric. This prevents soil from migrating into the gravel and clogging your drainage system.
- Gravel Backfill: After laying a few courses, fill the hollow cores of the blocks and the space behind the wall (at least 12 inches) with 1/2" to 3/4" crushed stone or gravel. This well-draining material reduces hydrostatic pressure on the wall.
- Backfill in Lifts and Compact: Backfill with gravel or approved on-site soils (avoiding organic materials) in lifts of no more than 8 inches. After each lift, compact the material thoroughly with a hand tamper or plate compactor. This prevents settlement and ensures the backfill provides stable support for the wall. Repeat this process as you build up each course of blocks.
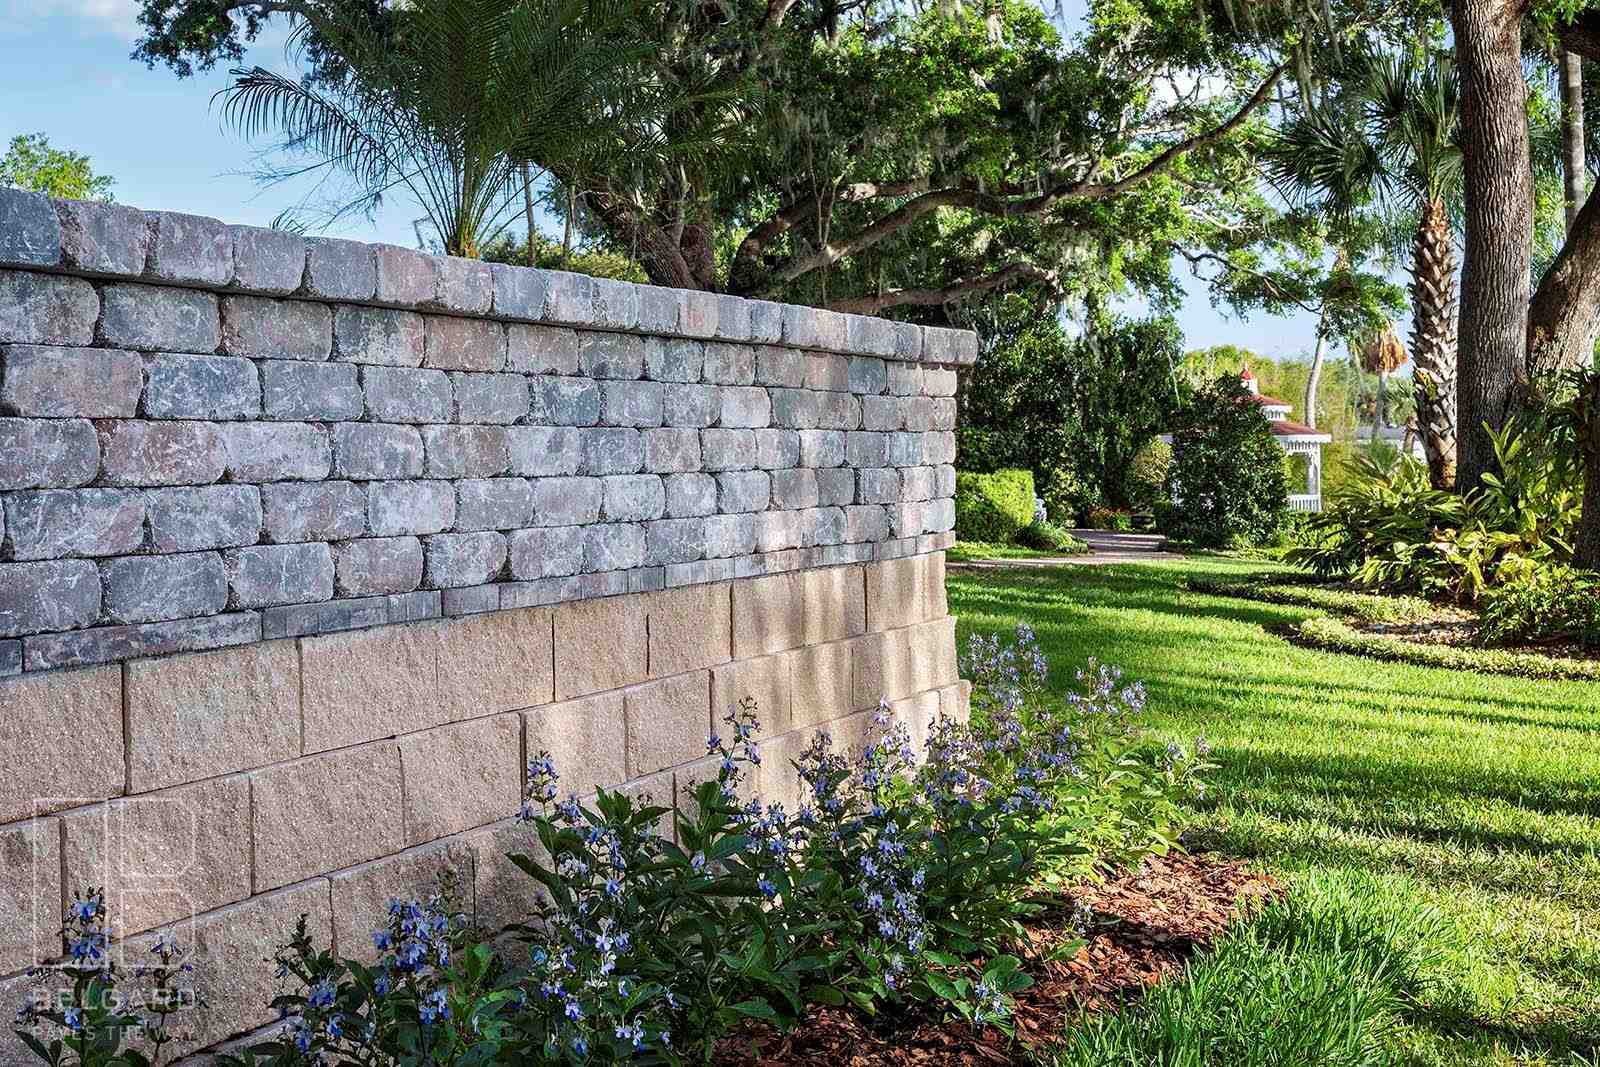
Finishing Your Wall and Avoiding Common Mistakes
A beautifully finished paver wall not only improves your landscape but also signifies a job done with care and precision. The final touches ensure both aesthetic appeal and long-term durability. Equally important is understanding and avoiding common pitfalls that can compromise the wall's integrity.
How to build a paver wall with a professional finish
Once the main structure of your paver wall is complete, it's time for the capstones – the crowning glory that provides a clean, finished look and protects the top course from erosion and weather.
- Clean the Surface: Ensure the top course of blocks is clean and dry. Any dirt, dust, or moisture can prevent the adhesive from bonding properly.
- Apply Adhesive: Apply a generous bead of specialty landscape block adhesive to the top surface of the final course of wall blocks. This adhesive is formulated to remain flexible, accommodating slight movements caused by temperature changes, which is beneficial in Central Florida's climate.
- Place Capstones: Carefully place the capstones on top of the adhesive. We often recommend a slight overhang of about 1 to 1 1/2 inches, extending slightly beyond the face of the wall. This creates a visually appealing shadow line and helps shed water away from the wall face.
- Align and Level: Ensure each capstone is level and aligned with its neighbors. You can stagger them backward and forward to get them to go straight across without spaces between, creating a seamless look. Tap gently with a rubber mallet if needed.
- Final Backfill and Grading: After the capstones are secured, complete any remaining backfilling behind the wall with topsoil. Grade the soil away from the wall to ensure proper drainage and prevent water from pooling, which could compromise the wall's stability. For tiered walls, separate wall tiers by a distance no less than twice the height of the wall below to prevent the weight and pressure of the upper wall from damaging the lower one.
How to build a paver wall and avoid costly errors
Building a paver wall is a significant investment in your home, and avoiding common mistakes is crucial for its longevity and your peace of mind. Our 25 years of experience in Central Florida hardscaping have taught us that attention to detail prevents future headaches.
- Poor Drainage: This is by far the most common and damaging mistake. Without proper drainage behind the wall, water pressure can build up, leading to bowing, cracking, or even collapse. Always ensure adequate gravel backfill and consider a perforated drain pipe, especially for taller walls or sites with poor drainage.
- Weak Base Preparation: A base that isn't deep enough, level, or properly compacted will lead to settlement and an unstable wall. The entire structure relies on this foundation. Remember to use crushed stone, not rounded gravel, for better interlocking and stability.
- Unlevel First Course: The first course sets the tone for the entire wall. If it's not perfectly level and straight, subsequent courses will compound the error, resulting in a visibly crooked or unstable wall. Take your time with this step!
- Ignoring Permits and Regulations: For walls over a certain height (often 4 feet), permits and even engineering plans are required in many Central Florida municipalities. Failing to secure these can lead to fines, forced removal, or reconstruction.
- Lack of Reinforcement: Taller walls often need geogrid or tiebacks for security. Ignoring these structural reinforcements can lead to wall failure, as the soil pressure will be too great for the blocks alone to withstand.
- Improper Backfilling: Using unsuitable backfill materials (like organic soil) or failing to compact backfill in lifts can lead to settlement behind the wall, creating uneven surfaces and putting undue stress on the structure.
- Insufficient Material: Running out of materials mid-project can cause delays and frustration. Always purchase 10% more than your estimate.
By understanding these common pitfalls and carefully following the steps outlined, we ensure your paver wall is not only beautiful but also structurally sound and built to last.
Conclusion
Your outdoor space holds so much potential. Whether you're battling a stubborn slope, dreaming of terraced garden beds, or simply wanting to add structure and beauty to your yard, learning to build a paver wall opens up a world of possibilities for your Central Florida property.
Throughout this guide, we've walked through every essential step—from that crucial first trench and compacted base to the satisfying moment when you secure those final capstones. We've emphasized what truly matters: proper planning, adequate drainage, a stable foundation, and attention to detail at every stage. These aren't just technical requirements; they're the difference between a wall that lasts decades and one that disappoints within a few seasons.
The truth is, building a paver wall is absolutely achievable for dedicated DIYers who have the time, tools, and patience to do it right. But we also know it's physically demanding work that requires precision, especially when it comes to drainage systems, proper base preparation, and ensuring that critical first course is perfectly level. For taller walls or challenging sites with significant slopes, the stakes are even higher—both structurally and in terms of local building codes.
That's where experience makes all the difference. At Alliance Pavers, we've spent 25 years changing yards across Central Florida—from St. Cloud and Orlando to Kissimmee and Lakeland. As a family-owned hardscaping company, we bring not just expertise in paver installation and retaining walls, but a genuine commitment to creating outdoor spaces that improve how you live and enjoy your home. We handle the heavy lifting, steer the permit requirements, and ensure every wall we build is structurally sound and beautifully finished.
Your landscape is an investment in your property and your quality of life. Whether you decide to tackle this project yourself or partner with professionals who live and breathe hardscaping, the result should be a functional, beautiful addition that serves you well for years to come.
Ready to transform your landscape? Learn more about our retaining wall services and let's discuss how we can bring your vision to life.