Don't Let Your Patio Crumble: Top-Tier Stone Patio Repair
Fix your crumbling patio! Learn stone patio repair, from identifying damage to DIY fixes & professional help. Restore beauty & safety.
Why Your Stone Patio Deserves Expert Repair
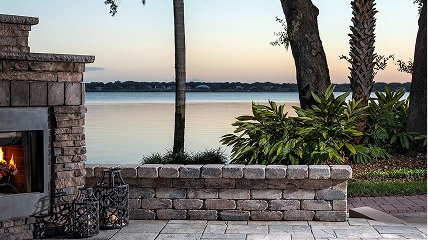
Stone patio repair is essential for the beauty and safety of your outdoor living space. A cracked, sinking, or uneven patio is more than an eyesore; it's a tripping hazard waiting to happen.
Quick Stone Patio Repair Overview:
- Common Issues: Sinking pavers, loose stones, crumbling mortar joints, weed growth
- Main Causes: Poor base preparation, inadequate drainage, freeze-thaw cycles
- Repair Types: Paver resetting, joint repair, base reconstruction, edge restraint replacement
- When to DIY: Minor joint filling, single paver replacement
- When to Hire Pros: Widespread sinking, foundation cracks, major drainage issues
As one expert notes: "A stone walkway with cracked mortar is an eyesore and can become a tripping hazard if water gets underneath and loosens the stones." This perfectly captures why timely repairs matter so much.
Patio problems often stem from poor installation, Florida's challenging weather, and natural settling. The good news? Most stone patio issues are completely fixable with the right techniques.
Whether you're dealing with a few wobbly pavers or major structural issues, this guide will help you understand your options, from simple DIY fixes to complex repairs that require professional expertise.
Key terms for Stone patio repair:
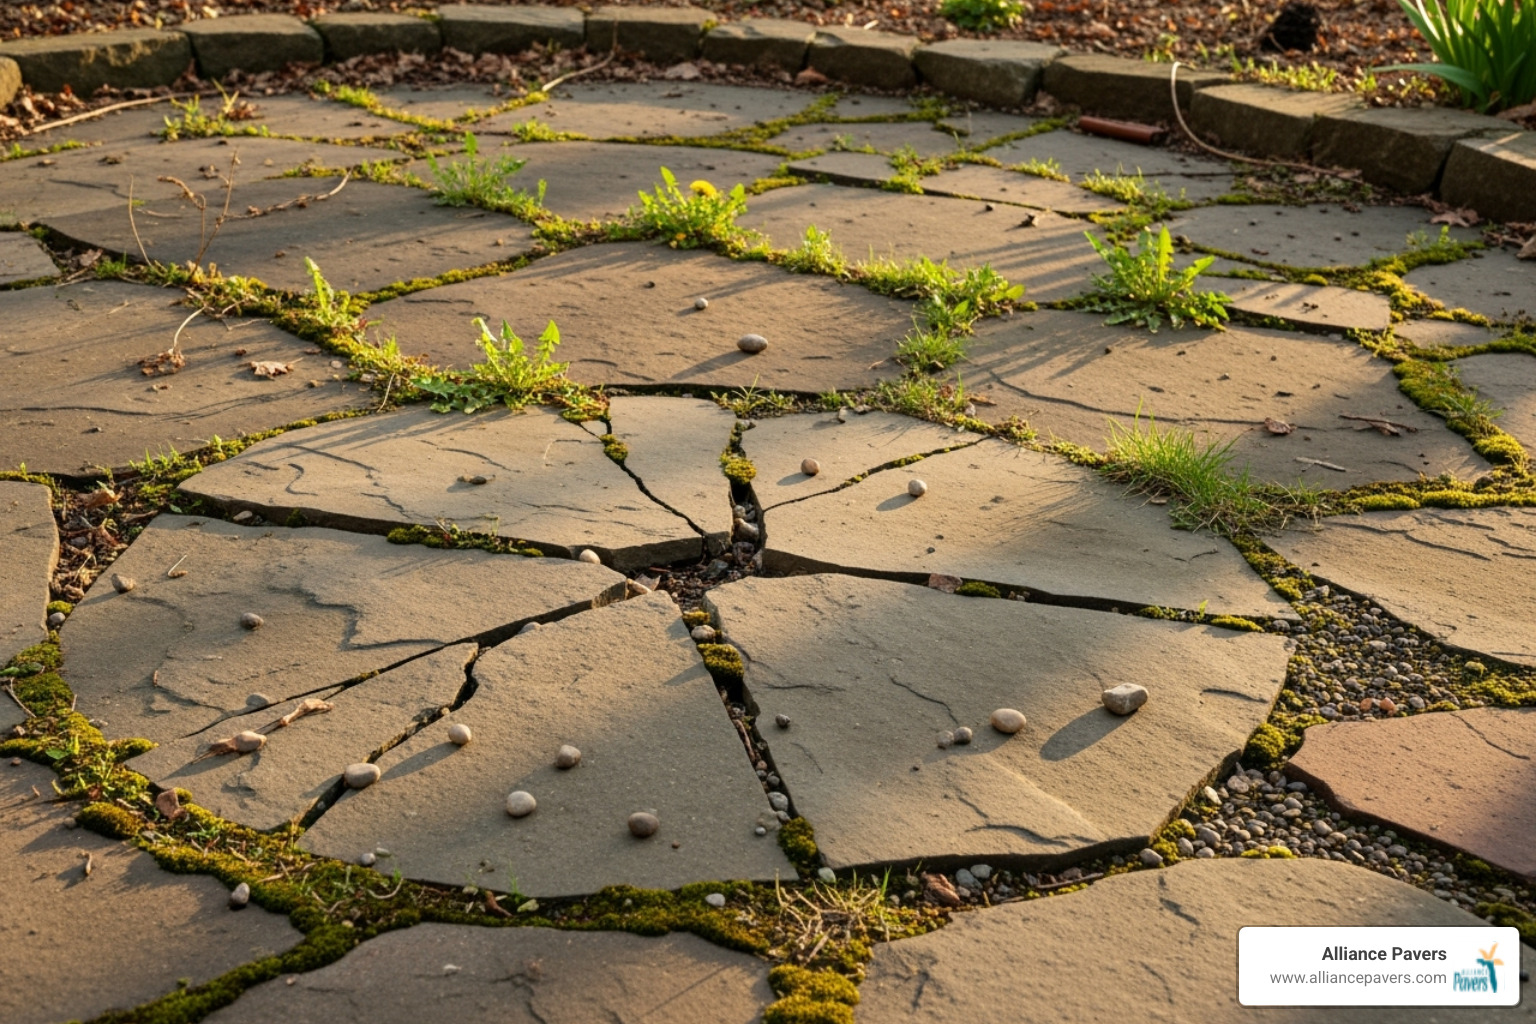
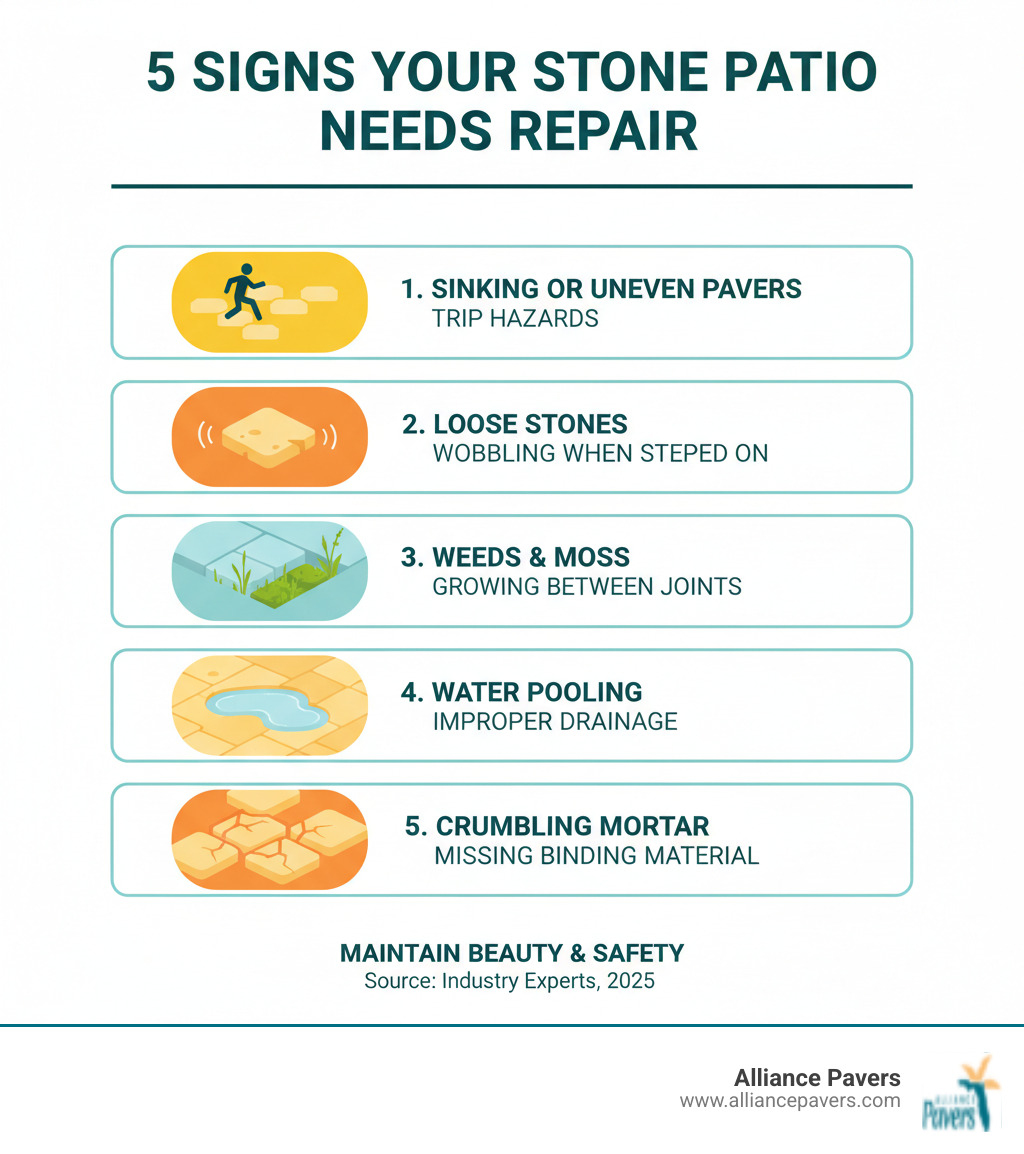
Identifying the Problem: Signs Your Stone Patio Needs Repair
Is your stone patio showing signs of wear? Small issues like cracks, wobbly stones, or puddles after rain are often symptoms of bigger problems. Identifying them early is key. Look for sinking pavers that create uneven, hazardous surfaces. Test for loose stones that move underfoot. Notice weeds growing between joints, which indicates weakened protective barriers.
Water pooling is another red flag. Your patio should direct water away from your home, not create ponds. When water sits, it's often working its way underneath your stones, undermining the foundation.
Florida's climate—intense heat, heavy rain, and sandy soil—presents unique challenges for patios, accelerating wear and tear. Proper drainage is crucial in this environment. For more on this, see our guide to Proper Stone Patio Drainage Doctor Phillips.
Common Causes of Patio Damage
Most stone patio repair projects stem from a few common causes:
- Improper Base Preparation: The number one cause. Using too much sand or failing to compact the base material leads to settling.
- Poor Drainage: Water that can't escape erodes the base, undermining the patio's stability.
- Failed Edge Restraints: The borders that hold pavers in place can fail, causing the patio to spread apart.
- Soil Erosion & Heavy Traffic: Gradual erosion and excessive weight can also contribute to deterioration over time.
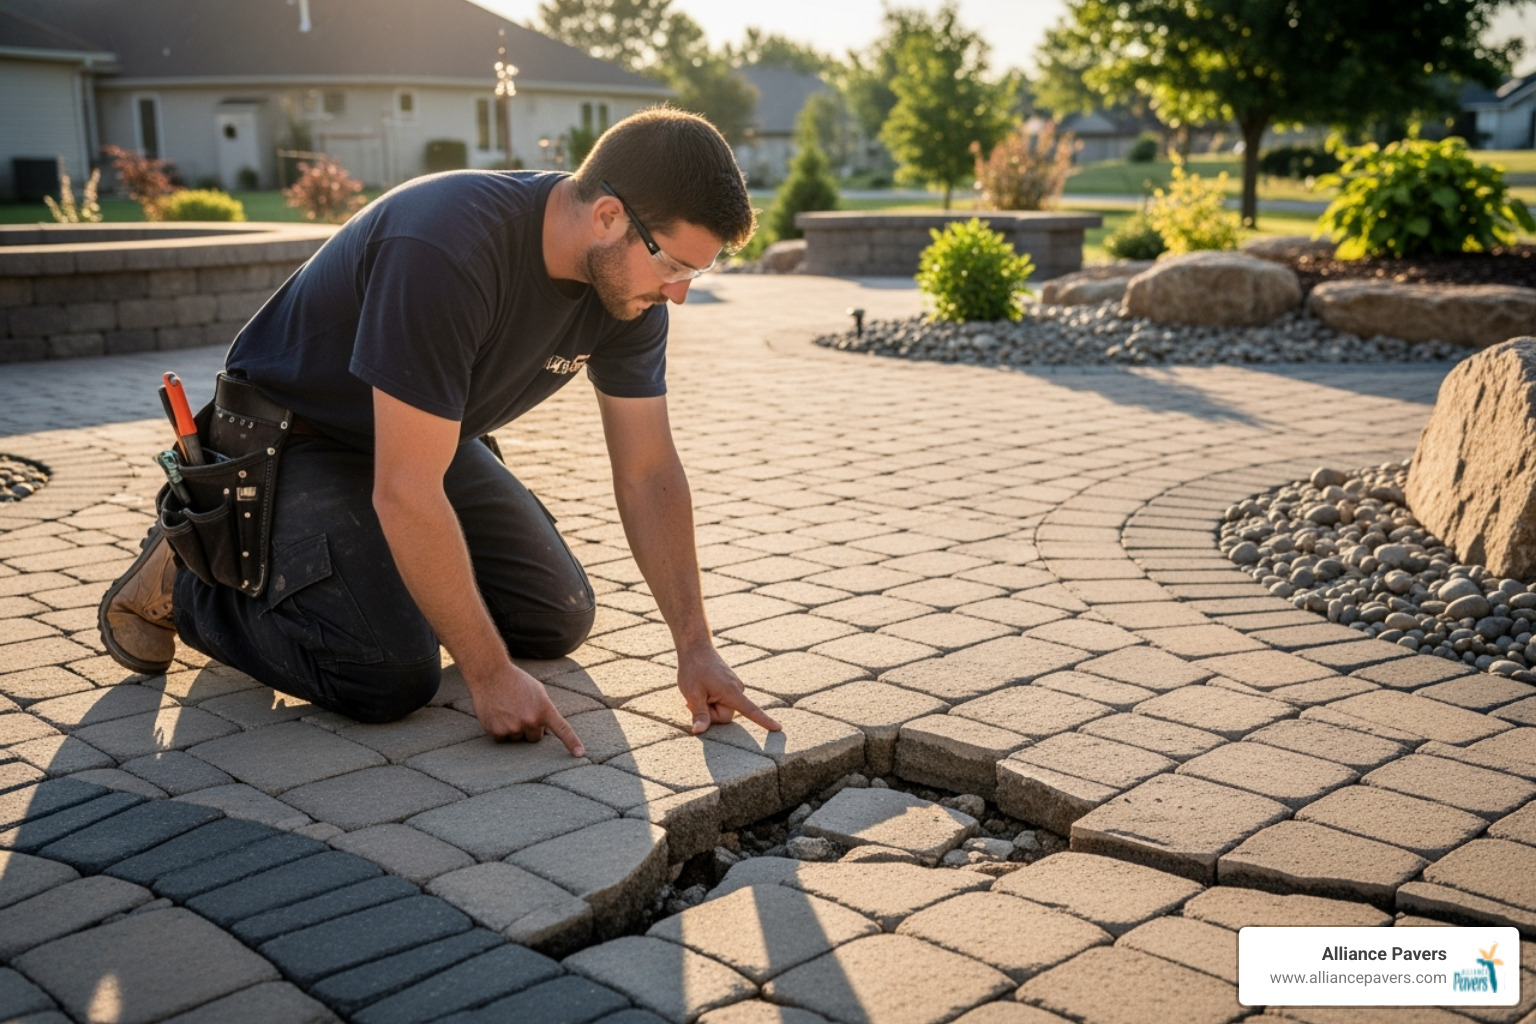
How to Assess the Severity of Damage
Before starting a repair, assess the damage severity:
- Visual Inspection: Walk the patio, looking for cracks, wide gaps, moss, and low spots where water pools.
- Wobble Test: Step on individual stones and rock them corner to corner. Any movement indicates a loss of foundation support.
- Use a Level: A 4-foot level can reveal uneven settling and confirm if the patio slopes correctly for drainage (away from your house).
- Check Mortar & Foundation: On mortared patios, look for widespread cracking or loose flagstones, which signal deeper issues.
- Assess the Scope: Determine if you have a few isolated problem spots or widespread sinking. Extensive issues often point to a systemic failure of the base or drainage requiring comprehensive stone patio repair.
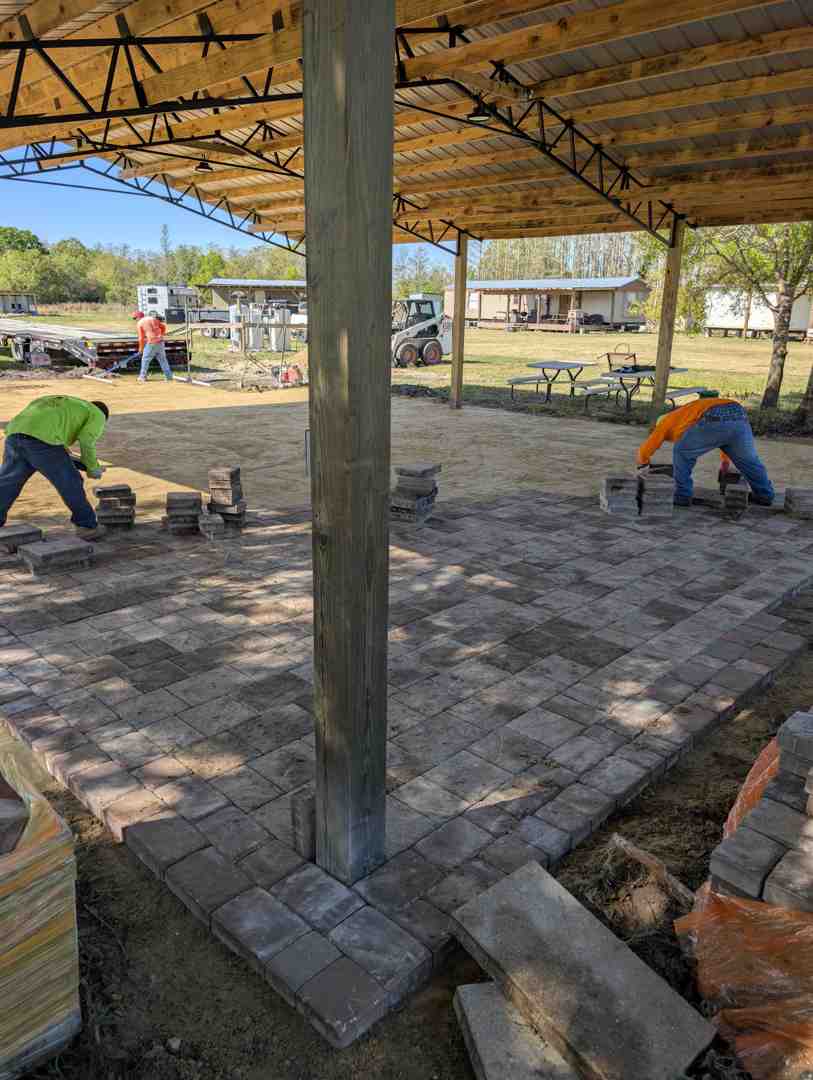
Common Types of Stone Patio Repair and Required Tools
Stone patio repair addresses various issues with specific solutions. Whether you're dealing with a wobbly paver or crumbling mortar, having the right approach is key.
Common repair types include:
- Paver Resetting: Lifting sunken or uneven stones to repair the base beneath them.
- Mortar Joint Repair: Removing old, crumbling mortar and replacing it with fresh material.
- Base Repair: A more intensive fix involving excavating and rebuilding a failed foundation from scratch.
- Edge Restraint Replacement: Fixing the borders that hold a paver patio together.
- Individual Stone Replacement: Swapping out single stones that are cracked or badly stained.
Our detailed guide on Paver Patio Repair covers many of these repair types in greater depth.
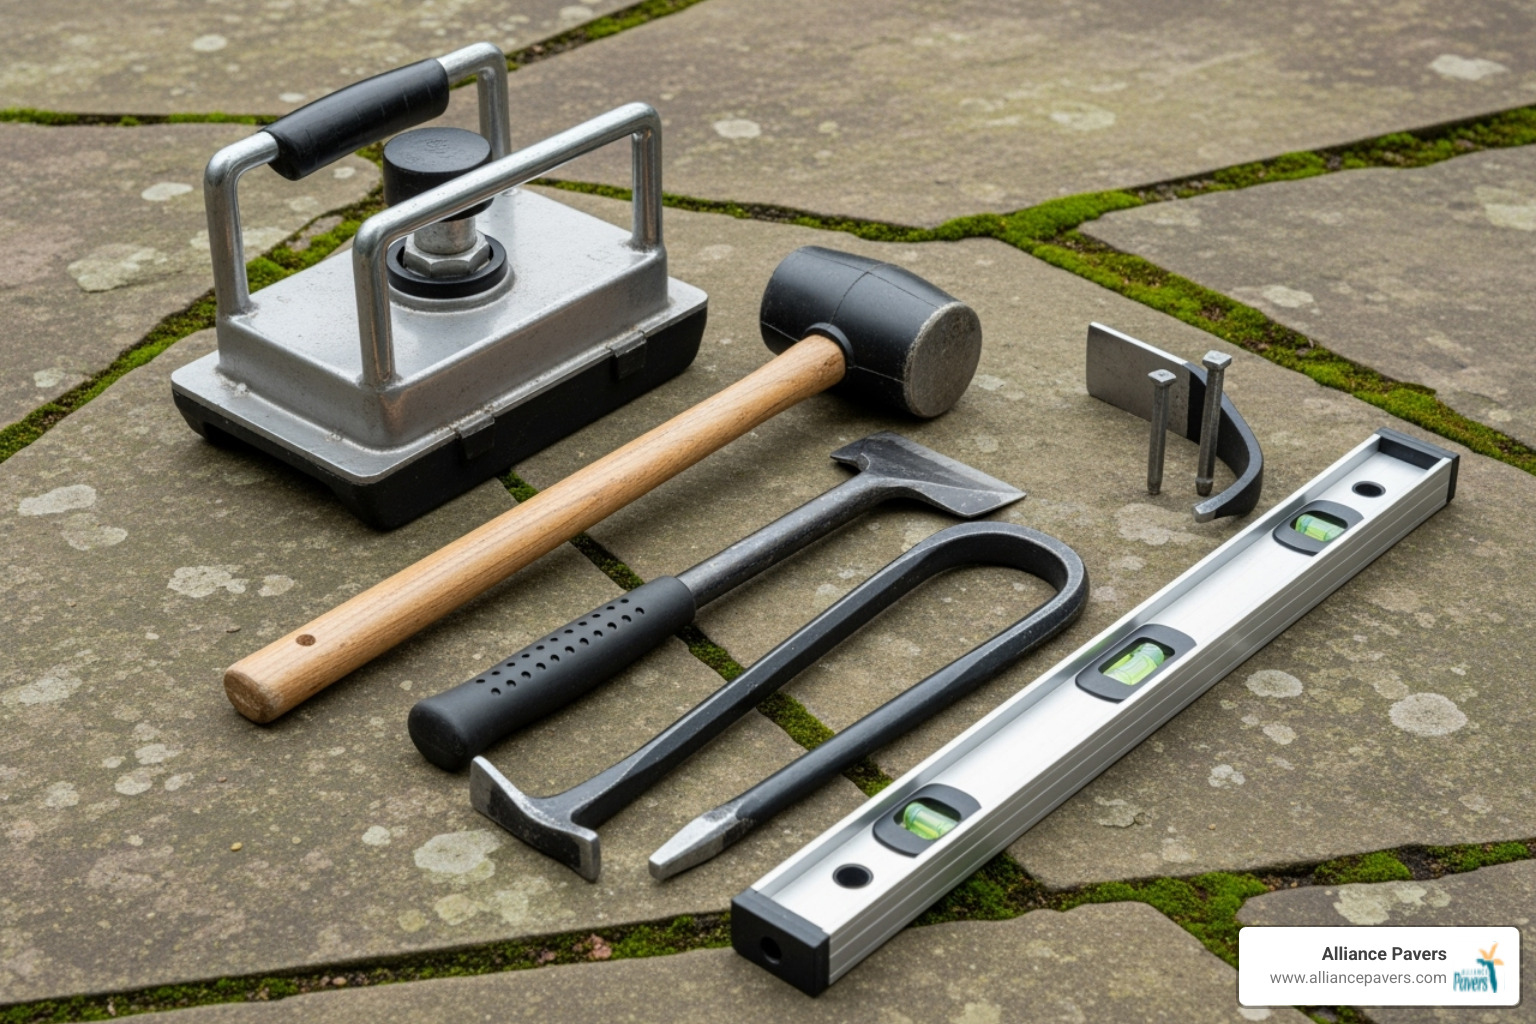
Tools and Materials for the Job
Using the right tools and materials is crucial for a lasting repair.
Essential Tools:
- For Base Work & Paver Setting: Hand tamper, rubber mallet, level, pry bars, putty knives, wheelbarrow.
- For Mortar Work: Pointing and finishing trowels, cold chisel, sledgehammer, angle grinder, stiff-bristled brush, grout bag.
Key Materials:
- Base & Bedding: Roadbase gravel (or 3/4" down limestone) and concrete sand.
- Joints: Polymeric sand for paver joints or sand-topping mortar (with acrylic fortifier) for flagstone.
- Other: Replacement stones, edge restraints, masonry adhesive.
Key Differences: Pavers vs. Flagstone Repair
The repair approach varies depending on your patio's construction.
- Paver Patios: These use interlocking, uniformly sized stones over a gravel and sand base. Joints are filled with sand (ideally polymeric), and repairs typically involve lifting stones to fix the base underneath.
- Flagstone Patios: These use irregular stones and can be built in two ways:
- Wet-Laid: Stones are set on a concrete slab or mortar bed with mortared joints. Repairs require chiseling out old mortar and reapplying it, which is a high-skill task.
- Dry-Laid: Stones are set on a gravel and stone dust base with sand or dust in the joints. Repairs are similar to paver repairs: lift, relevel the base, and reset the stone.
It's crucial to match the repair method to the original construction type.
Repair AspectPaver RepairWet-Laid Flagstone RepairDry-Laid Flagstone RepairBaseCompacted gravel with bedding sandConcrete slab or deep mortar bedCompacted gravel with stone dustJointsSand or polymeric sandMortar jointsStone dust or sandRepair ComplexityModerate - lift, level, reassembleHigh - mortar removal and precise applicationModerate - lift, level with dust, refill
Understanding these differences ensures your stone patio repair project succeeds the first time.
A Step-by-Step Guide to Stone Patio Repair
Ready to tackle your stone patio repair? These steps require moderate skill and physical work, but are manageable for many homeowners. Always prioritize safety: wear safety glasses, work gloves, and knee pads.
How to Fix Sinking or Uneven Pavers
This is the most common paver repair.
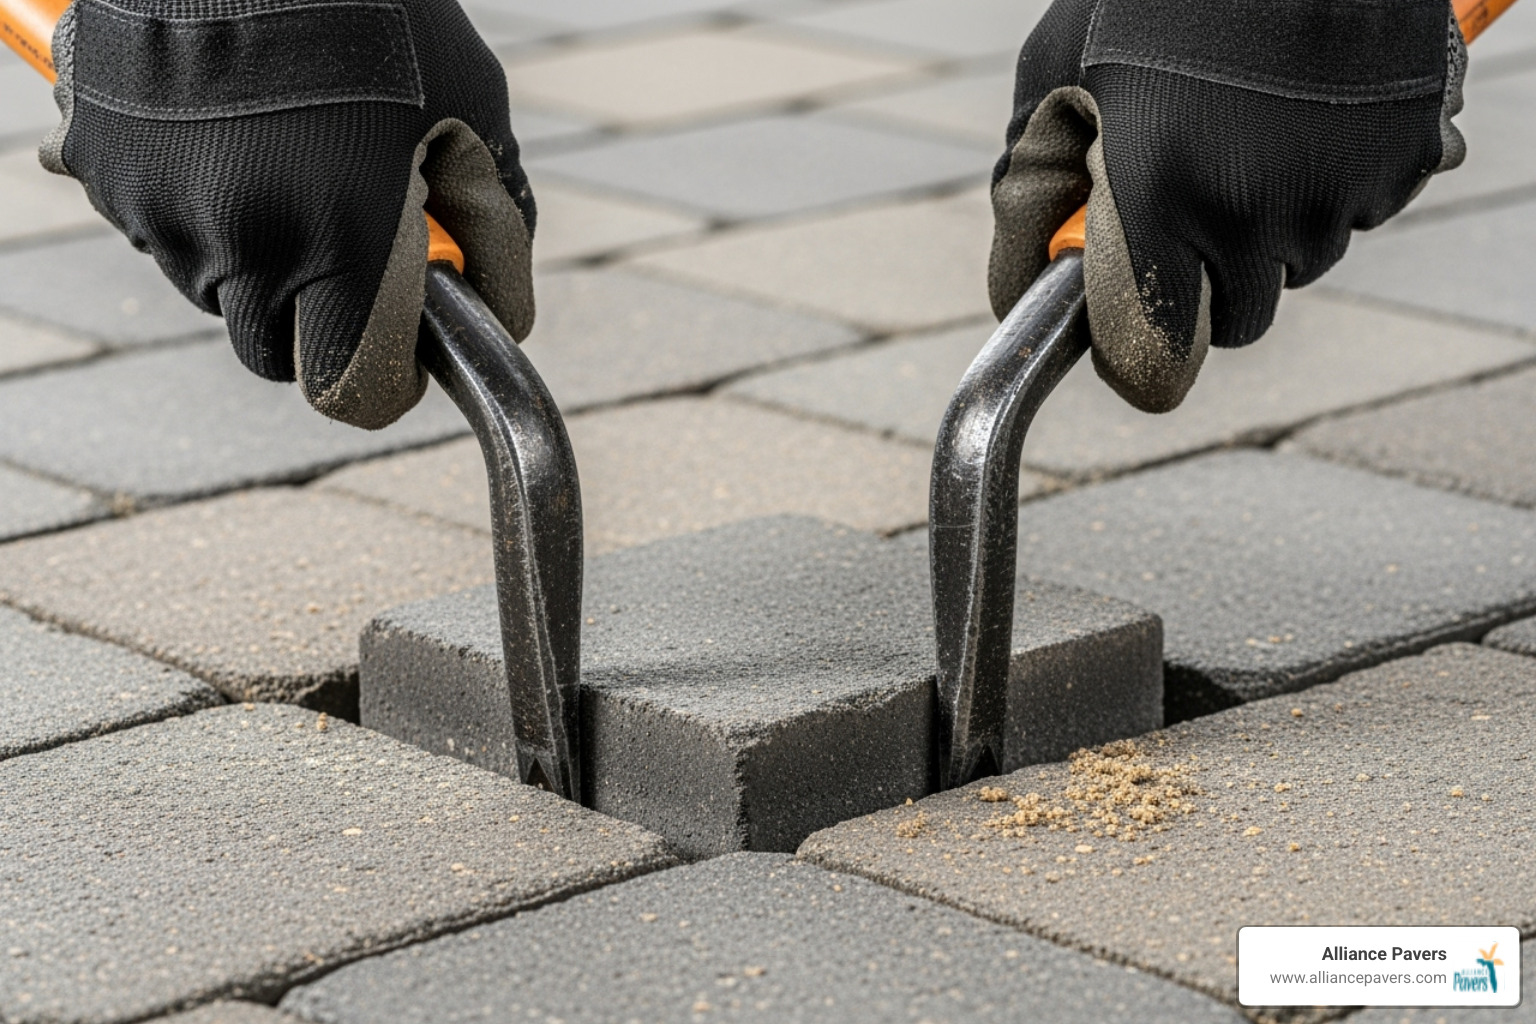
- Remove Pavers: Carefully lift the sunken pavers and those 12-16 inches around the affected area using pry bars. Number any custom-cut pieces so you can replace them correctly.
- Excavate the Base: Dig out the old bedding sand and compromised base material until you reach a firm, stable sub-base. The cause is often too much sand or poor compaction.
- Rebuild the Base: Add new roadbase gravel in 2-3 inch layers ("lifts"), compacting each one thoroughly with a hand tamper. This is critical to prevent future sinking.
- Add Bedding Sand: Following best practices for paver base preparation, spread a thin, 0.5-1 inch layer of concrete sand and screed it level, ensuring it slopes for drainage.
- Re-lay Pavers: Set the pavers back in place, using a rubber mallet to gently tap them level.
- Finish the Job: Compact the repaired area and sweep polymeric sand into the joints for a stable, long-lasting finish.
For detailed guidance on handling individual problem pavers, check out our guide on How to Fix a Loose Paver.
Repairing Crumbling Mortar Joints
Repairing joints on a wet-laid flagstone or brick patio requires precision.
- Remove Old Mortar: Use a cold chisel and sledgehammer (or an angle grinder for tough spots) to remove all loose and crumbling mortar down to a solid base.
- Clean Joints: Thoroughly brush out all dust and debris from the joints with a stiff nylon brush. A clean surface is essential for a strong bond.
- Mix New Mortar: Prepare a sand-topping mortar mix, preferably with an acrylic fortifier, to a peanut-butter consistency.
- Apply Mortar: Dampen the joints and stones with a sponge. Use a grout bag to force the mortar deep into the joints, filling them completely.
- Tool and Clean: After about an hour, once the mortar begins to set, use a pointing trowel to smooth and shape the joints. Immediately clean any excess mortar off the stone faces to prevent staining.
- Cure Properly: Keep the new mortar moist for several days by misting it or covering it with wet burlap. Avoid walking on the repaired area until it has fully cured.
The Role of Polymeric Sand in Modern Stone Patio Repair
Polymeric sand is a major upgrade from regular sand for paver joints. It contains polymers that harden when wet, creating a firm, flexible joint that locks pavers together. This provides superior weed prevention, insect resistance, and prevents sand from washing out in the rain.
For best results:
- Apply to Dry Surfaces: The pavers and joints must be completely dry.
- Sweep and Consolidate: Sweep the sand into the joints until they are full. Use a plate compactor to settle the sand, then sweep in more.
- Remove ALL Excess: Use a leaf blower at a low angle to remove every grain of sand from the paver surfaces to prevent a hazy residue.
- Water Carefully: Mist the area gently with a hose nozzle. Apply just enough water to saturate the joints without washing the sand out.
- Allow to Cure: Keep foot traffic off for 24 hours and protect from heavy rain as it cures.
For comprehensive guidance on keeping your patio in top condition, explore our Paver Patio Maintenance resource.
DIY vs. Professional Repair: When to Call the Experts
Deciding between a DIY stone patio repair and hiring a professional depends on the project's scale, your skill level, and the tools you have. While small fixes can be rewarding, tackling major structural issues without expertise can lead to bigger problems and safety hazards.
When a DIY Approach Is Feasible
Many smaller repairs are suitable for a DIY approach if you have the time and basic skills. These include:
- Minor Joint Refilling: Replacing washed-out sand or crumbling mortar in a small area.
- Replacing a Single Paver: Swapping out one or two cracked or damaged stones.
- Weed Removal and Prevention: Routine cleaning and applying polymeric sand.
- Minor Leveling: Lifting a single wobbly stone to add more bedding sand underneath.
Signs You Need to Hire a Professional
Some problems are too complex or large-scale for a DIY fix and require professional expertise to ensure safety and long-term results. Call a pro for:
- Widespread Sinking or Heaving: If large sections of the patio are uneven, it points to a systemic base failure that requires heavy equipment and knowledge of soil mechanics.
- Foundational Cracks: Cracks in a concrete base under flagstone indicate serious structural problems that need expert masonry repair.
- Major Drainage Failure: If water pools against your house or erodes the patio's edges, a professional is needed to re-grade the area or install a proper drainage system.
- Failing Retaining Walls: Leaning, bulging, or cracked retaining walls are a safety hazard and require immediate professional assessment.
- Large-Scale Repairs: Projects involving more than 20% of your patio are often too large and physically demanding for a homeowner.
Professionals have the specialized tools, experience, and understanding of proper base preparation to guarantee a repair that lasts. For complex stone patio repair needs in the Orlando area, our team at Alliance Pavers brings 25 years of experience to every project. We're here to help with professional solutions: Stone Patio Repair Orlando FL.
Frequently Asked Questions about Stone Patio Repair
Here are answers to some of the most common questions we hear about stone patio repair.
What is the most common reason stone patios sink?
By far, the most common reason is poor base preparation. A solid foundation is critical. Sinking usually results from:
- Insufficient Compaction: The original installer failed to properly compact the gravel base in layers, causing it to settle over time.
- Improper Base Material: Using too much bedding sand (more than the recommended 1 inch) creates an unstable layer that compresses and shifts.
- Poor Water Drainage: Water that doesn't drain away properly erodes the base material from underneath the pavers, creating voids and causing them to sink.
Can I just add more sand on top of my sunken pavers to level them?
No, this is a common mistake. Adding sand on top is a temporary, superficial fix that doesn't address the root cause—a failed base. The new sand will quickly wash away or settle, and you'll be back where you started, possibly with a worse problem. The only correct way is to lift the pavers, excavate the failed base, rebuild it properly, and then re-lay the pavers.
How do I prevent weeds from growing between my patio stones?
Preventing weeds is a multi-step process:
- Use Polymeric Sand: This is the most effective tool. It hardens to create a solid joint that blocks weed growth and resists insects and washout.
- Clean Regularly: Sweep away leaves and debris where weed seeds can germinate.
- Seal the Patio: Applying a quality sealer makes the surface less hospitable to weeds and easier to clean.
- Ensure Proper Drainage: Weeds and moss thrive in damp conditions. A well-drained patio stays drier and is less prone to growth.
Restore Your Patio's Beauty and Safety
Your patio should be an oasis for relaxing and entertaining, not an eyesore. When it's cracked, uneven, or overgrown with weeds, it's time for a change.
Restoring your patio's beauty creates an inviting backdrop for outdoor living. Ensuring safety is even more critical; repairing loose stones and uneven surfaces eliminates dangerous tripping hazards for your family and guests.
Proper stone patio repair also protects your long-term property value. A well-maintained outdoor space is a significant asset. Addressing small problems now prevents them from becoming larger, more expensive issues later. A single loose paver can lead to base erosion and widespread damage if ignored.
At Alliance Pavers, we understand how important your outdoor space is to you. As a family-owned company with 25 years of experience serving St. Cloud, FL, and the surrounding Orlando area, we've seen how the right repairs can completely transform a patio. We take pride in our craftsmanship and our commitment to delivering projects on time and on budget – because we know you want to get back to enjoying your outdoor space as quickly as possible.
Whether you're dealing with a few problem areas or need comprehensive restoration, we're here to help bring your patio back to life. Our expertise covers everything from simple paver resets to complex drainage solutions, always with an eye toward creating lasting results you can count on.
For expert paver repair services in the St. Cloud area, contact us today!