Solving Common Paver Installation Issues in Doctor Phillips
Solve common paver installation issues in Doctor Phillips with advice from Alliance Pavers. Learn fixes for settling, spacing, and surface imperfections.
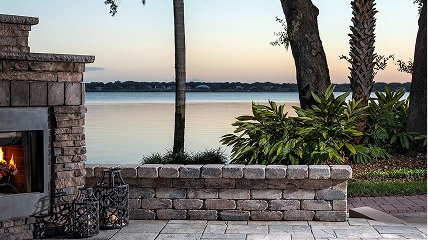
Pavers can take an average yard and turn it into something truly inviting. In Doctor Phillips, a smooth paver layout can do a lot more than just look good. It can define outdoor living spaces, create better walkways, or even boost a home's curb appeal. When the installation is done right, these upgrades feel lasting and solid. But when problems pop up, they’re not just cosmetic—they can affect how enjoyable and usable that space really is.
That’s why it helps to know what usually goes wrong and what to do about it. The goal isn’t just to catch problems after the fact but to prevent them during the planning and building stages. From sunken areas to stubborn weeds creeping between bricks, the more you understand these issues, the smoother your paver installation in Doctor Phillips will turn out.
Uneven Paver Placement
Uneven pavers are easy to spot and even easier to trip over. They’re one of the most common issues homeowners run into after an installation. The problem usually shows up a few weeks or months later, and it can make an otherwise beautiful outdoor area look messy. But the root cause is something that happens long before any stones are laid down—poor base preparation.
If the ground under the pavers isn't prepped right, the rest of the installation doesn’t stand much of a chance. In many cases, the installer may skip steps like properly compacting the soil or adding layers of crushed stone. This shortcut causes the pavers to sink or shift as time goes on. Florida’s frequent rain doesn’t help either, especially in Doctor Phillips, where soil can vary and water can settle in soft spots quickly.
Here’s how to cut down on the chances of uneven placement:
1. Grade the surface before laying any materials. A slight slope helps with water runoff.
2. Use a well-compacted base layer that includes gravel or crushed stone.
3. Don’t skip the sand bedding layer. It gives the pavers room to settle evenly.
4. Compact each layer before moving to the next step.
5. Install edge restraints to prevent pavers from spreading out over time.
When done right, proper base prep keeps everything tight and uniform, even after years of foot traffic and weather changes. Fixing uneven pavers afterward often means starting from scratch in affected spots—lifting stones, resetting the base, and re-compacting everything.
Avoiding Drainage Issues
Water can quietly undo an entire paver installation if it isn't handled the right way. Without the right setup for drainage, even a perfectly installed patio or walkway can turn into a problem area. You might notice puddles forming after it rains or find water making its way toward your home’s foundation. These signs usually mean the slope wasn’t done right or that better drainage should've been built into the design.
The soil in Doctor Phillips, along with plenty of afternoon rain during the warmer months, makes water management a must. Even the most level paver surfaces need help guiding water away.
To make drainage work with your paver plan, consider these tips:
1. Design a slight slope—usually about a 1-inch drop every 4 feet—so water drains away from buildings.
2. Add drains or channels between long stretches of pavers to give water somewhere to go.
3. Pick the right joint material. Permeable joint sands can let just enough water filter through without washing out.
4. Don’t allow landscaping to block water flow near paved areas.
5. Check that gutters and downspouts redirect water well away from the paved surface.
A real-life example? One homeowner in Doctor Phillips had a new paver driveway that looked great for a few months. But after every rainstorm, they noticed pooling at the bottom edge near the sidewalk. Turns out the slope wasn’t enough to carry water to the street. Fixing it meant adding a trench drain and re-leveling a portion of the drive—extra work that could’ve been avoided with a better plan upfront.
Letting water sit too long can also lead to algae, stains, or shifting pavers. Building with good drainage from the start really can make or break the lifespan of your space.
Preventing Weed and Ant Problems in Paver Joints
Even the nicest paver project can start looking rough if weeds start growing through the joints or ants decide to move in. These might seem like small problems, but they’re persistent and pretty frustrating once they take hold. In a warm, humid place like Doctor Phillips, these issues pop up often—especially in spots that get a mix of shade and moisture.
Weeds usually make their way through loose joints. If the sand between the pavers isn't compacted tightly or if there's a gap in sealing, seeds can settle in and sprout. As for ants, they love sand. It gives them the perfect place to build tunnels and colonies, right under your feet. Once they find a good spot, they’ll stick around and cause the sand to shift over time, which can lead to paver movement.
To steer clear of weed and ant issues:
1. Use polymeric sand between your pavers. It hardens after it's set with water and makes it harder for weeds and pests to settle in.
2. Seal the paver surface and joints. Sealing helps lock everything in and blocks out moisture—something ants and weed seeds are looking for.
3. Keep nearby plants trimmed and avoid overwatering. Too much moisture near pavers invites trouble.
4. Sweep regularly. Removing debris before it decays into the joints helps limit growth.
5. Refill or repair any missing or loose jointing sand.
An example? A property in Doctor Phillips had weeds take over a backyard paver patio. The original installer had used regular sand, didn’t seal anything, and small mounds marked where ants had kicked out the sand. Fixing it required replacing the joint sand with a better option and sealing the whole area. It took a weekend of work to get things back to looking neat again.
Keeping Pavers from Discoloring Over Time
Discoloration doesn’t mean the pavers are bad—it just means they’ve been exposed to the elements. In Doctor Phillips, the mix of hot sun, rain, and plant material can all leave stains or fade the color of pavers faster than expected. Whether it’s from mulch, standing water, rust from furniture legs, or tree sap, all of it adds up over time.
One of the biggest problems is sealing—or rather, not sealing. When pavers are left bare, they absorb water, dirt, and grime. Over time, that makes them look patchy or stained. Areas that get more shade may even start growing algae or mildew. Sun can bleach out color faster than you might expect too, especially on darker pavers.
To help keep your pavers looking clean and sharp:
1. Seal them after installation and re-seal every couple of years.
2. Use paver-safe cleaners when needed to remove stains without damaging the material.
3. Avoid using metal items that can rust directly on the pavers.
4. Place mats or sliders under furniture on patios or seating areas.
Routine maintenance should be part of the plan. A quick hose-down every so often, a light scrub when needed, and watching for problems early makes it a lot easier to keep the surface neat. Instead of waiting until stains really show, stay ahead with consistent care and good habits.
How to Make Your Outdoor Space Last
Pavers bring a lot of beauty to any outdoor space, but they don’t stay nice on their own—not without a little attention. From the very first planning stages through long-term care, it pays to spot the common mistakes before they lead to bigger issues. Uneven surfaces, poor drainage, pest problems, and fading color each tell a story of steps missed or shortcuts taken.
Taking time to get the foundation right, selecting the correct materials, and protecting what’s built can add years to the life of any paver area in Doctor Phillips. If a problem does come up, it’s usually best to deal with it sooner rather than later. Whether that means lifting a few pavers to redo a section or getting help with sealing, small repairs now can save a lot of hassle later.
Outdoor areas should be worth enjoying, not worrying about. By setting things up the right way and keeping up with simple maintenance, those patio, walkway, or driveway pavers will hold their beauty and function through the seasons—rain or shine.
Enhance your outdoor space with expert craftsmanship by choosing a trusted paver installation in Doctor Phillips from Alliance Pavers. For a quick estimate or to book a service visit, please contact us today.