7 Common Paver Problems and How to Fix Them Without Breaking a Sweat
Fix common paver problems and how to fix them: sinking, weeds, drainage, stains. DIY tips & pro advice for lasting patios.
Why Paver Problems Are More Common — and More Fixable — Than You Think
Understanding common paver problems and how to fix them can save you from costly repairs, safety hazards, and a backyard that looks worse every season. Whether you're dealing with sunken slabs after a rainy Florida summer, weeds pushing up through the joints, or edges that have slowly drifted out of place, these issues show up on patios, driveways, and pool decks more often than most homeowners expect.
Here's a quick look at the 7 most common paver problems and how to fix each one:
| Problem | Most Likely Cause | Best Fix |
|---|---|---|
| Sinking or uneven pavers | Weak or poorly compacted base | Remove, recompact base, reset pavers |
| Loose or shifting pavers | Worn joint sand, no edge restraint | Refill joints with polymeric sand, reinforce edges |
| Cracked pavers | Heavy loads, ground movement | Replace individual units, check base integrity |
| Water pooling | Inadequate slope or drainage | Regrade surface, add French or channel drain |
| Weed growth | Missing or eroded joint sand | Pull weeds, apply polymeric sand, seal surface |
| Edge restraint failure | Missing or undersized edging | Reinstall with 10-inch spikes every 12 inches |
| Staining, fading, or discoloration | UV exposure, spills, moss, efflorescence | Clean with appropriate product, reseal every 3–5 years |
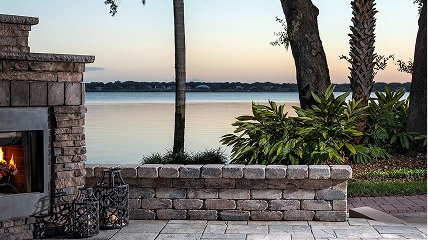
The good news? Most of these problems are very fixable — and many can be prevented altogether with the right habits. Pavers are one of the few outdoor surfaces where you can replace just the damaged pieces instead of tearing everything out. Concrete pavers can last 25 to 50 years, brick pavers 20 to 30 years, and natural stone can exceed 50 years — but only when they're properly installed and maintained.
This guide walks you through each problem clearly, so you know exactly what's happening under your feet and what to do about it.

Common paver problems and how to fix them: what usually goes wrong first
Most paver trouble starts small. A little wobble here, a puddle there, one weed that turns into a tiny jungle by next month. The most common issues homeowners run into are:
- Sinking pavers
- Loose or shifting joints
- Water pooling
- Weed and moss growth
- Cracked or chipped pavers
- Failing edges
- Stains, fading, and white haze
If caught early, these are usually straightforward repairs. If ignored, they can spread into larger problems involving drainage, base failure, and trip hazards.
Signs your pavers need attention before damage spreads
Watch for these early warning signs:
- Low spots that feel soft underfoot
- Puddles that stay long after rain
- Rocking or loose pavers
- Missing joint sand
- Borders that appear to spread outward
- White haze on the surface
- Areas lifted by nearby roots
These signs often point to a deeper issue below the surface. If you spot them in spring, fall, or after heavy storms, you can often fix the problem before it turns into a bigger rebuild.
Why base prep and drainage cause most long-term failures
In our experience, the base is where most long-term paver failures begin. If the groundwork is weak, the finished surface will eventually show it.
A standard paver patio usually needs 6 to 12 inches of excavation, depending on soil conditions and whether the area is for walking, entertaining, or vehicle traffic. That excavation should be followed by compacted crushed stone, installed in layers rather than dumped in all at once. Compacting in roughly 2-inch lifts helps create a stable foundation.
A proper system also includes:
- Crushed stone base, not dirt, sand alone, or pea gravel
- A thin bedding sand layer for setting the pavers
- Geotextile fabric where needed over weak soil
- A slope of at least 1/8 inch per foot, or about 1% to 2%, away from the home
- Strong edge restraints to hold the field of pavers in place
When any of those pieces are missing, you can end up with settling, washout, shifting, and drainage headaches. In short: pretty surface, unhappy foundation.
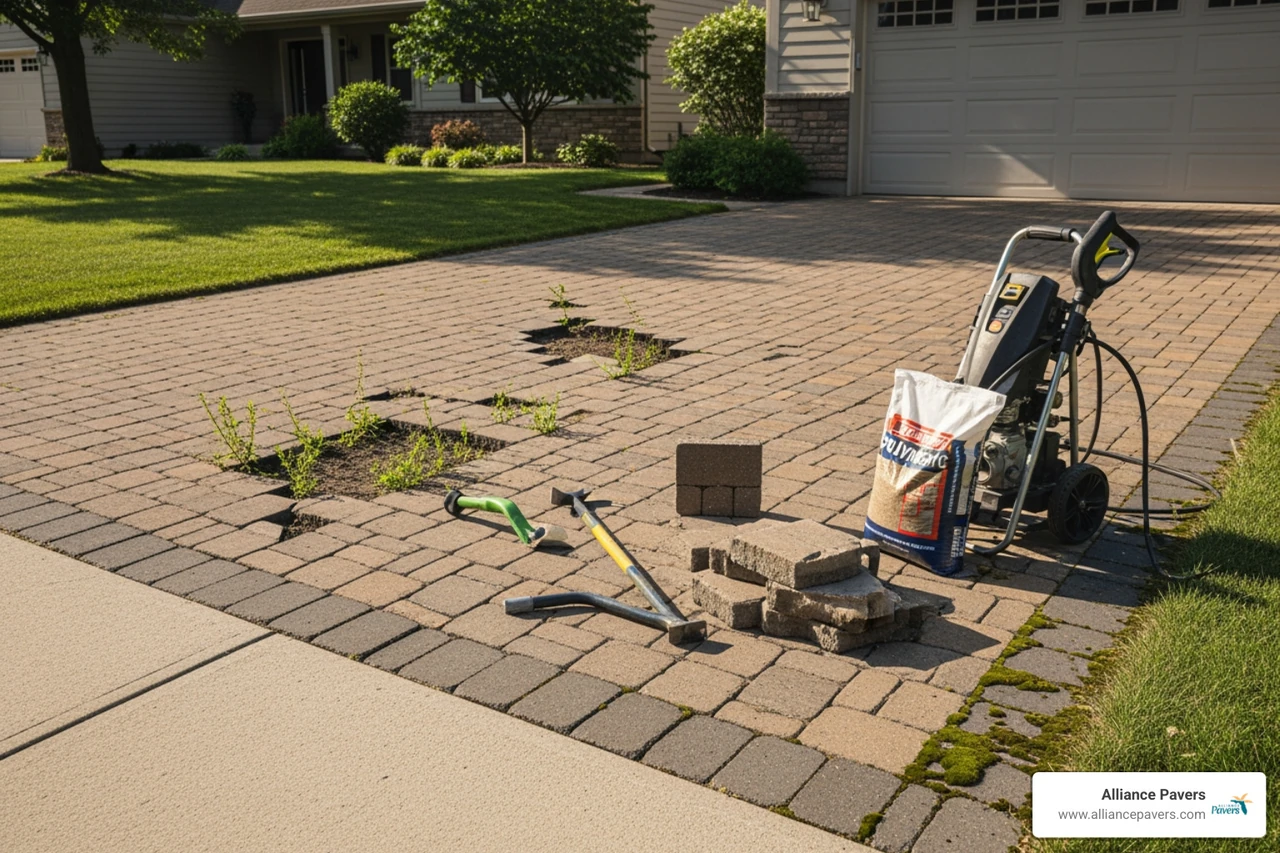
How to fix sunken, uneven, loose, or shifting pavers

Sunken or loose pavers are among the most common repairs we see across patios, walkways, and driveways. The nice part is that pavers are modular, so the damaged area can usually be repaired without replacing the whole surface. For more repair guidance, see Patio Paver Repair, How To Repair Paver Stone Patio, and Repair Paving.
Common paver problems and how to fix them when pavers sink or create trip hazards
Pavers usually sink because the base underneath settled, eroded, or was never compacted enough in the first place. Water often makes the problem worse by washing out bedding sand or weakening the soil below.
To fix a sunken area:
- Remove the affected pavers carefully so they can be reused.
- Inspect the bedding layer and base below.
- Remove any loose or washed-out material.
- Add the proper gravel base if needed.
- Compact the base thoroughly.
- Screed a fresh, even layer of bedding sand.
- Reset the pavers to match the surrounding height.
- Compact the surface and refill the joints.
If the low spot keeps coming back, that usually means the issue is deeper than the bedding sand. The base or drainage path likely needs correction too.
How to repair loose, shifting, or cracked pavers the right way
Loose pavers often rock because the joint sand between them has worn away. That sand is what helps the pavers lock together. Once it disappears, the interlock weakens and movement starts.
For minor movement:
- Lift the loose paver
- Add or adjust bedding sand below
- Reset the paver
- Sweep polymeric sand into the joints
- Compact lightly so the joints fill properly
For shifting along the edges, check the border restraint. If the edge is failing, the field pavers can slowly creep outward.
For cracked pavers:
- Remove the damaged unit
- Inspect the base below
- Replace it with a matching paver
- Refill and compact the joints
Because individual replacement is so common, it helps to keep extra pavers from the original installation. A good rule is to order 5% to 10% more pavers than the measured area for cuts, breakage, and future repairs. If you need more guidance on material-specific fixes, Stone Patio Repair is a helpful resource.
How poor drainage, edge restraint failure, and tree roots damage pavers
Not every paver problem starts at the surface. Sometimes the real trouble is water moving where it should not, edging that no longer holds, or roots pushing up from below. These are all classic signs of installation or site-condition issues. For a deeper look at preventable mistakes, visit Common Paver Installation Mistakes Homeowners Make.
Common paver problems and how to fix them caused by water pooling
Pooling water is more than an eyesore. It can erode joint sand, weaken the base, encourage weeds, and create slippery spots. Around a home, poor drainage can also direct runoff toward the structure instead of away from it.
Common causes include:
- Surface slope that is too flat
- Downspouts dumping water onto the pavers
- Low spots in the yard
- Heavy runoff during storms
- Inadequate subsurface drainage
The fix depends on the cause, but common solutions include:
- Regrading the paver area
- Rebuilding sections to restore a 1% to 2% slope
- Extending downspouts away from the patio or driveway
- Installing a French drain or channel drain
- Using permeable pavers in areas with chronic runoff
If puddles remain for hours after rain, do not assume it will fix itself. Water is patient. It always wins eventually.
Why edge restraints fail and how to reinforce them
Edge restraints keep pavers from spreading sideways. When they fail, the whole system can start to loosen. You may notice borders separating, curves flattening out, or outside rows drifting out of line.
A proper edge restraint repair may involve:
- Removing the outer paver rows
- Resetting the border on a stable base
- Installing high-quality plastic, metal, or concrete edge restraint
- Securing it with 10-inch spikes every 12 inches
- Reinstalling the border and refilling joints
A strong edge is not just for looks. It is what keeps the paver field locked tight under foot traffic, patio furniture, and vehicle loads.
What to do when tree roots lift or separate pavers
Tree roots are sneaky. They can travel up to three times the canopy spread, which means the roots causing the problem may start much farther away than homeowners expect.
When roots lift pavers, the right fix depends on how severe the growth is:
- For minor lift, remove the affected pavers and evaluate the root pattern
- For manageable roots, selective pruning may be possible
- For major roots near a valuable tree, consult an arborist before cutting
- Rebuild the section with adjusted base depth or a flexible reset
- In some cases, redesigning or relocating part of the paver area is the smartest long-term fix
Never aggressively cut large structural roots without guidance. Saving the patio is good. Saving the patio and the tree is better.
How to stop weeds, moss, stains, fading, and discoloration on pavers
Surface problems may look cosmetic, but many of them affect safety and stability too. Weeds can widen joints, moss can make surfaces slippery, and stains can bake into porous materials if left too long. For more upkeep tips, see Paver Patio Maintenance and Pool Deck Paver Repair Complete Guide.
Why weeds grow between pavers and how to prevent them
Weeds usually do not grow because pavers are "bad." They grow because joints lose sand, moisture collects, and windblown seeds find a place to settle.
To prevent and remove weeds:
- Pull existing weeds by the root
- Clean out the joints
- Refill with polymeric sand
- Activate the sand properly per product directions
- Keep the surface swept clean
- Seal the pavers if appropriate
Polymeric sand is especially helpful because it hardens when activated with water, helping block seed entry and reduce movement. In new builds or major rebuilds, geotextile fabric under the base can also help reduce weed intrusion from below.
Moss is similar. It tends to thrive in shady, damp areas. Remove it physically with a stiff brush, then use a paver-safe cleaner if needed. If the area stays wet, address the moisture source too, or the moss will simply RSVP for another visit.
How to clean common stains and surface discoloration without damaging pavers
Different stains need different cleaning methods. Start gentle before moving to stronger products.
Common surface issues include:
- Oil spots on driveways
- Rust marks from furniture or metal décor
- Leaf and organic stains
- Chlorine-related discoloration around pool decks
- White haze or efflorescence
- UV fading over time
Safe cleaning tips:
- Blot fresh oil with absorbent material first
- Use a degreaser made for pavers on oil stains
- Clean general dirt with mild detergent and water
- Scrub with a soft to medium brush, not a wire brush
- Use caution with pressure washing so you do not blast out the joint sand
- For white haze, identify whether it is efflorescence or sealer residue before treating
Efflorescence is that chalky white film sometimes seen on concrete products. It is usually mineral salts rising to the surface and is often more of a cosmetic issue than a structural one. It can often be reduced with the right cleaner and time, but harsh acids should be used carefully and only when appropriate for the material.
How sealing and routine upkeep extend paver life
Routine maintenance goes a long way toward helping pavers reach their expected lifespan. A simple upkeep plan includes:
- Sweeping debris regularly
- Rinsing off dirt and spills
- Checking for weed growth
- Replenishing joint sand when needed
- Inspecting edges and low spots twice a year
- Resealing every 3 to 5 years
Sealer helps protect color, improve stain resistance, and reduce joint sand loss. It is not magic in a can, but it is a very useful layer of defense.
DIY paver repairs vs hiring a professional
Some repairs are very DIY-friendly. Others look simple until half the patio is stacked on your lawn and you are suddenly in a very committed relationship with a plate compactor.
Helpful reading if you are weighing your options: Patio Repairs Near Me, Brick Paver Repair Cost, and Patio Paver Repair Experts In Clermont Fl.
Repairs most homeowners can handle confidently
Many homeowners can take care of small, isolated issues such as:
- One loose paver
- Light weed removal
- Spot joint-sand refill
- Minor stain cleaning
- Small touch-up resealing jobs
These projects usually stay manageable as long as the underlying base is still sound.
When professional repair is the smarter move
We recommend professional help when you are dealing with:
- Large sunken or uneven sections
- Recurring puddles after rain
- Driveway pavers shifting under vehicle loads
- Widespread edge failure
- Root-related lifting
- Drainage redesign
- Base reconstruction
At that point, the repair is less about swapping pavers and more about correcting the system underneath. With 25 years of experience serving homeowners across Central Florida, we know how to diagnose whether the problem is cosmetic, structural, or both. Our goal at Alliance Pavers is to make repairs stress-free, on time, and built to last.
Frequently Asked Questions about common paver problems and how to fix them
How often should pavers be inspected and maintained?
A good rule is to inspect pavers at least twice a year, usually in spring and fall, plus after major storms. Look for:
- Sand loss in joints
- New low spots
- Standing water
- Weed or moss growth
- Loose edges
- Surface stains
Staying ahead of those issues is much easier than waiting until the patio starts feeling like a tiny obstacle course.
What are the clearest signs of poor paver installation?
The biggest red flags include:
- Shallow excavation
- Soft or under-compacted base
- No visible drainage slope
- Weak or missing edge restraint
- Uneven pattern lines
- Fast-developing dips and movement
- Patchy color from poor pallet staging
Most failing paver systems do not fail because pavers are inherently weak. They fail because the base, drainage, or edge support was not built correctly from the beginning.
How long can pavers last with proper care?
With solid installation and regular maintenance, pavers can last a very long time:
- Concrete pavers: 25 to 50 years
- Brick pavers: 20 to 30 years
- Natural stone: 50+ years
That is one of the biggest reasons homeowners continue to choose them for patios, pool decks, walkways, and driveways.
Conclusion
Most paver issues are not random. They usually trace back to one of a few familiar causes: weak base prep, poor drainage, joint sand loss, failing edges, or simple wear over time. The upside is that once you understand common paver problems and how to fix them, you can respond early, repair the right way, and avoid bigger headaches later.
The best long-term strategy is simple:
- Inspect in spring and fall
- Keep joints filled
- Clean stains early
- Watch drainage after storms
- Reseal every few years
- Fix small movement before it spreads
If your patio, driveway, pool deck, or walkway is starting to sink, shift, stain, or sprout more weeds than your garden bed, we can help. For more information about repair and installation solutions, visit More info about paver services.