Seat Walls: From Foundation to Finish, Your DIY Installation Handbook
Master Seating Walls Installation! Our DIY guide covers planning, building, and maintaining your perfect outdoor living space.
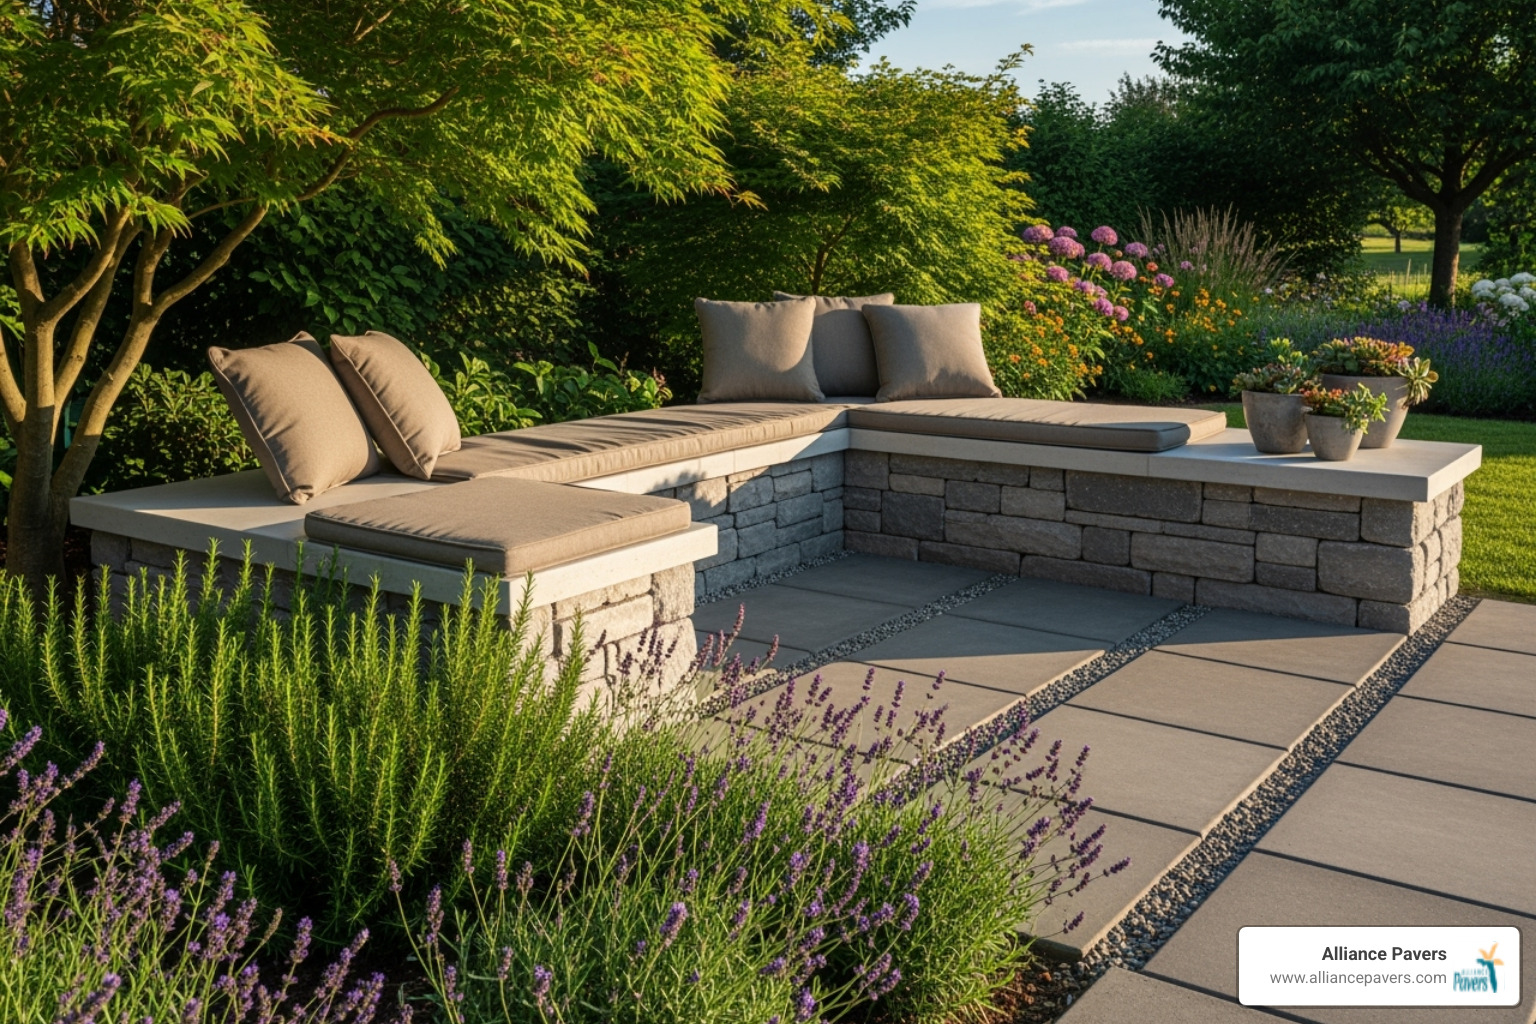
The Art and Function of Seating Walls
Seating Walls Installation transforms any outdoor space into a functional entertainment area that combines beauty with practicality. These low-profile walls serve dual purposes - providing comfortable seating while defining separate areas in your yard or patio.
Quick Installation Overview:
- Foundation: Dig 6-inch deep trench, add compacted base material
- Building: Layer paver blocks with staggered joints using construction adhesive
- Finishing: Cap with comfortable seating stones, allow 24-hour cure time
- Timeline: Most DIY projects complete in 1-2 weekends
According to the American Society of Landscape Architects, built-in seating has consistently ranked among the top 10 trends in outdoor living design. This popularity stems from seating walls offering permanent solutions that outlast traditional outdoor furniture exposed to weather elements.
Seating walls typically stand 18-24 inches high with cap widths of 12-18 inches for comfortable seating. They work perfectly around fire pits, as borders for patios, or as attractive alternatives to retaining walls on sloped properties.
The benefits extend beyond just extra seating. These walls can:
- Define outdoor rooms and separate dining areas from conversation spaces
- Add elevation changes to flat yards for visual interest
- Increase property value through improved outdoor living functionality
- Accommodate large gatherings without dragging chairs around
Whether you're hosting backyard barbecues or creating a cozy fire pit area, seating walls provide that permanent foundation for outdoor memories.

Planning Your Perfect Seating Wall
A successful Seating Walls Installation starts with careful planning, laying the groundwork for years of outdoor enjoyment.
Location is everything. You want to capture perfect sunset views while staying close to your kitchen for easy entertaining. Consider the sun's path across your yard—no one wants to sit on scorching stones in the afternoon. The sweet spot is usually near existing gathering areas like your patio or deck, where the wall can naturally extend your living space. A well-placed seating wall guides foot traffic and creates natural conversation areas that feel both intimate and welcoming.
Design considerations open up a world of possibilities. Your seating wall can be the sturdy, reliable type that anchors a fire pit area, or the neat curved variety that softly defines garden spaces. These versatile walls work equally well in modern minimalist yards and cozy cottage gardens.
Material selection shapes both the look and lifespan of your project. While we specialize in paver installations and have seen their incredible durability firsthand, each material brings its own character to your outdoor space.
Don't forget to gather your tools and equipment early. Having everything ready—from shovels and levels to tampers and potentially a stone saw—keeps your project moving smoothly once you start building.
Material TypeDurability & LongevityDIY-FriendlinessAesthetic AppealPaversHighly durable, withstands weather and heavy use; long lifespan.Moderate to High; many interlocking systems are designed for DIY.Highly customizable with endless options for colors, textures, and patterns. Can be modern, classic, or rustic.Natural StoneVery strong and durable; excellent longevity.Moderate to Low; requires more skill and precise placement.Understated elegance, unique tones, shapes, and sizes for a more organic, contemporary, or rustic look.Concrete BlocksDurable and robust; can last a very long time with proper maintenance.High; readily available in various sizes and shapes, good for curves.Versatile, can be faced with veneer or stucco for different finishes, often used as a base for other materials.
Key Design Factors for Your Seating Walls Installation
Getting the dimensions right makes the difference between a seating wall people love and one that becomes an expensive planter. Height and width aren't just numbers—they're the foundation of comfort.
The 18 to 24-inch height range works perfectly for most adults. You can sit down easily without feeling like you're perching on a bar stool or sinking into a low couch. For the capstones where you'll actually sit, 12 to 18 inches wide gives you enough room to sit comfortably without feeling like you're balancing on a ledge.
Ergonomics matter more than you might think. Sharp edges on caps can be uncomfortable. A quick pass with a grinder to soften those edges makes a world of difference. If you have young children, consider creating a lower section—around 10 to 12 inches for toddlers or 15 to 18 inches for tweens.
The shape of your sitting wall dramatically impacts both function and feel. Straight walls create clean boundaries and work beautifully along patios or property lines. They're also easier to build if you're new to hardscaping.
Curved walls bring a softer, more organic feel to your space. They're perfect for wrapping around fire pits or creating cozy nooks in larger yards. Many pavers come in trapezoidal shapes specifically designed to make smooth curves achievable for DIY builders.
Before breaking ground, always check local regulations. Most communities don't require permits for low seating walls, but rules change when walls get taller or serve as retaining structures. A quick call to your local building department can save headaches later.
Integrating Your Wall with Other Landscape Features
The real magic happens when your seating wall connects with and improves other elements in your yard.
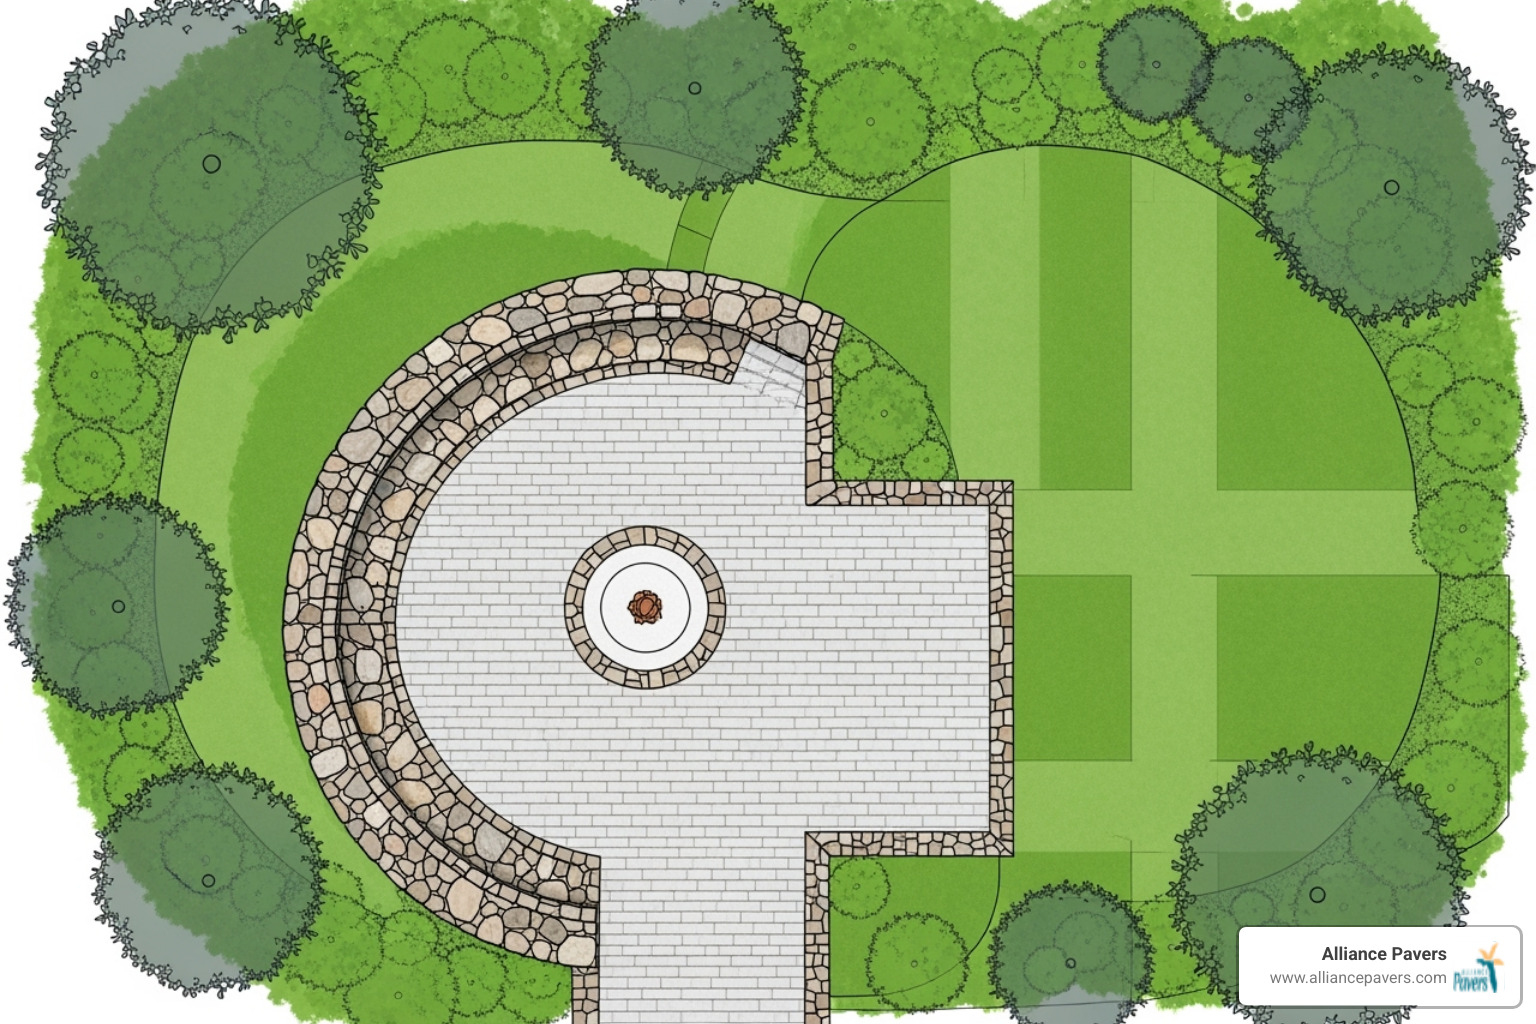
Patios and seating walls are natural partners. An L-shaped wall along one edge of your patio creates defined seating without the clutter of dragging chairs around, changing a simple paved area into an inviting outdoor room.
Fire pits practically beg for seating walls. A curved wall around your fire feature provides permanent seating that won't blow away or need winter storage. The wall also helps reflect heat, making cool evening gatherings even cozier.
Retaining walls offer double duty when designed as seating walls. On sloped properties, you can control soil erosion while creating comfortable seating, turning a structural necessity into a beautiful, functional feature.
Adding built-in planters to your seating walls softens the hardscape with greenery. A raised planter section breaks up long wall runs and gives you a spot for seasonal flowers or herbs.
Water features in your seating wall design create something truly special. A small fountain or waterfall integrated into one end adds the soothing sound of moving water to your space.
Popular integration ideas include fire pit surrounds for cozy gatherings, patio borders that define outdoor rooms, retaining wall combinations on sloped lots, planter integrations for added greenery, entry flanking for grand entrances, outdoor kitchen adjacency for convenient dining, room separation in larger yards, and lighting incorporation for evening ambiance and safety.
Step-by-Step Seating Walls Installation Guide
Ready to roll up your sleeves? The actual Seating Walls Installation process is surprisingly straightforward when you break it down into manageable steps. While it might look intimidating at first glance, thousands of homeowners have successfully built their own seating walls with just basic tools and a weekend's worth of effort.
The key to success lies in taking your time with each phase. Think of it like baking a cake – each layer depends on the one below it being just right. Rush the foundation, and you'll regret it when your beautiful wall starts settling unevenly six months later.
We'll walk through the entire process, from that first shovelful of dirt to sitting back with a cold drink on your finished wall. The whole project typically takes a determined DIYer about two weekends, though weather and soil conditions can affect your timeline.
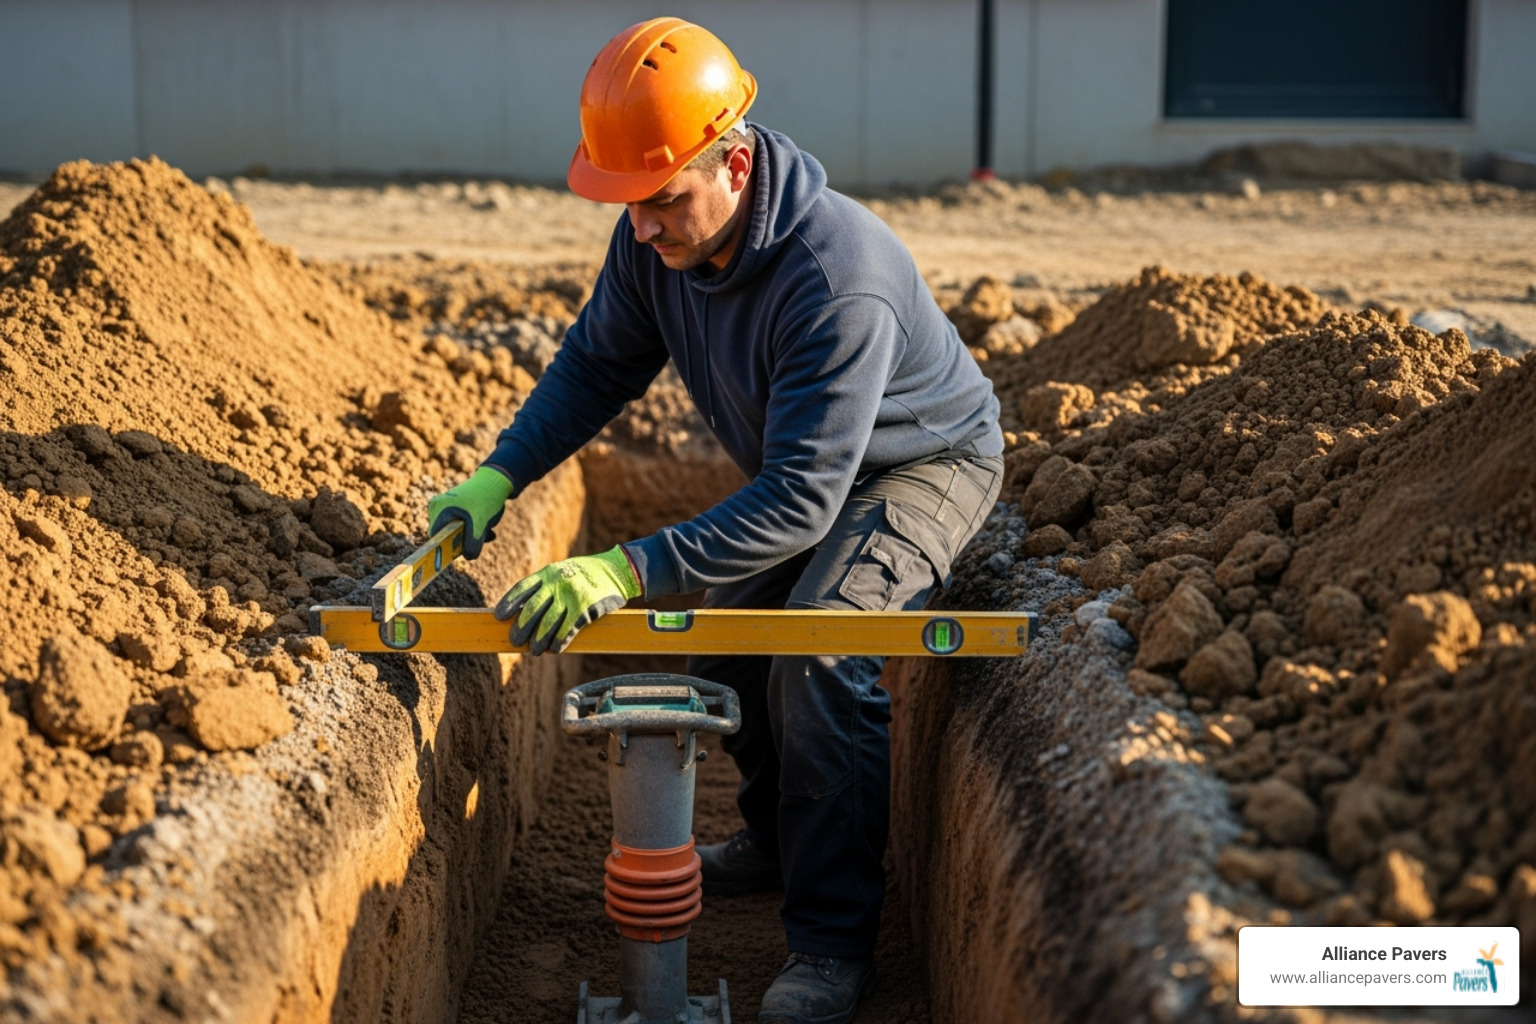
Step 1: Preparing the Foundation
Your seating wall is only as good as what's underneath it. This foundation work might not be glamorous, but it's absolutely critical for a wall that will stay level and stable for decades to come.
Start by marking the layout with spray paint or chalk. For straight walls, stretch a string line between stakes at each end. For curves, use a garden hose to visualize the shape, then mark it permanently. Take a step back and walk around your marked area – this is your last chance to make changes before you start digging!
Time to dig out a shallow and even trench. You'll want to go at least 6 inches deep, following your marked lines precisely. The trench should be about 2 inches wider than your blocks on each side. Keep the bottom as level as possible – a few minutes with a level now saves hours of frustration later. You can find helpful techniques for how to dig out a shallow and even trench if you need more detailed guidance.
The trench depth matters more than you might think. In colder climates, you may need to go deeper to get below the frost line. When in doubt, call your local building department – they'll know the requirements for your area.
Next comes compacting paver base material. Add your crushed stone base in 2-3 inch lifts, tamping each layer thoroughly. This isn't the time to rush – properly compacted base material prevents settling and keeps your wall straight. A hand tamper works fine for smaller walls, but consider renting a plate compactor for longer projects.
Finally, add and level your sand layer – about an inch of coarse sand or stone dust creates the perfect bed for your first course of blocks. Use a screed board (a straight 2x4 works great) to level this layer perfectly. Your blocks will thank you for this extra attention to detail.
Step 2: Laying the Paver Courses
Now for the fun part – watching your wall rise from the ground! This is where your careful foundation work pays off, making each course easier to install.
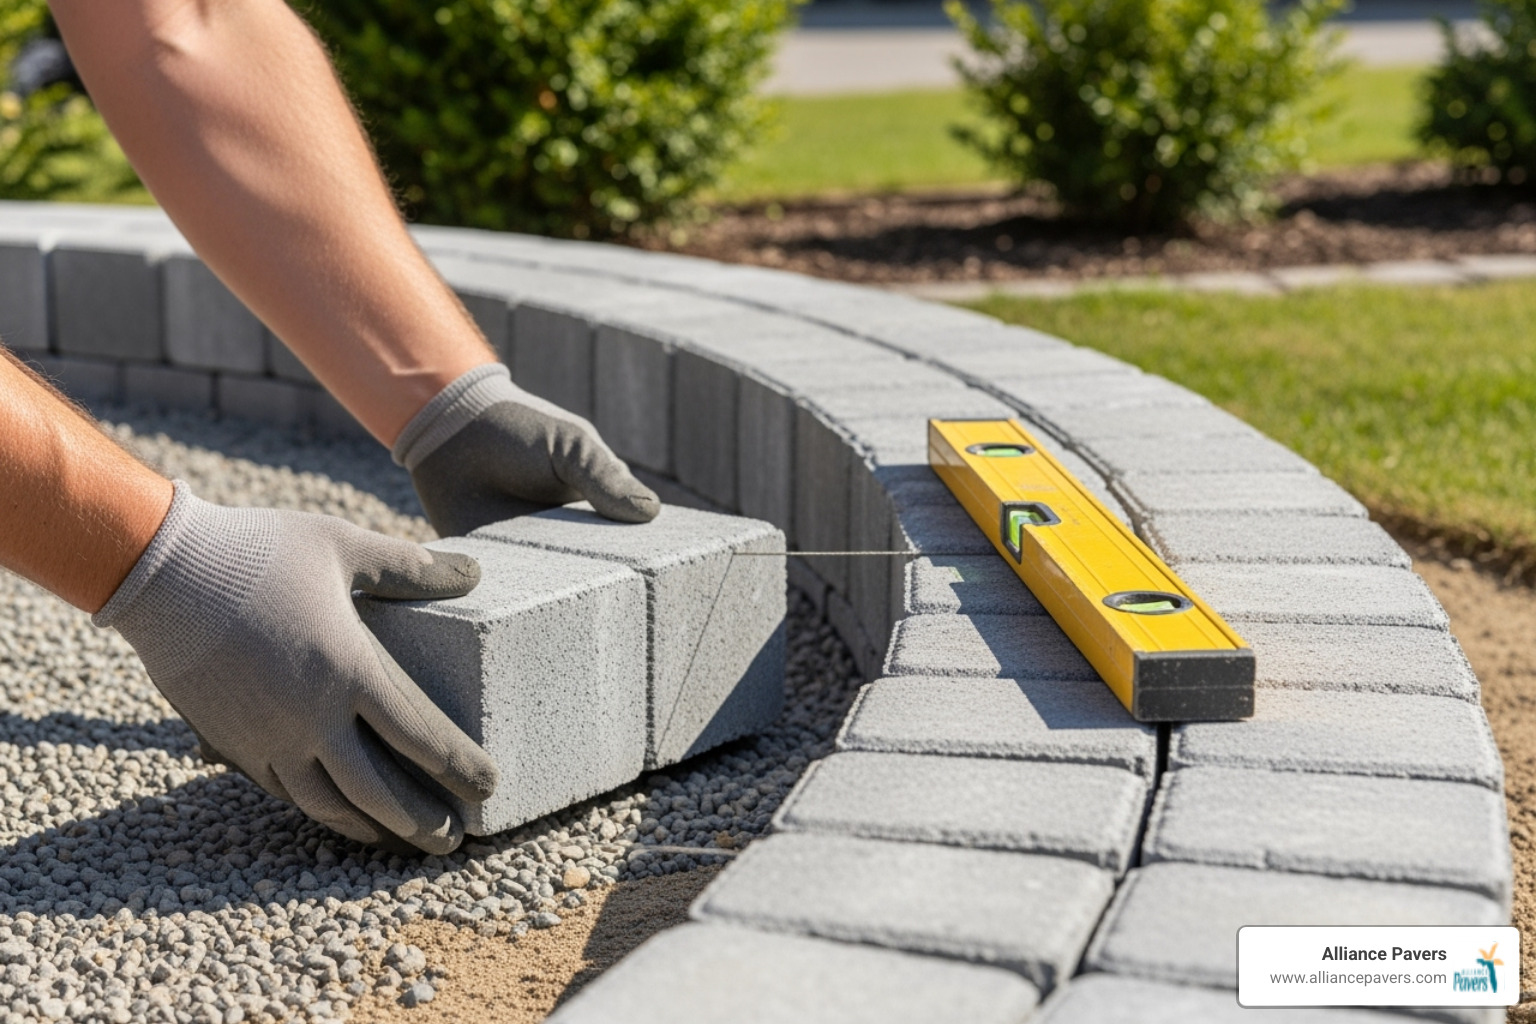
First course installation sets the stage for everything above it. Place each block carefully on your leveled sand, checking both directions with your level. A gentle tap with a rubber mallet helps seat each block, but avoid hammering – you're not trying to drive nails here! If a block sits too high, remove it and scrape away a bit of sand rather than forcing it down.
Staggering joints between courses creates the structural strength that makes your wall solid. Think of it like laying bricks in a classic brick wall – each joint should fall at the center of the block below it. Most wall systems are designed to make this easy, often requiring you to start alternating courses with a half-block.
Using construction adhesive transforms your stack of blocks into a single, solid structure. Apply a wavy bead along the top of each course before adding the next layer. Don't go overboard – you want enough to create a bond without squeezing out excessively when you set the next block.
As you're building subsequent layers, step back occasionally to check your progress. Is the wall staying plumb? Are your courses staying level? Small adjustments are easy to make as you go, but become major headaches if you wait until the wall is finished.
Remember to check for level after each course. A 4-foot level gives you a good read on longer walls, while a 2-footer works well for shorter sections. Your wall should be perfectly vertical – any lean will only get worse as you build higher.
Step 3: Capping and Finishing Touches for Your Seating Walls Installation
The home stretch! Your capstones transform a simple retaining wall into comfortable seating, so this step deserves special attention to both function and beauty.
Choosing capstones involves balancing comfort with aesthetics. Wider caps provide more seating space, while bullnose edges feel more comfortable against your legs. Many homeowners choose caps that complement their existing patio or walkway materials for a cohesive look throughout their landscape.
Applying adhesive for the capstones requires a more generous application than you used between courses. These stones will bear the most weight and stress, so don't skimp on the construction adhesive. Apply it in a zigzag pattern across the entire top surface of your wall.
Setting the capstones is your moment to shine. Position each stone carefully – you get one shot at this, as the adhesive grabs quickly. For wider seating surfaces, consider orienting the caps perpendicular to the wall direction. This creates a nice overhang that feels more like a proper bench.
Allow proper curing time before using your new seating wall. We know it's tempting to immediately test your handiwork, but 24-48 hours of patience ensures your adhesive reaches full strength. Use this time to complete your backfilling around the base and clean up your work area.
Consider adding built-in lighting for seating walls to extend your enjoyment into the evening hours. Low-voltage LED strips tucked under the capstone overhang create beautiful ambient lighting that's both functional and atmospheric. Solar options are available if running electrical lines seems too complicated for your DIY comfort level.
Your finished seating wall should feel solid, look level, and invite people to sit and stay awhile. If you've followed these steps carefully, you've created a feature that will serve your family for decades to come.
Seating Wall Maintenance and Longevity
Once your beautiful new seating wall is installed, you'll want to ensure it stands the test of time and continues to improve your outdoor space for years to come. The good news is that seating walls, especially those built with pavers, are relatively low-maintenance. However, a little routine care goes a long way in preserving their beauty and structural integrity.
Routine cleaning is your first line of defense. Regularly clear away leaves, dirt, and any other debris that might accumulate on and around your wall. A simple sweep or a quick rinse with a garden hose is often all it takes. This prevents organic matter from breaking down and potentially staining the wall, and also helps prevent water from pooling in unwanted areas.
Sealing the wall is a crucial step for longevity. We recommend resealing your seating wall every few years with a water-resistant sealer. This protective barrier helps guard against moisture penetration, staining, and the damaging effects of the elements, keeping your wall looking vibrant and new. The frequency depends on the type of sealer you choose and your local climate, but a periodic reapplication is a wise investment.
For any accidental spills or stubborn marks, addressing stain removal promptly is key. Depending on the type of paver or stone, specific cleaning solutions might be recommended. Always test a small, inconspicuous area first to ensure the cleaner won't damage the material.
While your wall is built to last, minor wear and tear can occur. For minor crack repair, a concrete repair mortar can often be used to fill small cracks or chips, preventing them from worsening. However, for larger damage or signs of structural compromise, it’s always best to consult with a professional.
Finally, conduct a seasonal inspection. Take a walk around your seating wall a couple of times a year, perhaps in spring and fall. Look for any signs of structural damage such as bulging, cracking, or crumbling. Check for loose capstones or shifting blocks. Addressing these issues promptly can prevent them from escalating into more significant and costly problems down the line. With proper maintenance, your seating wall will remain a beautiful, functional centerpiece of your outdoor living area for a very long time.
Frequently Asked Questions about Seating Wall Installation
When homeowners start dreaming about their perfect outdoor space, questions naturally bubble up. After 25 years of helping families in Central Florida create beautiful hardscaping features, we've heard just about every question you can imagine about Seating Walls Installation. Let's tackle the most common ones together.
How high should a seating wall be for comfort?
Getting the height just right makes all the difference between a wall that becomes everyone's favorite spot and one that sits empty. The ideal height for comfortable adult seating falls between 18 to 24 inches. In our experience, most families find that sweet spot right around 18 inches – it's easy to sit down, easy to stand up, and feels natural for conversation.
But height is only part of the comfort equation. The capstone width – that's the top surface where you'll actually sit – should be between 12 to 18 inches wide. Think of it like this: too narrow feels like perching on a fence rail, while too wide makes you feel like you're sitting on a coffee table. We want that "just right" feeling.
Here's a little insider tip from our years of building these walls: comfort considerations go beyond just the numbers. If you're planning to add outdoor cushions, factor that extra height in. Sharp edges on capstones can be uncomfortable, so we often recommend slightly rounded edges. And if you have little ones running around, consider creating a lower section of your wall – maybe 10 to 12 inches for toddlers or 15 to 18 inches for older kids. It creates natural family gathering spots where everyone can sit comfortably together.
Do I need a permit to build a seating wall?
Ah, the permit question – probably the one that makes most DIY enthusiasts pause and scratch their heads. The honest answer? It depends on what your wall is actually doing and where you live.
Most local building codes are pretty reasonable about simple seating walls. If you're building a straightforward wall that's just for sitting – not holding back soil or exceeding certain height restrictions – many communities don't require permits. The key word here is "simple."
Things change when your seating wall pulls double duty as a retaining wall function. If it's holding back soil on a slope, even a little bit, most municipalities want to make sure it's built to handle that pressure safely. That usually means a permit and sometimes an engineer's stamp.
Our advice? Checking with your municipality is always worth a quick phone call or website visit. Every city and county has slightly different rules, and what flies in one neighborhood might need approval in another. The building department folks are usually pretty helpful – they'd much rather answer your questions upfront than deal with problems later. Trust us, it's much easier to get the right paperwork before you start digging than to explain why you didn't after the fact.
Can a seating wall also be a retaining wall?
This is one of our favorite questions because the answer opens up so many possibilities for your outdoor space. Yes, absolutely! A seating wall can definitely serve dual functionality as both comfortable seating and a sturdy retaining wall. It's like getting two features for the effort of one – pretty smart, right?
When your seating wall needs to hold back soil, it does need to meet specific structural requirements. The wall has to be strong enough to handle the pressure from all that earth behind it, especially when it gets saturated with water after heavy rains. This means we pay extra attention to the foundation depth, use proper compaction techniques, and sometimes add reinforcement depending on how much soil we're dealing with.
Drainage considerations become absolutely critical in these situations. Water is both a friend and enemy to retaining walls – we need it to drain away properly, or it builds up pressure that can push your beautiful new wall right over. We typically install drainage systems behind retaining walls, including gravel backfill and sometimes perforated pipes to keep water moving where it should go.
Here's where we always recommend honesty about your skill level and the complexity of your project. A simple seating wall that's holding back a foot of soil on a gentle slope? That might be a great DIY project. But if you're dealing with significant height, steep slopes, or challenging soil conditions, professional consultation isn't just smart – it's essential for safety and longevity.
At Alliance Pavers, we've seen what happens when retaining walls aren't built properly, and it's not pretty. The good news? When they're done right, these dual-purpose walls become the backbone of amazing outdoor living spaces that families enjoy for decades.
When to Call a Professional for Your Project
While we've walked you through every step of a Seating Walls Installation, there comes a moment in every homeowner's journey where you need to ask yourself: "Should I tackle this myself, or call in the pros?" It's a fair question, and honestly, there's no shame in either choice.
The DIY vs. professional decision usually boils down to a few key considerations that go beyond just wanting to save a few dollars. Let's be real here – some projects are perfect weekend warrior material, while others are best left to folks who do this every single day.
Project complexity is often the deciding factor. If you're dreaming of gentle curves that flow around your fire pit, or you want to incorporate built-in planters and lighting, the complexity can ramp up quickly. Multi-level designs that step down a hillside or walls that need to tie into existing hardscaping features require an experienced eye and steady hand. What looks simple in your mind can become surprisingly tricky when you're actually holding that level and trying to make everything line up perfectly.
Here's where structural integrity becomes non-negotiable. People will be sitting on this wall – your family, friends, maybe even the neighborhood kids during a backyard party. A seating wall that also functions as a retaining wall has even more responsibility, holding back tons of soil while providing a safe place to sit. This isn't the time to wing it or hope for the best. Professional installers know exactly how deep that foundation needs to go, how much base material to use, and which adhesives will create bonds that last decades, not just seasons.
Consider your available time and tools realistically. Between marking the layout, digging trenches, compacting base materials, and carefully laying each course, a quality seating wall installation can easily eat up several weekends. Add in the specialized equipment you might need to rent – plate compactors, stone saws, levels long enough for the job – and suddenly that "simple" DIY project starts looking more complicated.
This is exactly where Alliance Pavers expertise makes all the difference. With 25 years of hands-on experience right here in Florida, we've seen every soil condition, weathered every storm season, and solved every challenge that Central Florida can throw at a hardscaping project. We're a family-owned business, which means we treat every project like it's going in our own backyard.
We've perfected the art of Seating Walls Installation from Apopka to Winter Springs, and we know exactly what it takes to build walls that will still be beautiful and solid decades from now. More importantly, we deliver that stress-free experience where you can focus on planning your first backyard gathering instead of worrying about whether the foundation is level.
For a flawless and structurally sound project in the St. Cloud area, consider a professional Seating Wall Installation. We're here to transform your outdoor space into that functional, beautiful gathering place you've been envisioning – the kind of space where memories are made and stories are shared for years to come.